1. Connect the device that you want to sample (audio
device or microphone) to one of the AUDIO INPUT jacks.
MEMO
For more about connections, refer to “Rear Panel (Connecting
Your Equipment)” (p. 6).
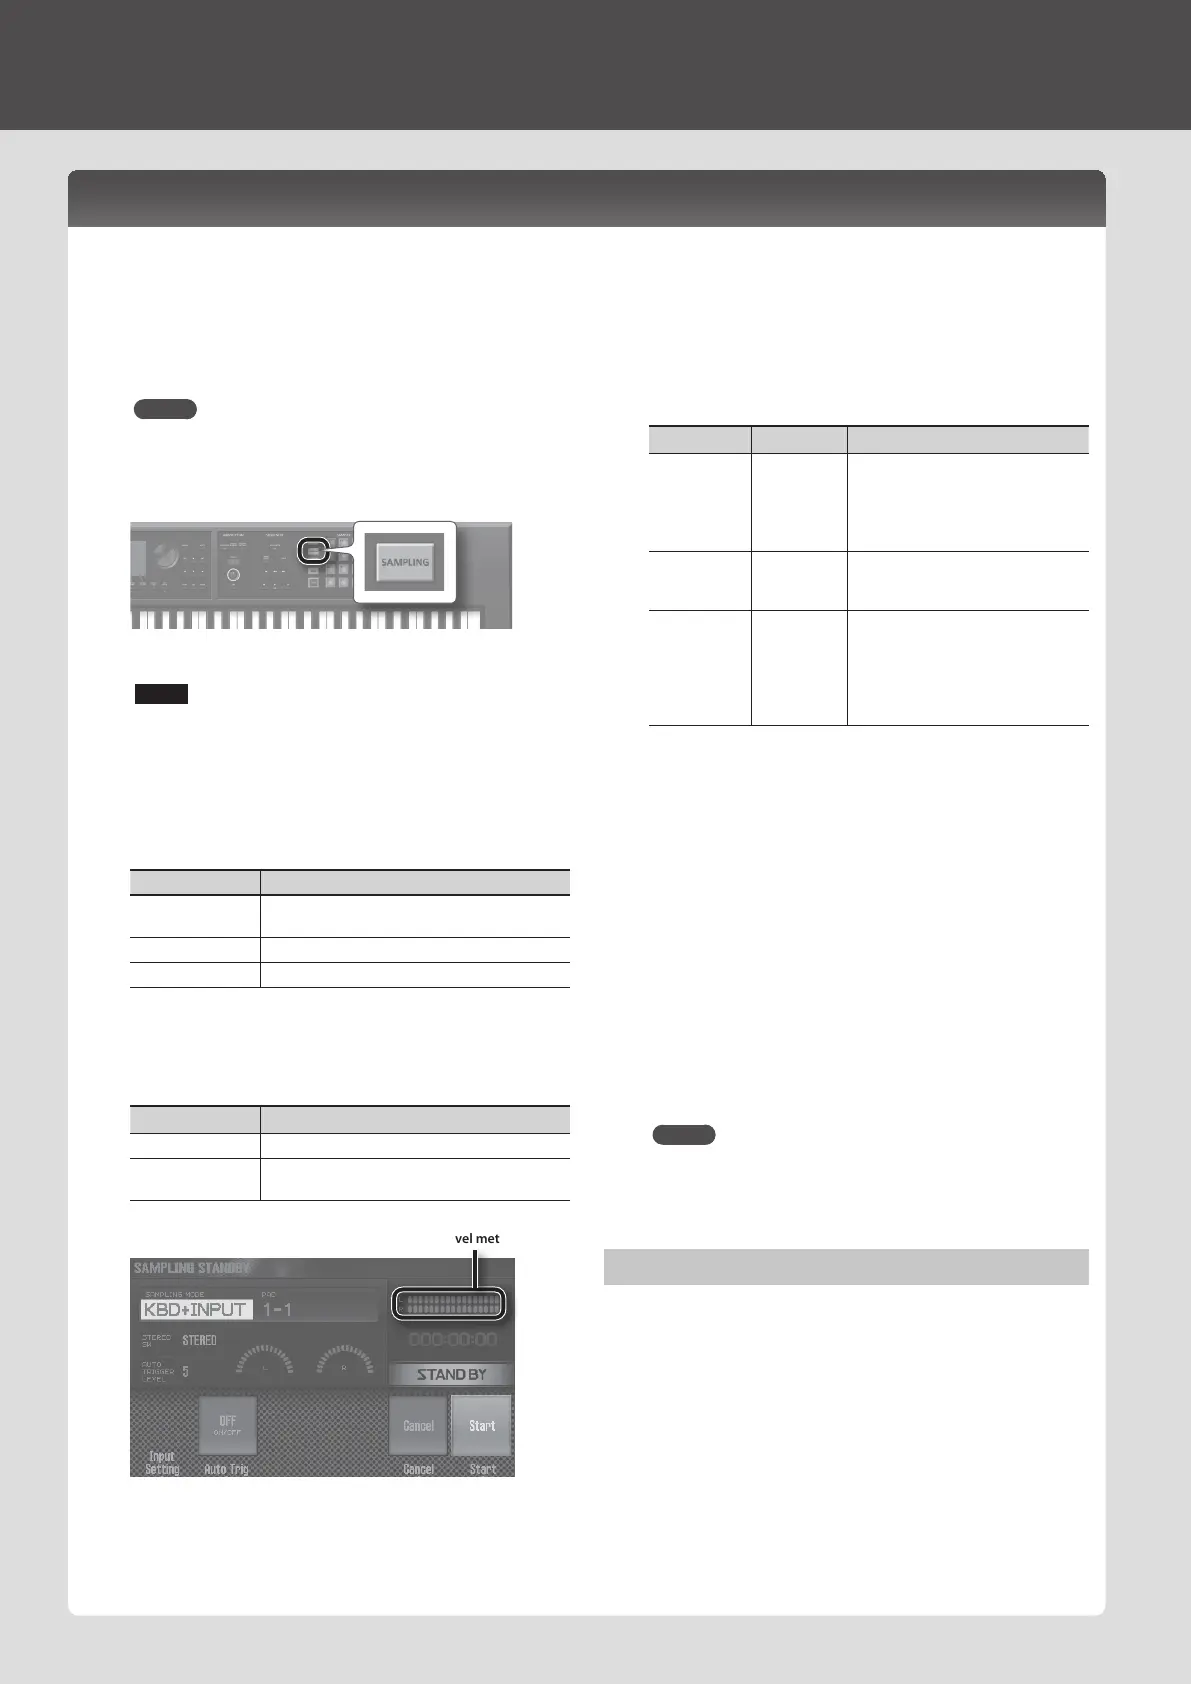
2. Press the [SAMPLING] button to make it light.
Pads that don’t contain a sample are blinking.
NOTE
If you sample into a pad that already contains a sample, the
existing sample is overwritten.
3. Press the sampling-destination pad to make it light.
The SAMPLING STANDBY screen appears.
4. Turn the dial to select the sampling mode.
Parameter Explanation
KBD+INPUT
The input from the keyboard and the AUDIO INPUT
jacks is sampled.
KBD The keyboard performance is sampled.
INPUT
The input from the AUDIO INPUT jacks is sampled.
5. Adjust the volume at which you want to sample.
Adjust the volume as high as possible without allowing the level
meter to reach the maximum.
Device to sample Explanation
Audio device Adjust the volume on your audio device.
Microphone or
guitar
Adjust the rear panel [LEVEL] knob.
Level meter
6. Make sampling settings.
Use the cursor buttons to select a parameter, and use the dial to
change its value.
Parameter Value Explanation
STEREO SW
MONO,
STEREO
Choose “MONO” if you’re sampling in
monaural, such as from a microphone
or guitar.
Choose “STEREO” if you’re sampling in
stereo, such as from an audio device.
AUTO TRIGGER
LEVEL
0–15
If Auto Trig is "ON," sampling starts
when a signal that exceeds this setting
is input.
Auto Trig OFF, ON
If this is ON, sampling starts when a
signal that exceeds the AUTO TRIGGER
LEVEL setting is input.
If this is “OFF,” sampling starts
immediately when you press the [7]
(Start) button.
7. Produce sound on the device that’s connected to this
unit, and press the [7] (Start) button when you want to
start sampling.
During sampling, the display indicates “NOW SAMPLING!”
If you turned Auto Trig “OFF” in step 6
Sampling starts when you press the [7] (Start) button. Produce
sound on the device that’s connected to this unit.
If you turned Auto Trig “ON” in step 6
Produce sound on the device connected to this unit; sampling
starts when a signal exceeding the AUTO TRIGGER LEVEL setting
is input.
8. When you want to stop sampling, press the [6] (Stop)
button.
Sampling stops, and the sample is saved to the sample-
destination pad.
MEMO
• Sample data is saved to the SD card.
• WAV, AIFF, or MP3 data from your computer can be loaded as
samples. For details, refer to “Editing a Sample” in “Reference
Manual” (PDF).
Deleting a Sample (Delete)
Here’s how to delete a sample.
1. Press the [PAD UTILITY] button.
2. Press a pad to select the sample that you want to delete.
3. Press the [4] (Sample Delete) button.
A conrmation message appears.
If you decide to cancel, press the [7] (Cancel) button.
4. Press the [6] (OK) button.
The sample is deleted.
Sampler (Recording)
Sampling
This unit lets you sample the following sounds. Samples you’ve recorded can be played using the pads.
• Keyboard performance
• Input from the AUDIO INPUT jacks (audio device, microphone, guitar)
20