11
Screen Layout
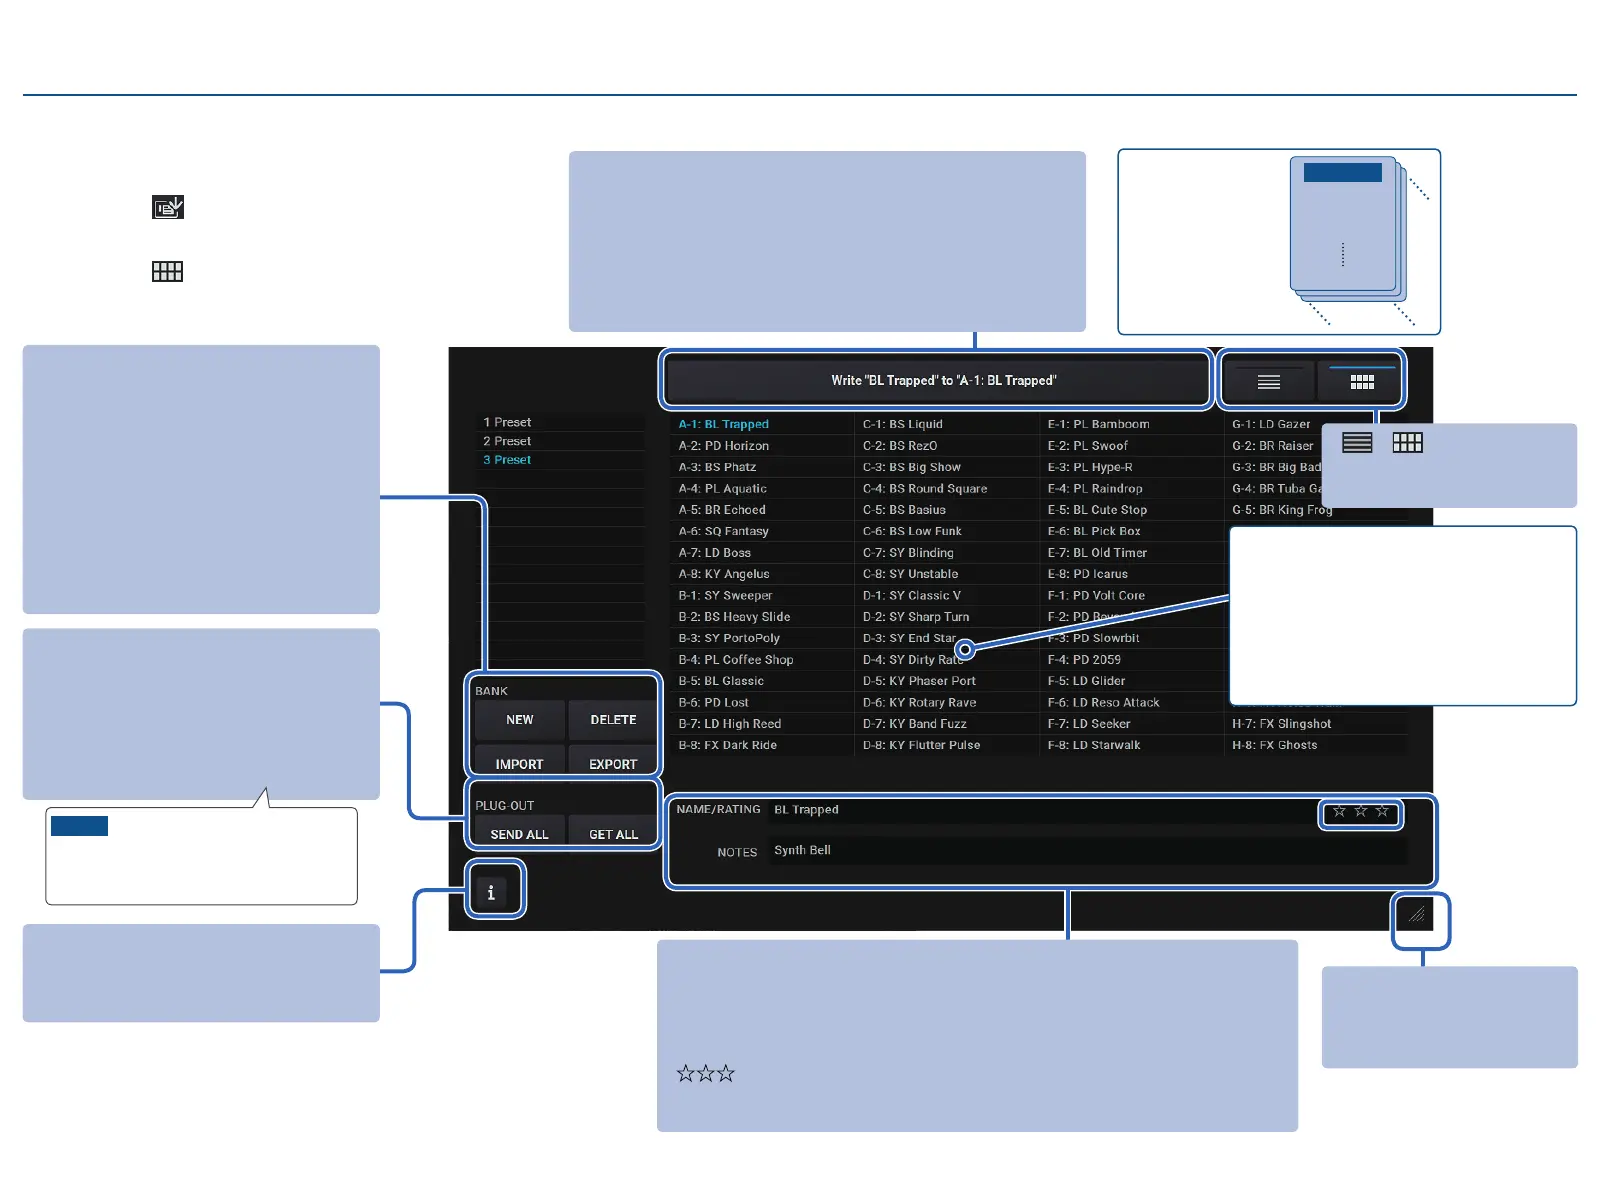
List View
This view shows the patches within the banks as a list.
1. Click the [ ] button in the header.
The Patch Manager window appears.
2. Click the [ ] button.
A group of 64 patches is
called a “bank”.
Bank
Patch 01
Patch 02
Patch 03
Patch 64
[NEW] button
Creates a new bank.
[DELETE] button
Deletes the selected bank or banks.
[IMPORT] button
Loads a bank from a file.
[EXPORT] button
Exports a bank to a file.
[SEND ALL] button
Sends all 64 patches in a bank to the SYSTEM-8.
[GET ALL] button
Receives all 64 patches from the SYSTEM-8.
“ i ” mark
Hover your mouse cursor (pointer) over this mark to see a list
of shortcuts.
NOTE
This receives and overwrites the 64 patches in the selected
bank. If you want to keep the bank as-is, create a new bank
and then store the received data into the new bank.
[ ]/[ ] buttons
Switches between views in the Patch
Manager window.
What you can do with the patch list
You can do the following things with the patches you select.
Swap patches in a bank
Use your mouse to drag and swap bank numbers.
Edit patch names
Click to edit the patch names.
Zoom
Drag the bottom-right corner of the
window to resize (zoom).
[NAME]
Shows the selected patch. Click to edit the patch name.
[NOTES]
Shows the note for the selected patch. Click to edit the patch’s note.
[ ] (RATING)
Shows the rating of the selected patch. Click to edit the patch’s rating.
[WRITE] button
Saves your edited tone as a patch into a bank.
1. You can select the save destination patch from the
list.
2. Click the [WRITE] button.
3. Input the name of the patch to save.