Settings for the Entire TD (SYSTEM)
38
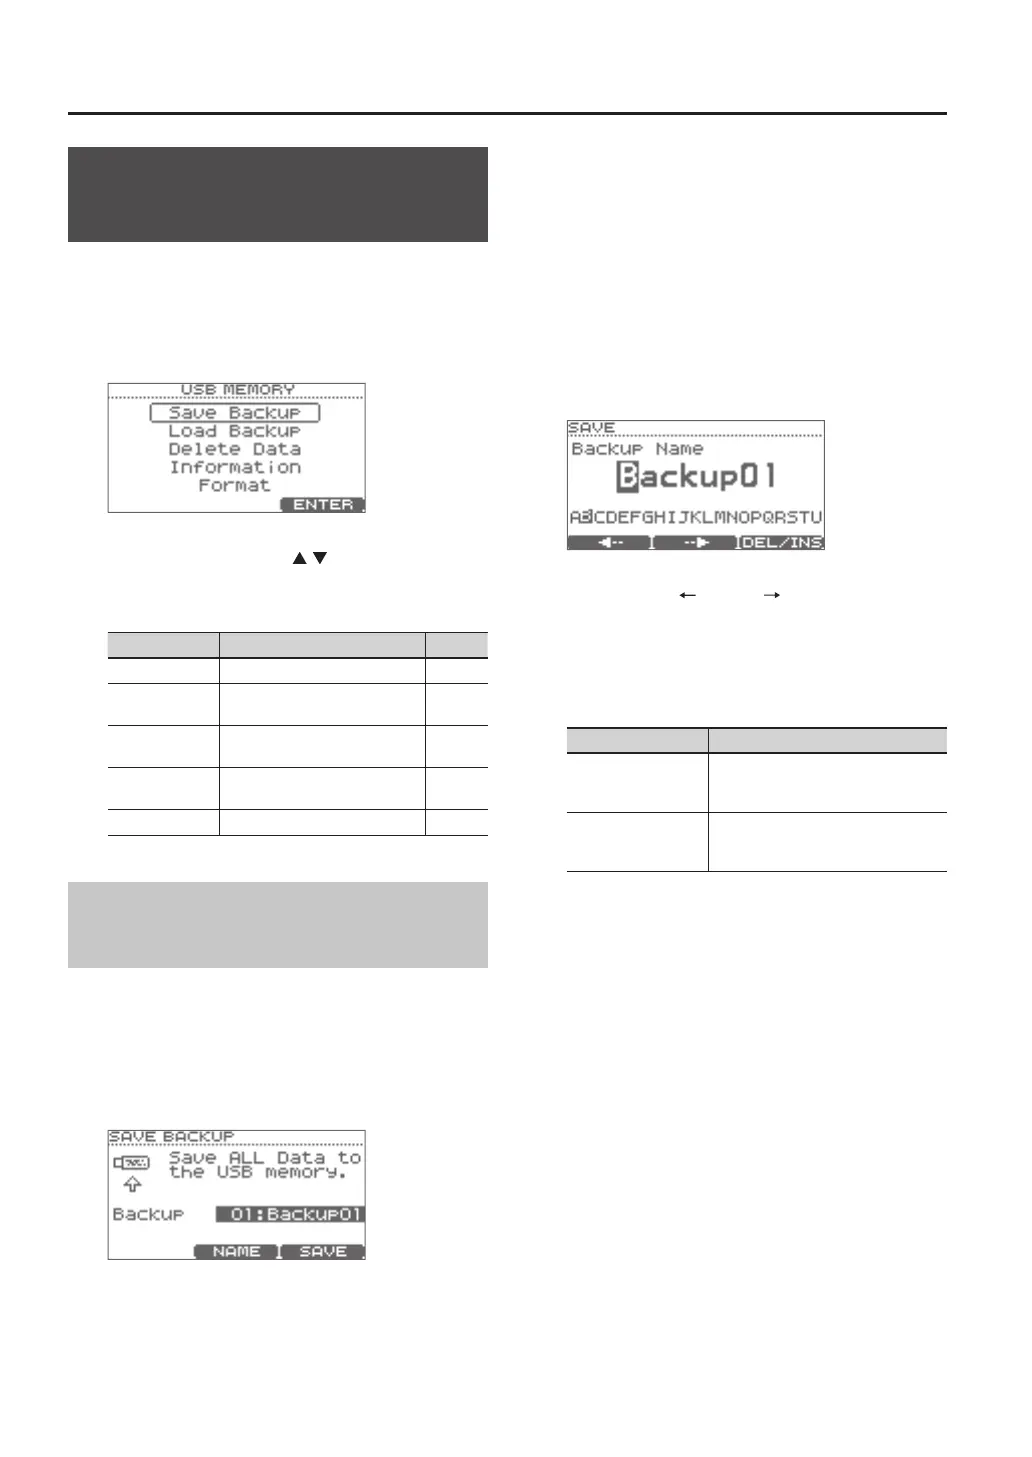
Using USB Flash Drive
(USB Memory)
1. First connect your USB ash drive to the TD (p. 9).
2. In step 4 of the basic procedure (p. 34), choose
“USB Memory” and then press the [F3] (ENTER)
button to access the USB MEMORY screen.
3. Use the cursor buttons ( / ) to select the
desired menu item.
You can choose from the following menu items.
Menu Description Page
Save Backup Save data to the USB ash drive. p. 38
Load Backup
Load data from the USB ash
drive into the TD.
p. 39
Delete Data
Delete data from the USB ash
drive.
p. 39
Information
View information about the USB
ash drive.
p. 40
Format Format the USB ash drive. p. 40
Saving Data to a USB Flash Drive
(Save Backup)
Here’s how to save TD data to a USB ash drive.
Data that will be saved
• All drum kits
• System settings
1. Choose “Save Backup“ and press the [F3] (ENTER)
button (p. 38).
2. Use the value dial to select the save-destination
number.
Next you can assign a name to the data that will be
saved.
If you don’t need to assign a name, proceed to step 7.
3. Press the [F2] (NAME) button.
The SAVE screen will appear.
You can assign a name of up to eight characters.
4. Press the [F1] ( ) or [F2] ( ) button to move the
cursor to the character that you want to change.
5. Use the value dial to change the character.
Here you can hold down the [F3] (DEL/INS) button and
use the [F1][F2]buttons to delete or insert a character.
Button Description
[F3]+[F1] (DEL)
Deletes the character at the cursor
location, and moves the subsequent
characters one place to the left.
[F3]+[F2] (INS)
Inserts a space at the cursor location
and moves the subsequent characters
one place to the right.
6. When you’ve assigned a name, press the [EXIT]
button to return to the previous screen.
7. Press the [F3] (SAVE) button.
* If you select a number in which data has already
been saved, and then press the [F3] (SAVE) button,
a conrmation message will appear, asking you
whether you really want to overwrite the data.
If you decide to cancel, press the [F1] (CANCEL)
button and then reselect the save-destination
number.
If it is OK to overwrite the existing data, press the [F3]
(OK) button.
When the data has been saved, the screen will indicate
“Completed.”

 Loading...