2
Panel Descriptions
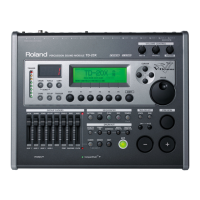
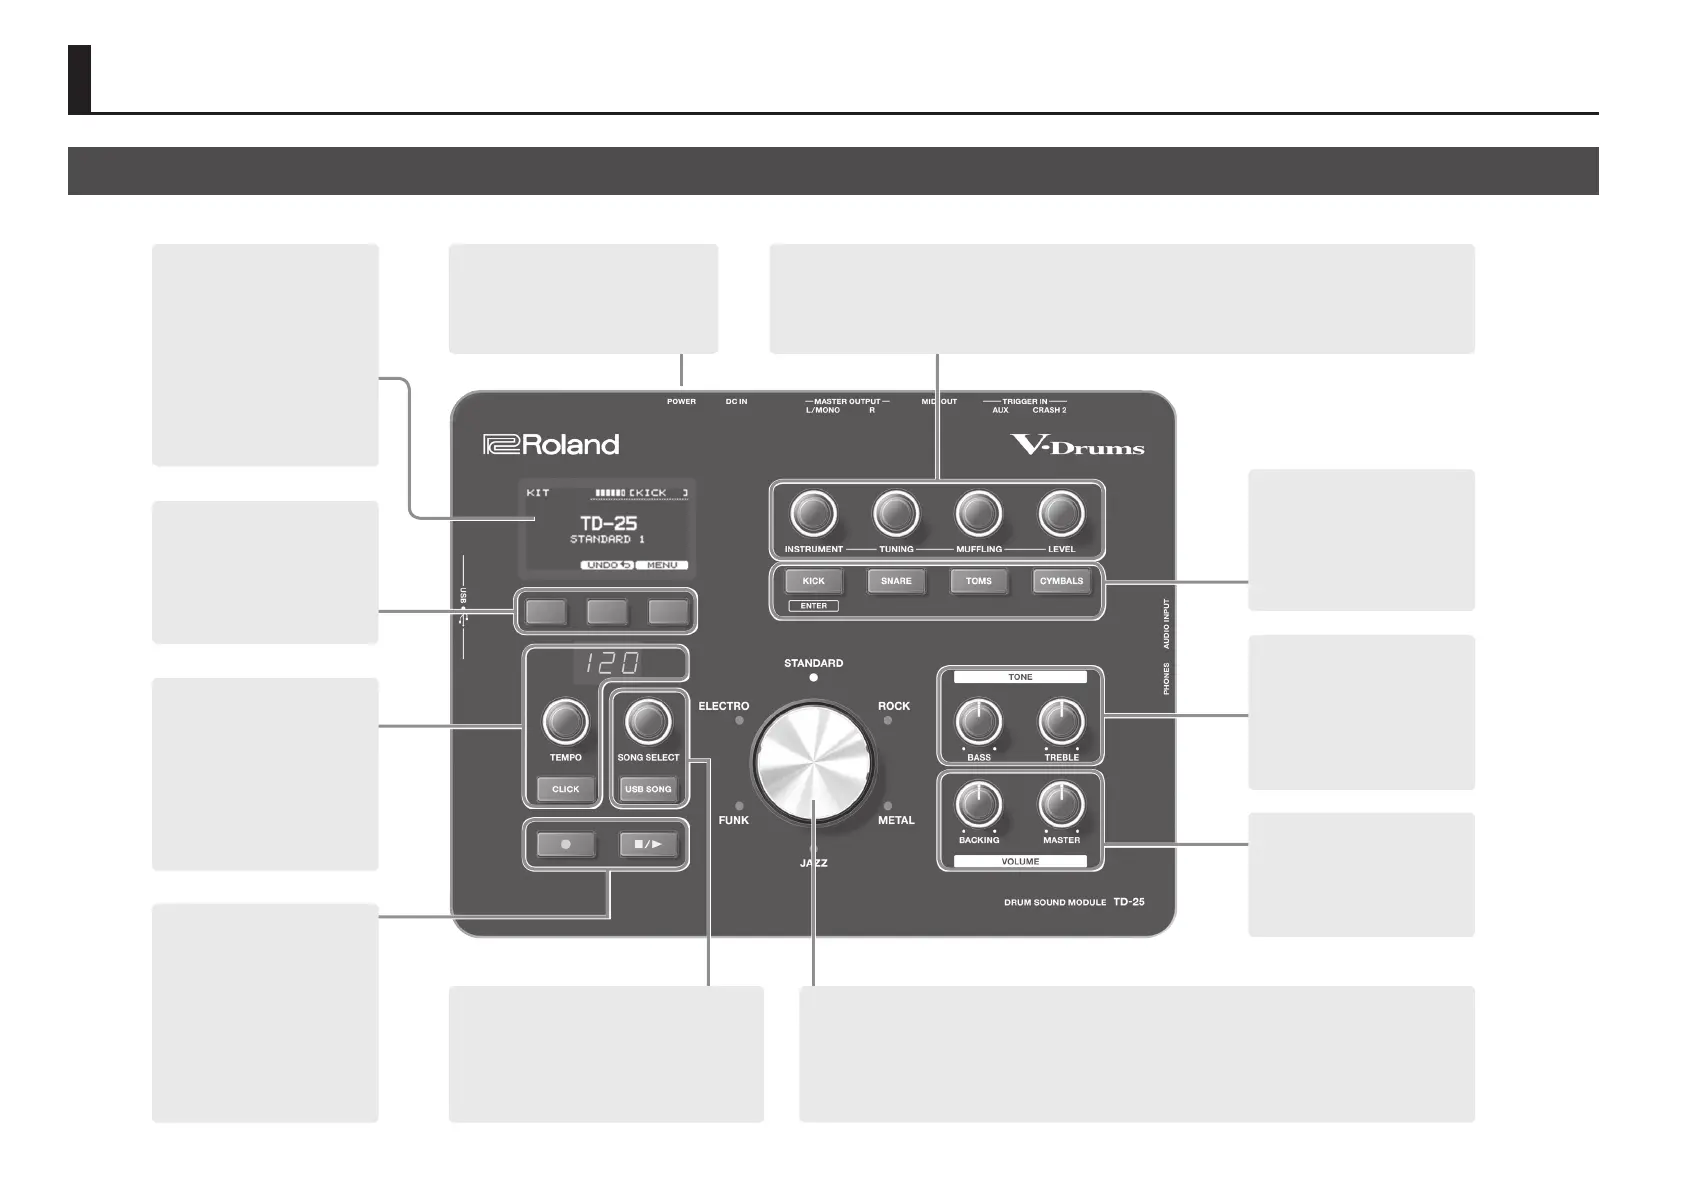
Top Panel
[POWER] switch
Turns the power on/o.
&p. 3
Display
This shows various information.
When you turn on the power, the KIT
screen appears.
[F1] [F2] [F3] buttons
The function of these buttons will
change depending on the screen.
The names of the current functions
are shown in the bottom of the
screen. &p. 10
[TEMPO] knob
[CLICK] button
Press the [CLICK] button to turn the
click on/o.
Use [TEMPO] knob to adjust the
tempo. &p. 7
Long-press the [CLICK] button to
specify the click settings.
[SONG SELECT] knob
[USB SONG] button
Here you can select an audio le from a USB ash
drive.
&p. 8
Kit selector
Turn the selector to select a kit.
Press the selector to switch variation kits.&p. 5
From any screen, pressing the selector takes you back to the KIT screen.
VOLUME
[MASTER] knob: Adjusts the overall
volume.
[BACKING] knob: Adjusts the
volume of the song, click, and
AUDIO INPUT.
TONE
The eect applies to all drum kits.
[TREBLE] knob:
Adjusts high frequency range.
[BASS] knob:
Adjusts low frequency range.
Instrument buttons
When you press one of these
buttons, the sound of each pad is
shown in the display.
The [TOMS] and [CYMBALS] buttons
alternate between pads each time
you press them. &p. 5
Sound modify
These knobs change the instrument and adjust the tuning, muing, and level.
&p. 6
Audio Rec
These buttons record/play your
performance.
The sound that’s input from the
AUDIO INPUT jack is also recorded.
You’ll also use this to play back audio
les from a USB ash drive.
&p. 8
 Loading...