19
CHAPTER 5 - OPERATION KAPITEL 5 - ANVÄNDNING
TILLVÄGAGÅNGSSÄTT
DRIVING SEQUENCE
Be sure the platforms are fully closed before getting on/off the
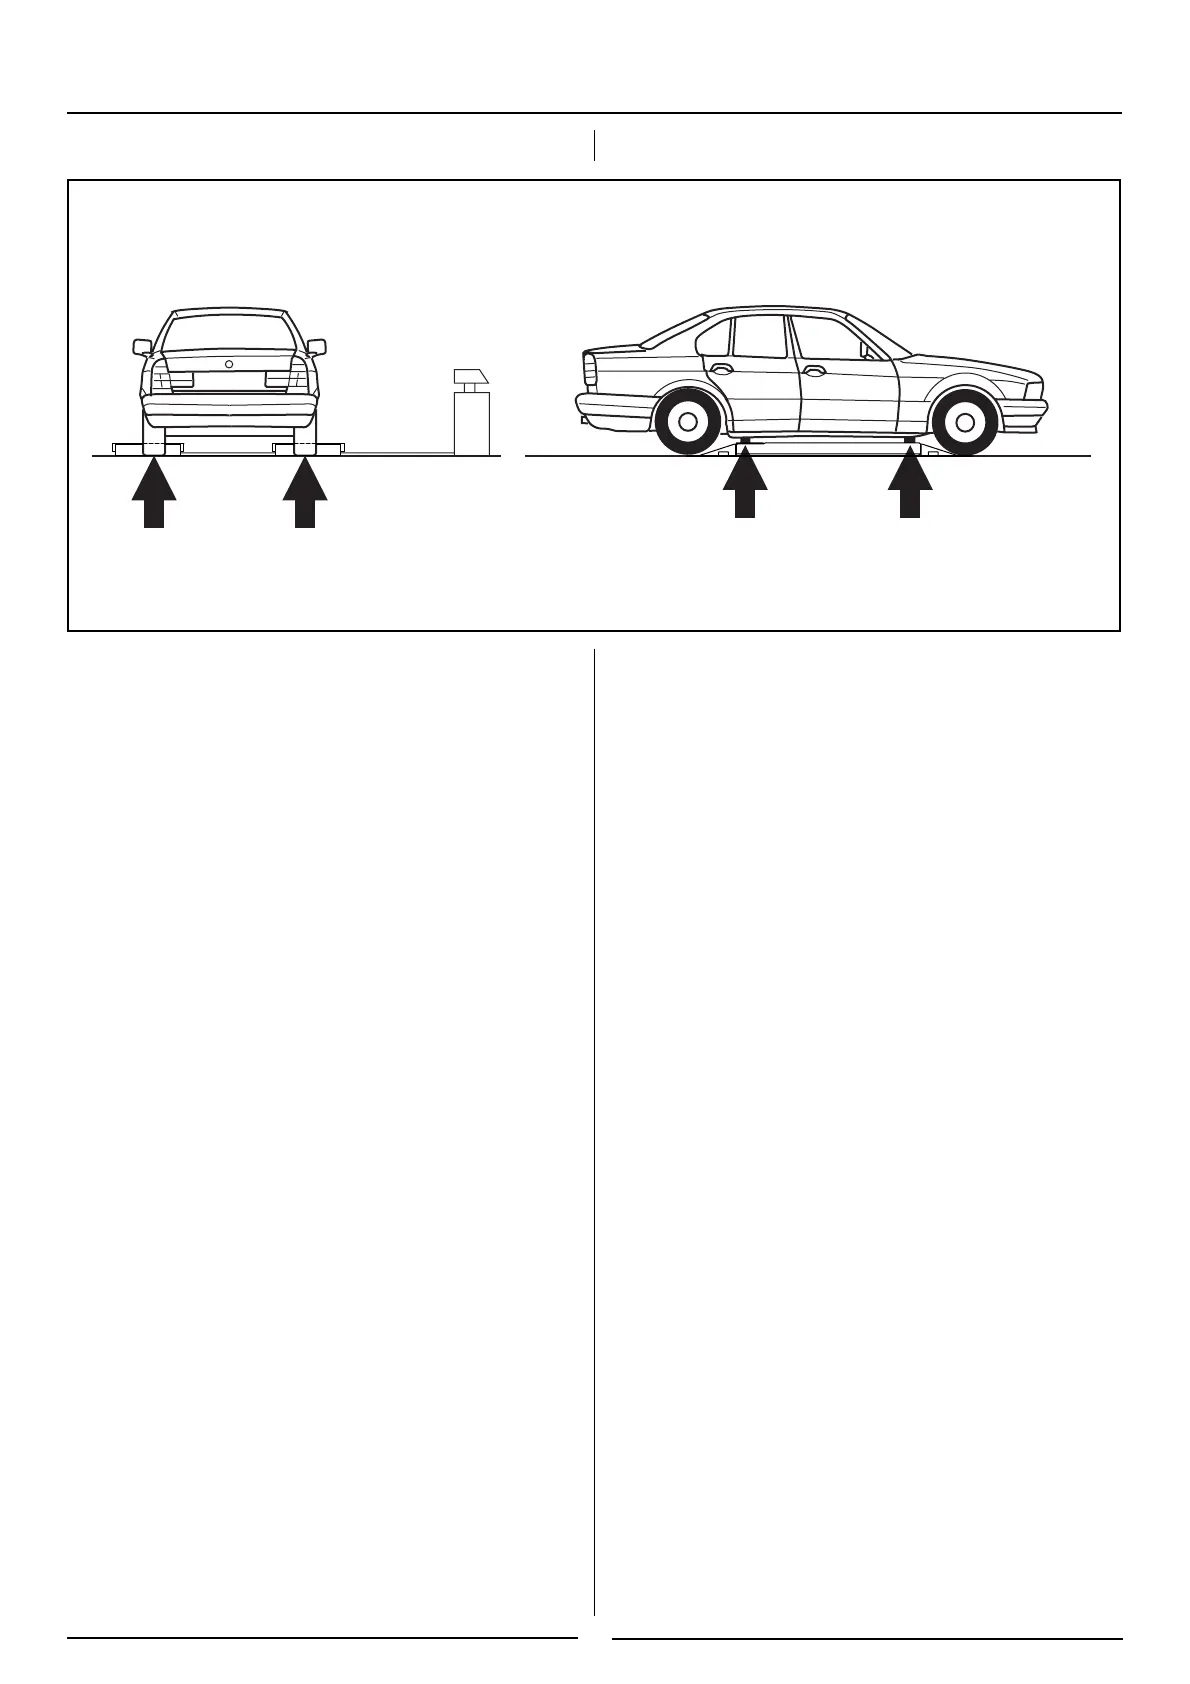
lift. Get in the vehicle and drive on the lift; be sure the vehi-
cle is centred and both rear and front wheels are properly
positioned, place the proper rubber pads on the platform
(picture 14) so that they are in line with the lifting points
specified by the manufacturer. Press the "lifting" button,keep
it pressed until the required height is reached. To lower the lift,
press the "lowering" button (picture 4, pos.2). During the lowe-
ring phase, the lift will produce a safety acoustic signal.
During the first hours of operation cracking noises could
occur. This is due to the natural settlement of mechanical
parts and will disappear during the following hours of ope-
ration.
CHECKS
Perform the following checks when operating the car lift:
- Carefully check the car lift and its load during
lifting/lowering operation.
- Check the warning acoustic signal operation of the car lift
during lowering phase.
- ATTENTION: When the lift is operating, there high pres-
sure in the hydraulic pipes (270 bar max).
If the plat-forms do not start simultaneously, this might be due
to the following causes :
air in the A2 or B2 cylinder and/or differentiated service pres-
sure in the A2 o B2 line. In this case, repeat the previous pro-
cedure while pistons are at their max. height, operating on the
two lines alternatively several times to bleed air and balance the
service pressure.
pict. - Fig.
14
1 Se till att plattformarna är i sina nedersta lägen samt att de
utdragbara konsolerna är helt inskjutna.
2 Kör in med fordonet på lyftplatsen. Bilen måste placeras
centrerat över lyftplattorna enligt fi g. 14 ovan.
3 Placera gummiblocken under de lyftpunkter som rekom-
menderas av bilens tillverkare. Dra ut konsolerna om
det
behövs för att nå de bakre lyftpunkterna.
4 Tryck på UPP-knappen tills bilen har lättat från golvet.
Kontrollera att bilen ligger stadigt på gummiblocken. Fort-
sätt sedan lyfta bilen till önskad arbetshöjd.
5 Tryck på NED-knappen när bilen skall sänkas. Vid en sä-
kerhetshöjd av cirka 25 cm över golvet avbryts sänkningen
automatiskt.
6 Släpp då NED-knappen, Fortsätt därefter sänkningen med
Slutsänknings-knappen. Under denna sista fas av sänkning-
en hörs en ljudsignal som varnar för klämrisken. Kontrollera
att inga personer befi nner sig inom lyftens riskområde.
Under de första driftstimmarna efter att lyften tagits i bruk
kan det höras knakande ljud från lyften. Det är naturligt och
kommer från mekaniska komponenter som ”sätter” sig, ljudet
försvinner gradvis under det att lyften fortsätter användas.
KONTROLLERA:
Observera alltid följande när lyften används:
• Studera billyften och dess last hela tiden när den är i
rörelse uppåt eller nedåt.
• Kontrollera att inga personer befi nner sig inom lyftens
riskområde.
• OBSERVERA: När lyften arbetar är det ett högt arbets-
tryck i hydraulsystemet (som mest 270 bar).
Om plattformarna inte startar samtidigt från golvet kan orsaken
vara att det fi nns luft kvar i hydraulsystemet eller att trycket är
olika i de två hydraulkretsarna. När lyften är i sitt nedersta läge,
börjar man i sådant fall med att öppna tryckutjämningsskru-
varna (OM A2-B2, fi g 15) ett varv och sedan stänga dom helt
igen (en i taget). Då utjämnas eventuell tryckskillnad. Om detta
ej hjälper måste luftning göras, se föregående sida.

 Loading...