11
1. Press Protect:
Remote controller goes to inactive state if no button is
pressed after 10 seconds. When in this state pressing
up and down will cause no movement. Remote
controller will indicate all columns in the system with
a solid yellow light, to show their inactive state. To
reactivate lift controls press resume button. All columns
will flash their beacons and beep to acknowledge
reactivation.
Note: Ensure desired lift flashes and beeps to confirm
correctly configured remote controller is used.
2. SINGLE / PAIR / ALL Using remote (Flex or Flex Max):
PAIR or GROUP mode:
Deactivate pairs of columns which you do not want
to move by selecting the column button associated
with the pair. Active columns are indicated with a solid
green light, while inactive columns are indicated with
a flashing yellow light. Only active columns will move
when the raise/lower joystick is moved. To return to ALL
mode either select deactivated column pairs or press
resume.
SINGLE mode:
From active ALL mode select resume button. Columns
will unlock from remote controller, and be free to be
controlled individually from column lift controls, to return
to ALL press resume.
3. Using SINGLE/PAIR/ALL button on column membrane
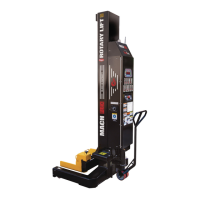
(Flex Max only) Fig. 4.
Change modes pressing the Single/Pair/All button on a
column. Text on the screen indicates current mode.
ALL mode: Default, all columns in system raise and
lower together, via remote or column motion buttons.
SINGLE/SOLO Mode: Active column will state “SoLo”
and can be raised and lowered independent from
group using column motion buttons. All other columns
are inactive and state “IdLE”. Change active column
by pressing “Single/ Pair/All” on column you wish to
activate.
PAIR Mode: When activated the columns on the same
axle will activate and the others will become inactive.
Active pair of columns will state “PAIr” and can be
raised and lowered together via remote or column
buttons on active columns. Inactive columns will state
“IdLE”.
Operating Instruction Details/Options
4. Column LED Indication – Summary of column LED’s,
refer to Fig. 5:
Green Light – Linked column that can be controlled by
remote controller.
Yellow Light – Linked column that cannot currently be
controlled by remote controller, in active pair, set in
single columns mode, or columns still being set up.
Blinking Yellow Light – Column to be placed, remote
controller looking for column to be turned on with the
matching system ID selected.
Red – Height limit reached, or error with column (if error
on a column ALPHANUMERIC display will display code).
Blinking Red – Column with the error.
5. RESUME quick startup:
Power on the remote controller and press the resume
button. Column ID’s are confirmed and positioned as
before. With a successful re-link to columns, linked
columns will flash beacons and beep as well as display
will indicate linked columns with solid green Lights.
6. Changing the System Configuration:
If pairs of columns are needed to be added or removed
from the system. Turn off columns and remote controller,
and restart setup process.
7. Swap single column from Linked group:
If a single column needs to be swapped from a group,
this can be done via standard setup process or via
resume quick start. To use resume quick startup method,
turn off column that needs to be replaced and bring in
a new column in its position it as column it replaced.
Turn remote controller off and back on, press RESUME.
Remote controller will find 1 less than desired column
quantity and will prompt user to place column in desired
location. Turn on new column and change to desired
system ID. Remote controller will accept new column
and lock configuration and is ready to move system.
Note: When possible swap columns when columns are
fully on the ground to ensure proper engagement. If this is
not possible use appropriate jack stand to lift load slightly
off column, and position replacement column exactly as
the column it replaced, then lower jack stand back onto
column prior activating re-configured system.
 Loading...
