6
On one bolt, place
(2)5/16" Star Washers
Push nuts hold bolts to brackets.
Fill Breather Cap
Use (4)5/16"-18NC
x1-1/2" lg. HHCS
and Nuts
CAPACITY
9,000 LBS.
For SPOA9/SPO9
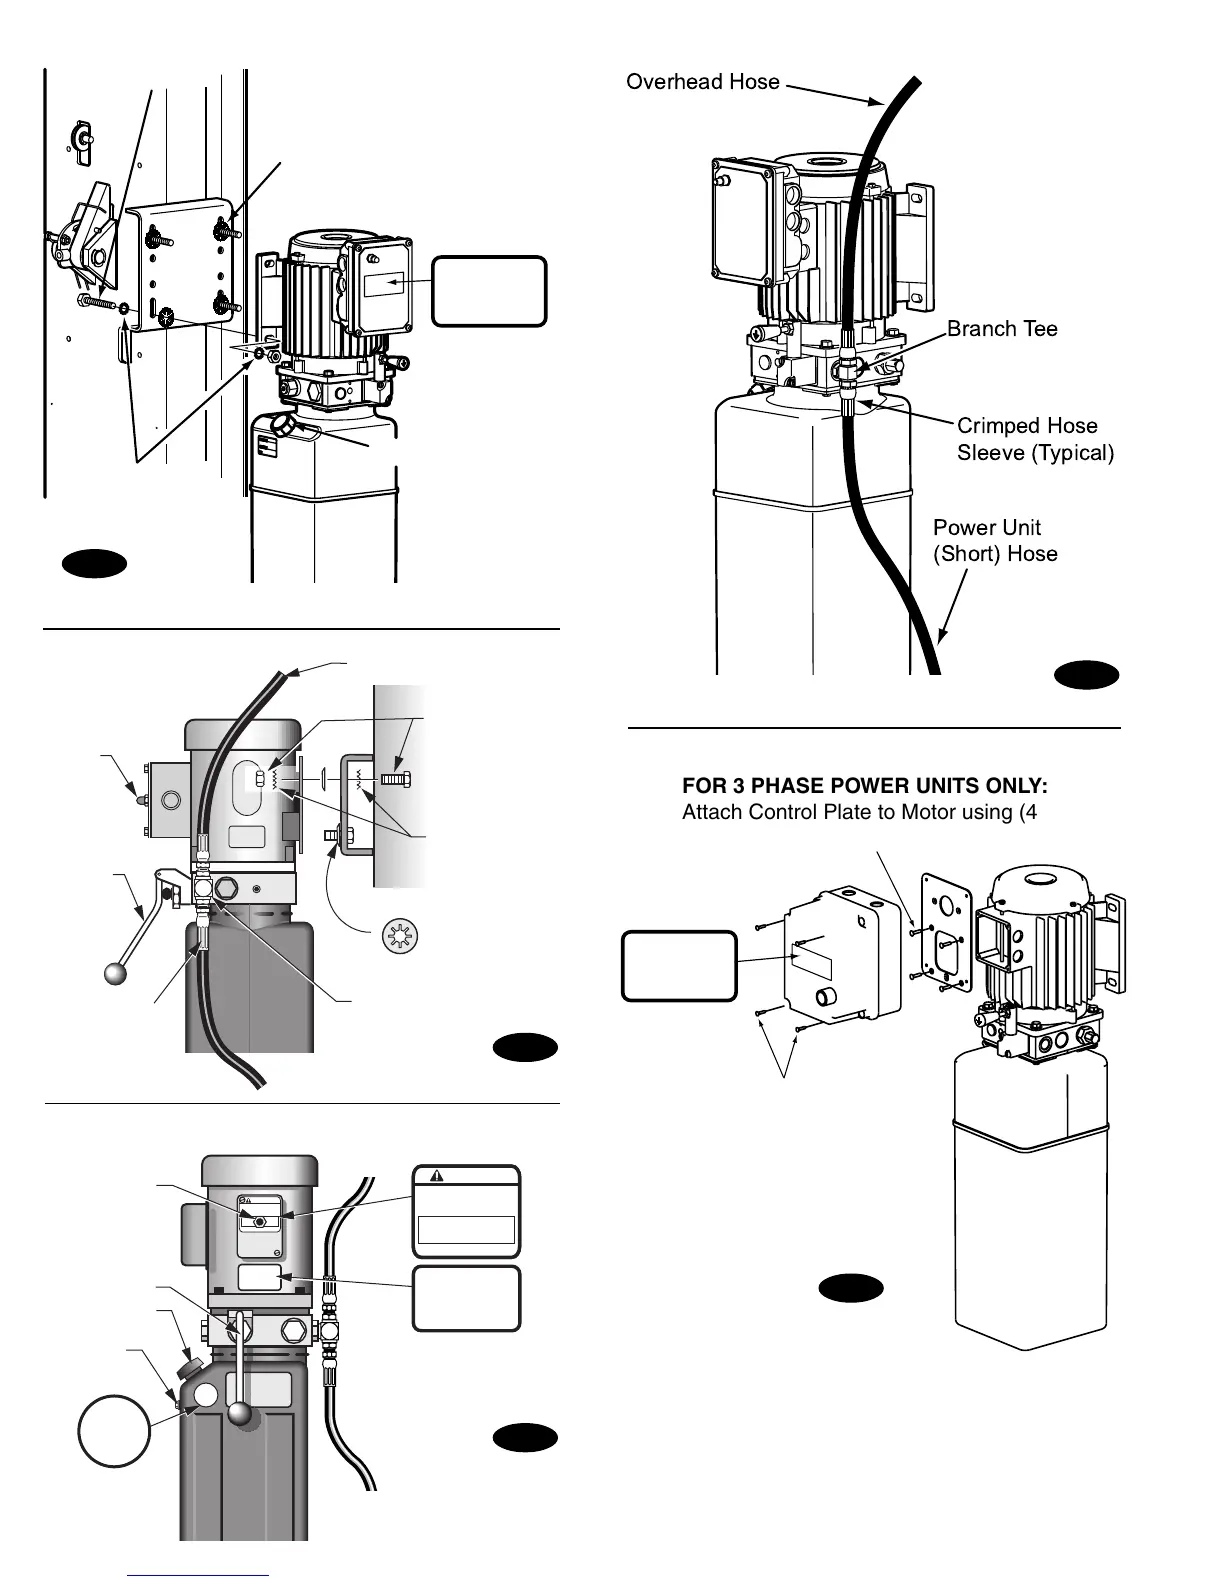
10. Hoses: Clean adapters and hose. Inspect all threads
for damage and hose ends to be sure they are crimped,
Fig. 8a or Fig. 8b. Install hose and hose clamps, Fig. 9b.
HYDRAULIC POWER UNIT
FILLINSTRUCTIONS: Lower lift. Removefill cap
andsocket headvent plug.Fillto vent holewith clean
DexronII ATF
ForParts & Service contact:(800) 445-5438
ROTARYLIFT / ADOVER INDUSTRIESCO.
PUSH
LEVER
TO
LOWER
CAPACITY
7000 LBS.
ALLOW 2 SECONDS
BETWEEN MOTOR STARTS
FAILURE TOCOMPLY MAY
CAUSE MOTORBURNOUT
PUSH BUTTON TO RAISE
NOTICE
Fill-Vent
Screw
Fill-Breather
Cap
Raise
Switch
Lowering
Valve
PUSH
LEVER
TO
LOWER
Branch
Tee
Power Unit
Hose
Overhead
Hose
ALLOW 2 SECONDS
BETWEEN MOTOR STARTS
FAILURE TO COMPLY MAY
CAUSE MOTOR BURNOUT
PUSH BUTTON TO RAISE
NOTICE
ALLOW 2 SECONDS
BETWEEN MOTOR STARTS
FAILURE TO COMPLY MAY
CAUSE MOTOR BURNOUT
PUSH BUTTON TO RAISE
NOTICE
CAPACITY
7,000 LBS.
NP241
For SPOA7
Lowering
Valve
Push-nuts
hold bolts
to bracket.
Use (4) 5/16"-18NC
x 1-1/2" HHCS, and
5/16"-18NC Nuts
On one bolt,
place 5/16"
Star Washers.
Overhead Hose
Branch Tee
Raise
Switch
Lowering
Valve
Crimped Hose
Sleeve(typical)
Overhead Hose
Power Unit
(Short) Hose
Crimped Hose
Sleeve (Typical)
Branch Tee
FOR 3 PHASE POWER UNITS ONLY:
Attach Control Plate to Motor using (4)
5mm-.80 x 8mm lg. Flat Head Machine Screws
Attach control box to plate
using (4) #8-32NC x 1/2"
Self-Tapping Slotted PHMS
CAPACITY
9,000 LBS.
For SPOA9/SPO9
Fig. 7a
Fig. 8a
Fig. 7b
Fig. 8b
Fig. 8c

 Loading...