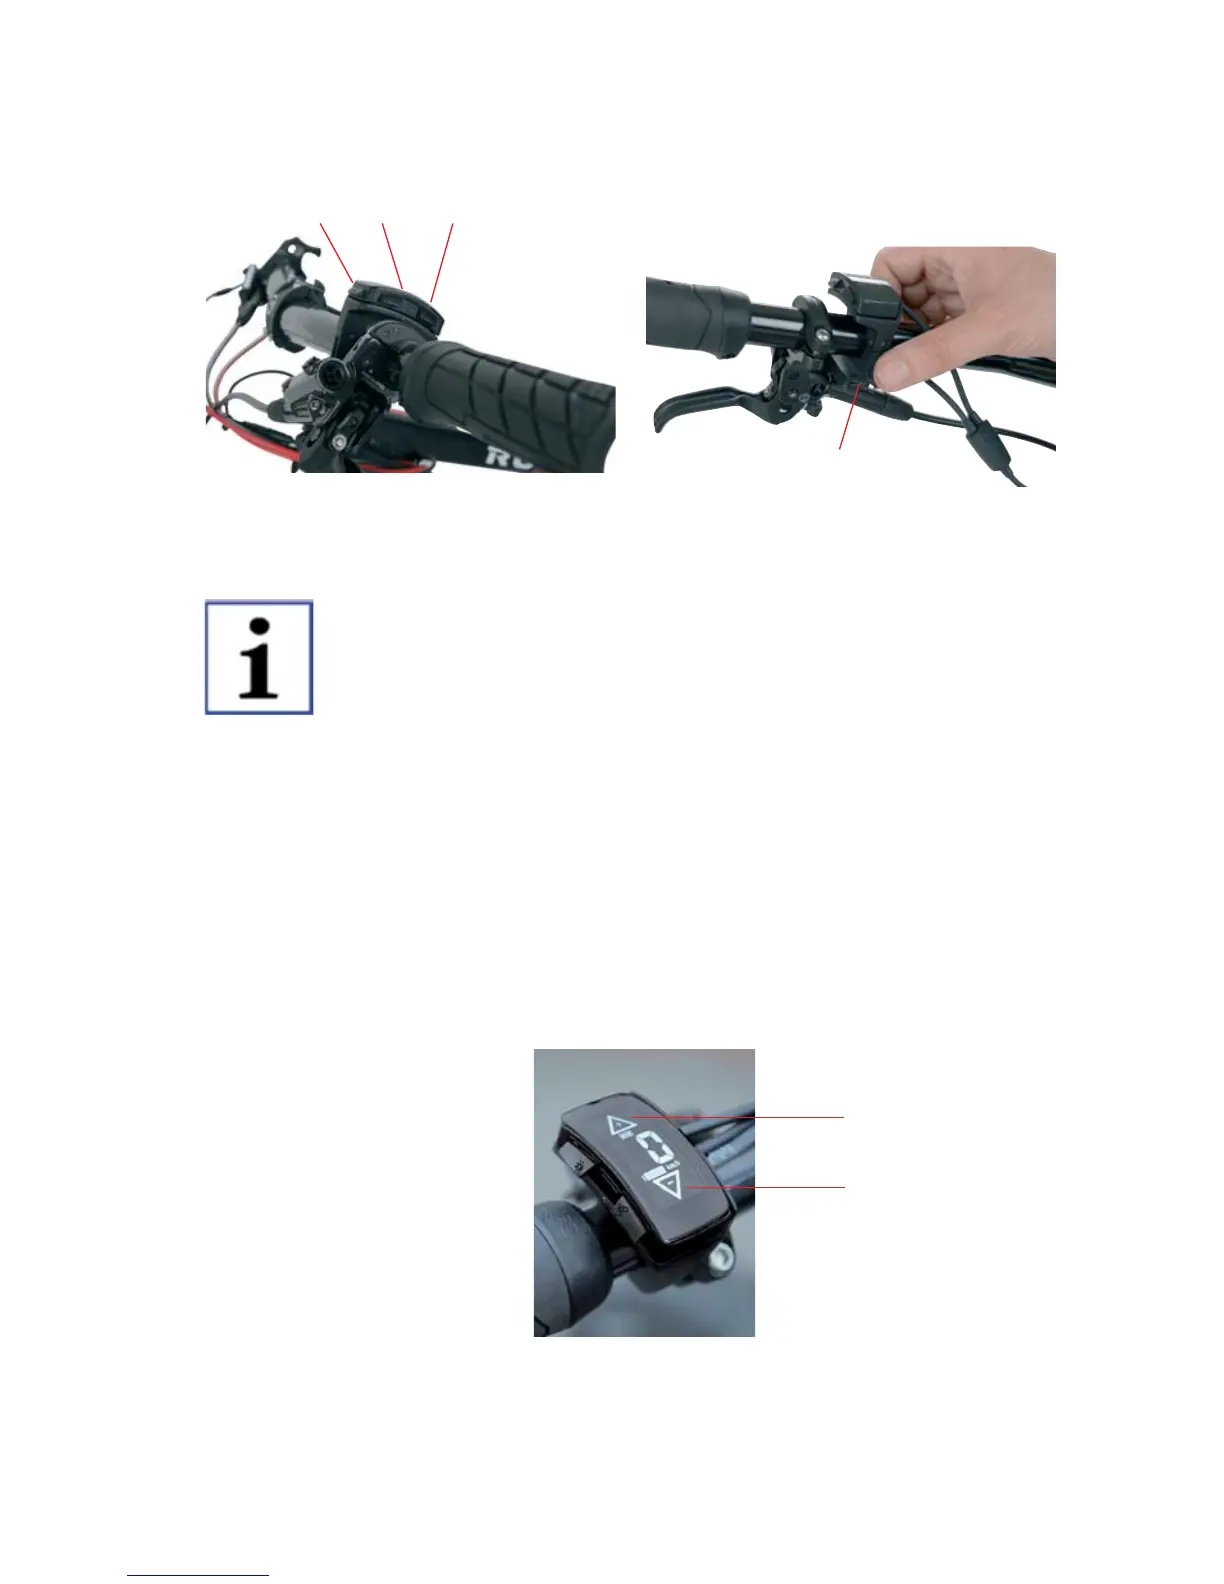
Figure 38: Mini display control panel button layout and USB socket
1 On/Off 3 Pushing aid
2 Lighting 4 USB socket
The position of the rubber flap should be checked and adjusted if
necessary when the USB socket is not in use to avoid water ente-
ring.
7.7.2.2 Mini remote display control panel
Additional adjustments can be carried out using the rocker on the control panel as
well as to the 3 buttons described above. In order to change the level of support
press the + or - buttons which can be seen on the display field.
Figure 39: Mini display with integrated controls mounted on the left-hand side
within reach
1 Press to increase the level of support
2 Press to decrease the level of support
64
2
1
1 2 3
4



 To Next Page