VERTICAL CONTACT TOASTER
8 P/N 1010807 Rev. I 06/12
INSTALLATION (continued)
Installing the Optional Belt Wraps and
Roller Tensioners
NOTE: Beltwraps and Roller Tensioners are
REQUIRED on models with Mfg. No. 9210716,
9210722, and 9210727.
INSTALLING BELT WRAPS
NOTE: Depending on toaster usage and how well
they are cleaned daily, the Belt Wraps should
last between 3 - 6 months. Additional Belt Wraps
may be purchased from your Authorized Service
Agency.
1. Ensure that the power if off, the power cord is
unplugged, and the unit is cool.
2. Remove the Bun Feeder and Heat Shield and set
theBunThicknessCompressionKnobsto6and
6 (Figure 7).
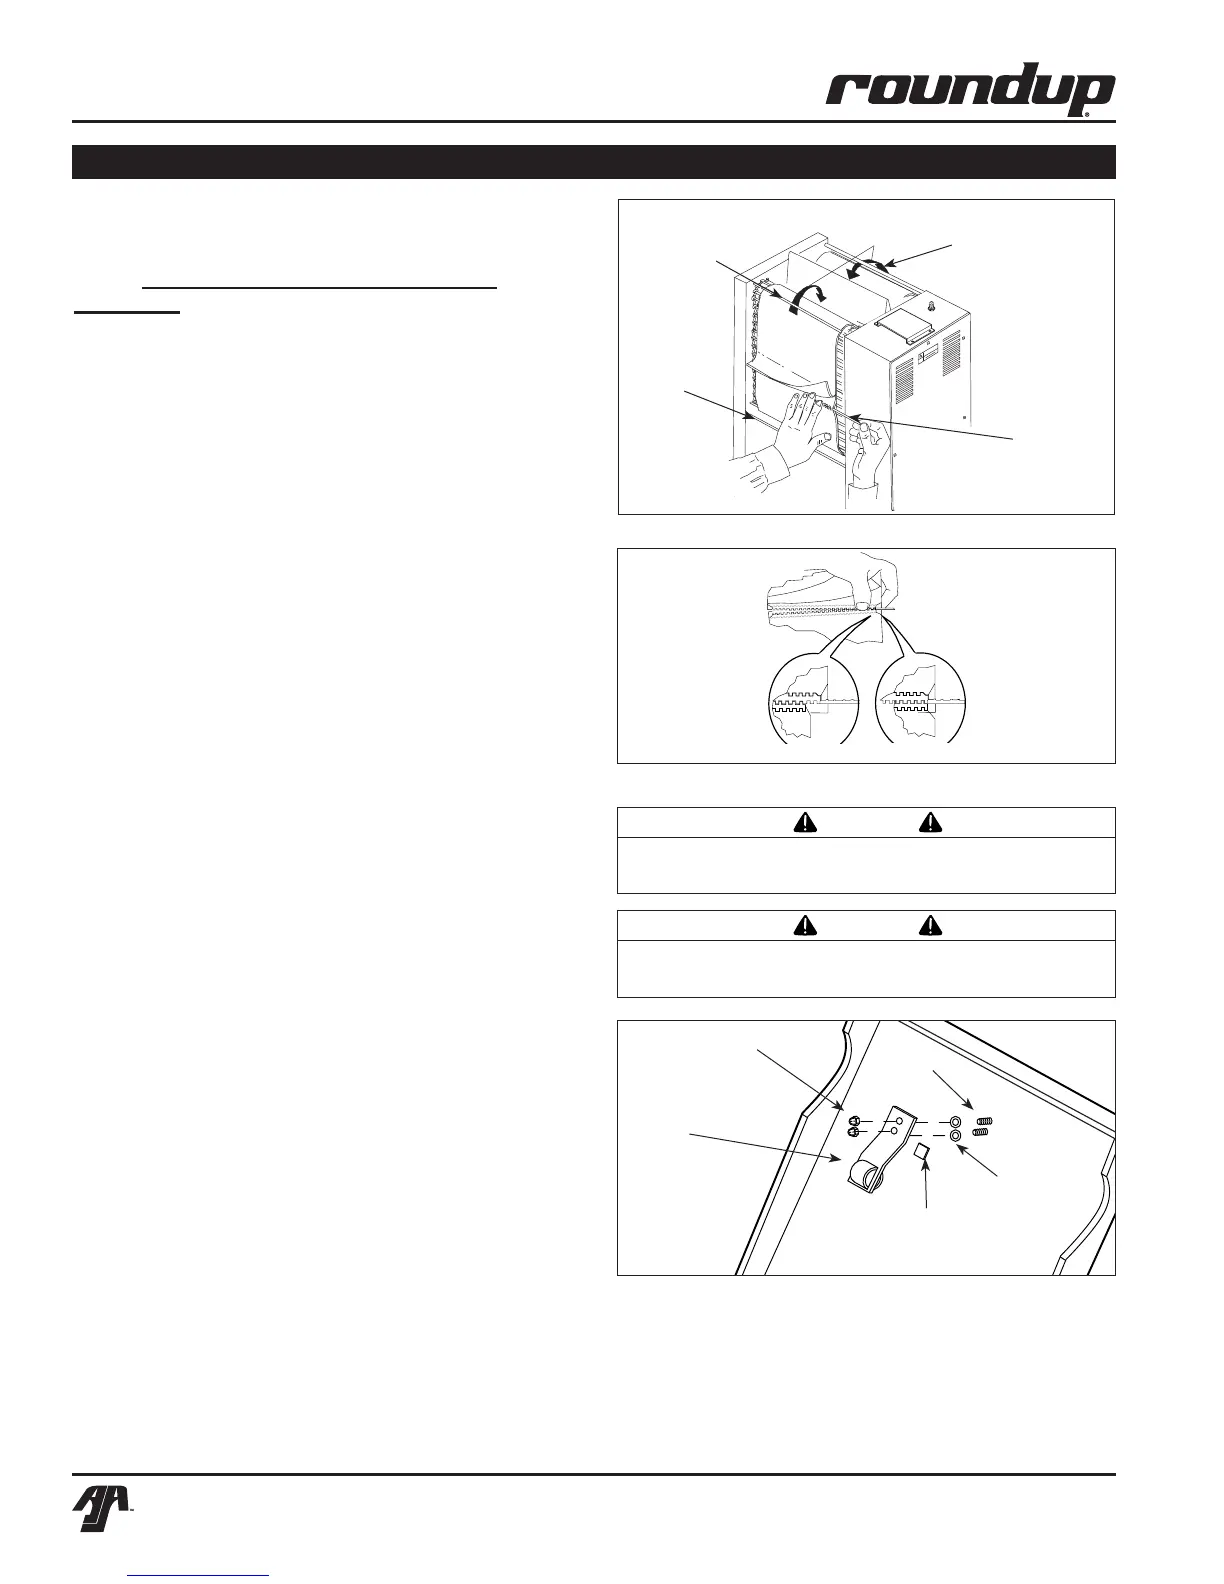
3. Open both Conveyor Covers and install the Belt
Wraps around the Conveyor Belt Chains inside
the yellow rods with the zipper flap exposed and
hanging down (Figures 3 & 4).
4. Close the Conveyor Cover(s), set the
CompressionControlKnobsbacktotheirnormal
settings and reinstall the Heat Shield and Bun
Feeder.
INSTALLING OPTIONAL ROLLER TENSIONERS
1. Ensure that the power if off, the power cord is
unplugged, and the unit is cool.
2. Remove the Bun Feeder and Heat Shield and set
theBunThicknessCompressionKnobsto6and
6 (Figure 7).
3. Open the Conveyor Cover(s).
4. Install the Tensioner Assembly. Make sure the
spacers are placed inside the Tensioner arm.
The spacers are smaller than the holes to allow
the Tensioner to pivot freely. (Figure 5).
5. Close the Conveyor Cover(s) and reassemble the
unit.
Figure 3. Installing Optional Belt Wraps
Figure 4. Aligning Belt Teeth
Belt
Wrap
Pin
Belt Rotation
Upper
Yellow
Support
Rod
Lower Yellow
Support Rod
CAUTION
PositiontheBeltWrapUNDERtheupperandlower
yellow support rods or damage to the unit may occur.
CAUTION
Align the ends of the Belt Wrap properly (Figure 4) or
the Belt Wrap may be damaged.
Acorn Nuts
Tensioner
Assy.
Tape
Spacers
Weld
Screws
Figure 5 Installing Optional Roller Tensioner
Assembly