W www.saferoads.com.au
T 1800 060 672
E sales@saferoads.com.au
June 2020
Page 48
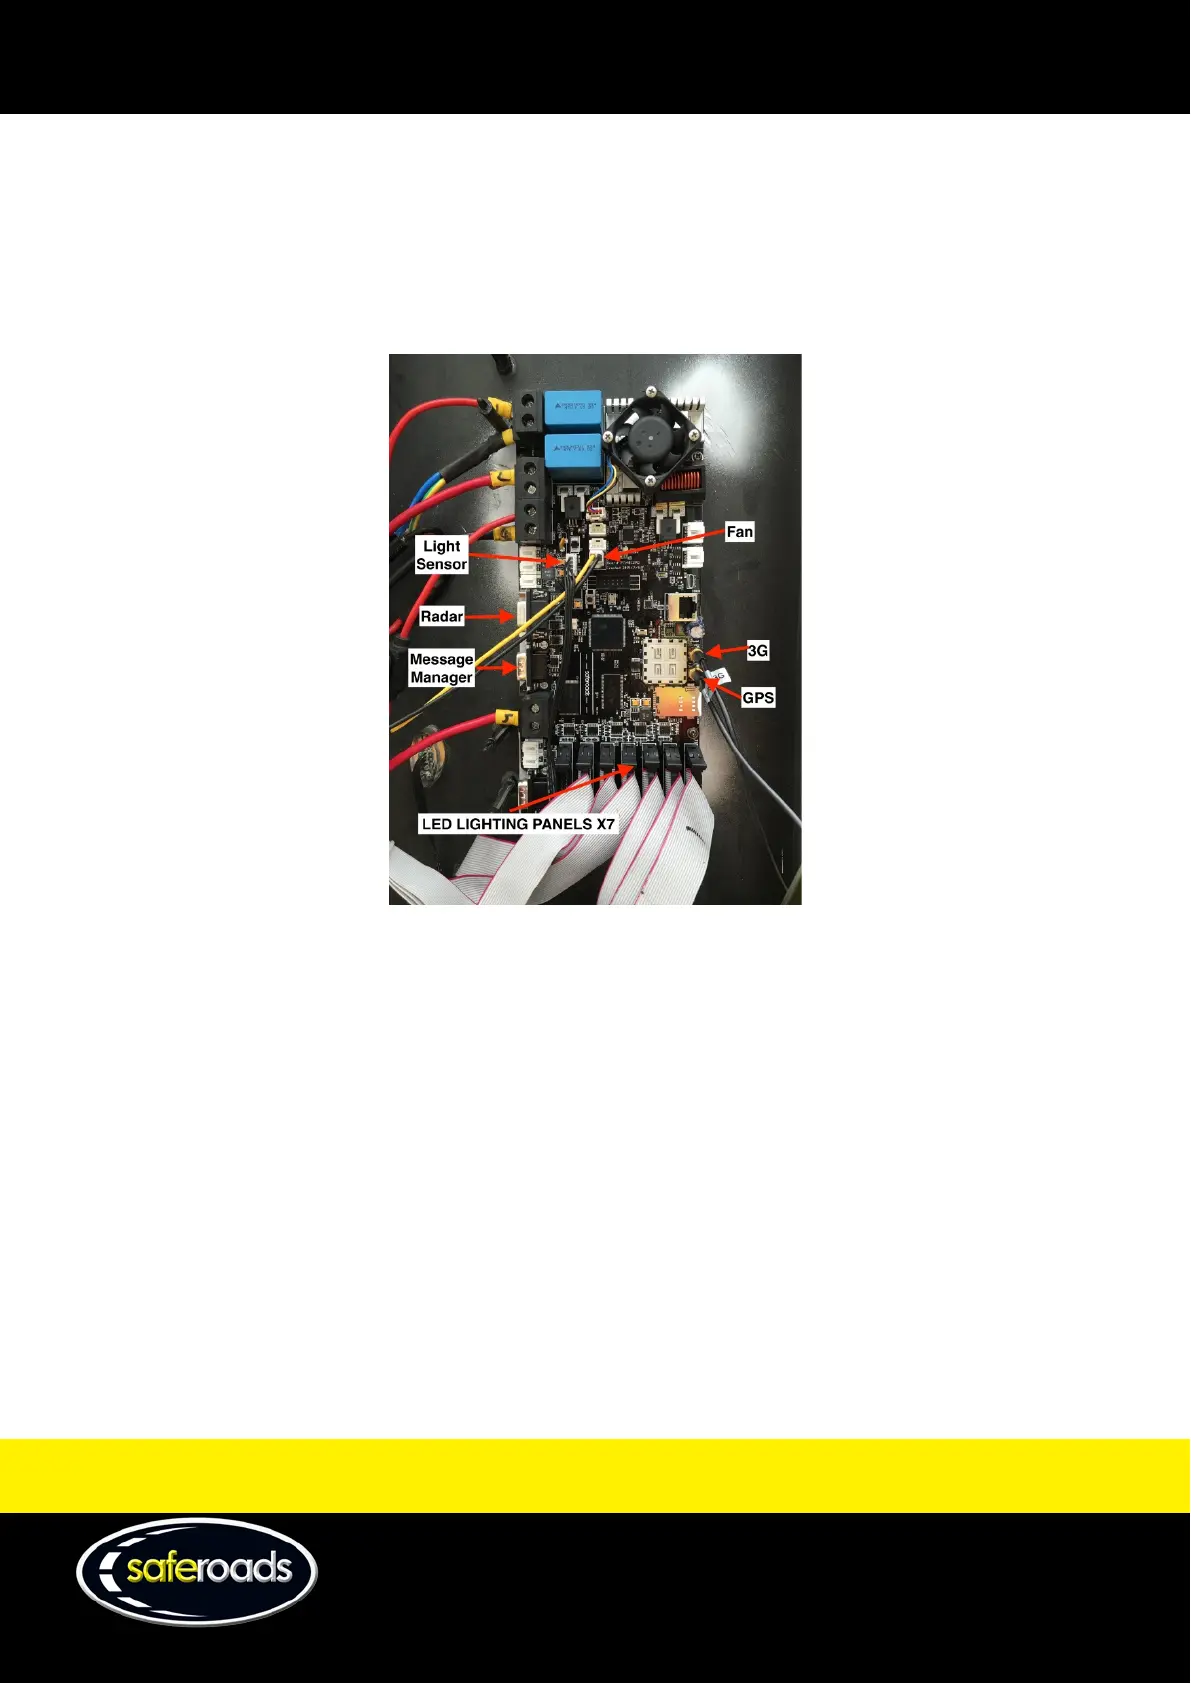
5.
Unplug the connections in the following order:
a. Fan
b. LED lighting panels, numbered 1-7 from right to left
c. Light sensor
d. Message Manager
e. GPS
f. Radar (if fitted)
Figure 71
6.
Unscrew the four screws located in each corner of the circuit board (CPU).
7.
Remove motherboard from Display Panel Case.
8.
Replace fuses.
9.
Close Display Panel Case and latch the Display Panel Locks.
10.
For installation procedure, complete steps in the reverse order.
Modem Removal and Installation
1. Open the Display Panel Case as outlined on page 43 of this manual.
2. Using needle nose pliers remove the two fuses located at the bottom right hand corner of the Display
Panel Case to ensure the main source of power is disconnected from the circuit. See Figure 63 on page 44.
3. To remove the modem, follow this procedure:
• Use the specific Snap-in removal tool to dismount the cover (P/N: 306CLE-001-00E).