SING THE RADI
After the unit is switched on, the radio will turn on if it was being previousl
listened to – or the USB/SD signal source last pla
ed has been removed
necessary, use the
WR
M
button to select the TUNER
unction
ANUAL TUNING / STORING PROGRAMS
riefl
keep pressing the
uttons to manuall
tune in the desired radio station. The search will automaticall
stop at the next radio station. Press and hold one of the buttons for about 2 seconds to switch to manual tuning. Then, keeping
ne o
the buttons pressed or pressing it brie
y, you can increase or decrease the tuning
requency (
ne tuning). I
no buttons are pressed
or 5 seconds, the unit will revert to the previous automatic search mode. I
, a
ter
nding the desired
program, an
of numerical buttons 1 to 6 are kept pressed for 2 seconds, an
station found will be stored under the preset number being pressed. The preset number CH1…6 will briefl
appear on the displa
.
• Please remember that the unit may skip stations with weaker reception, and the stations may be stored in a sequence diff erent from what you have defi ned.
• Select manual tuning and preset storage in order to per
orm custom settings
• If the unit is being used at a distance from the original tuned location – such as when travelling – the same station might have to be tuned in again on a diff erent frequenc
. The same program is broadcast on diff erent frequencies in diff eren
eo
raphical locations.
AUT
MATIC TUNING AND ST
RING
ee
t
e
ND/AS button pressed for 2 seconds to automaticall
search for and store the radio stations available in the current area. Tuning and storage progress can be monitored on the displa
. If there is good reception, it is possible to store
radio stations in each of the 6 presets of bands
M2
n
M
fter FM1. The number of the current memor
location
CH1
) appears on the displa
in the meantime
• Please remember that the unit ma
skip stations with weaker reception, and the stations ma
be stored in a sequence di
erent
rom what
ou have de
ned.
• Select manual tunin
and preset stora
e in order to perform custom settin
s
• If the unit is being used at a distance from the original tuned location – such as when travelling – the same station might have to be tuned in again on a diff erent frequency. The same program is broadcast on diff erent frequencies in diff eren
geographical locations
SELECTI
N
F ST
RED RADI
STATI
NS
rie
y press the number corresponding to the desired station
rom 1 to
Make sure that the appropriate FM band is selected be
orehand (BND
A
button:
M1-FM2-FM3
.
• When pressed
or longer than 2 seconds, it will not switch to the station previousl
stored but will store the program currentl
being listened to in the preset location. The original program saved there will be overwritten
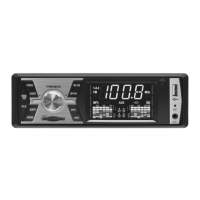
LAYBACK
FROM USB/SD/MMC STORAGE
you wish to listen to MP3 encoded music
rom a USB/SD/MMC source instead o
listening to the radio, simply connect the external storage. The unit will detect this and start playback automatically. The track number will
rst appear on the
ispla
then the elapsed time of the song. S
mbols indicate insertion of USB and SD signal sources. The corresponding s
mbol of the selected signal source will illuminate. The
in
icator wi
e concurrent
active accor
ing to t
e au
io
ormat being played back.
• Recommended memor
device
le s
stem: FAT32. Do not use NTFS
ormatted memor
devices
• If the unit emits no sound, or fails to detect the USB/SD/MMC memory, remove the memory card then reconnect it again. If this does not solve the problem, try selecting it using the PWR/MOD button. If necessary, switch off the unit then back on, or
i
all else
ails press the RST button.
• I
the unit
ails to recognize all or some o
the
les copied to the inserted signal source, proceed as described in the previous section, or the USB device can be inserted into an alread
switched on unit, and its contents will be re-scanned and re
reshed
y t
e system
• Remove the external memory card only a
ter switching to a signal source other than USB/SD/MMC memory using the PWR/MOD button or having switched o
the unit. Failure to observe this can lead to data corruption
•
Never disconnect any external unit during playback
• After inserting the memory, playback will begin from the fi rst track. If it was being previously listened to and not removed, playback will continue from the given point of the track selected last, even if the unit was switch off in the meantime.
• The USB storage and the SD/MMC cards can be removed by simply pushing then in then pulling them out. When properly inserted, the memory card will slightly project
rom the unit.
• T
e SD/MMC
card’s cut-off corner should be forward and facing right
, so that the contacts are not visible as the face down. Never touch the contacts by hand.
• The USB connector can be inserted in one direction only. If you encounter diffi culty, fl ip it over and try again but do not force it!
• Make sure that the device projecting
rom the unit does not a
ect sa
e driving, and avoid hitting and breaking it. The use o
SD cards is pre
erred as they are sa
er to use
• It is im
ortant to
ee
t
e USB/SD/MMC contacts c
ean on
ot
t
e unit an
t
e me
ia. Do not a
ow
air,
irt or
ust to co
ect on t
em.
• Leavin
t
e me
ia in t
e ve
ic
e in extreme
eat or co
wi
ama
e it
• The special
eatures o
storage device can cause erratic operation, however, this is not a mal
unction o
the unit!
PAU
epeate
pressing togg
es
etween p
a
ac
an
pause. T
e e
apse
trac
time wi
in
on t
e
isp
a
in t
e
atter case.
rie
y press the buttons to skip to the next or previous track. Kong pressing them will activate the quick search
unction covering all tracks on the device. A
ter you release the button, playback o
the newly selected track starts. This
unction is
uite useful if there are hundreds or perhaps thousands of son
s to choose from.
INT
ong intro function: Pla
s 10 seconds from the beginning of all available tracks. The displa
briefl
shows the text
on being switched on. If an
track is to
our liking, press the button repeatedl
for further continuous pla
back. The displa
briefl
shows the text ALL
3
RPT
urrent track repeat function. The displa
briefl
shows the text
on being switched on. Press this button repeatedl
for further continuous pla
back. The displa
briefl
shows the text
4
RD
layback in random order. The display brie
y shows the text
D
on being switched on. I
any track is to your liking, press the button repeatedly
or
urther continuous playback. The display brie
y shows the text
5 / -10
riefl
press this button to skip ten songs back among the tracks. Press and hold the
tt
n t
se
rch f
ster
6
+1
riefl
press this button to skip ten songs forward among the tracks. Press and hold the
tt
n t
se
rch f
ster
SETTING THE CLOC
To displa
the clock, press the
L
button briefl y. In order to adjust the clock keep the
L
button pressed until the hour digits begin to fl ash. Use the
rotatin
knob to increase or decrease the value. Pressin
the CL
button will advance to the
inute digits which can likewise be adjusted using the
otating knob. The in
ormation will be saved automatically in 5 seconds a
ter
nishing adjustment.
• The clock emplo
s 24-hour displa
and is visible even if the power is o
.
A
X STERE
A
DI
INP
T
A 3.5mm stereo p
ug can
e use
to connect an
externa
units w
ic
ave a
ea
p
one/au
io output
irect
to t
e
socket on the front panel. It is possible to listen to such portable devices in high qualit
via the car radio’s speakers if
the AU
mode is selected using the
WR
M
button.
A mo
i
e p
one, me
ia p
ayer, CD/DVD p
ayer, GPS etc. can
e connecte
.
• The purchase of an external adapter may be required for connecting products that lack 3.5mm audio output connectors
• For
urther in
ormation please see the instructions
or use o
the unit to be connected.
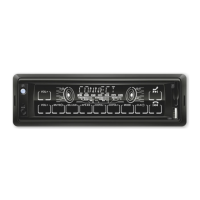
NNECTING AN EXTERNAL AMPLIFIE
The preampli
er output is located on the rear panel o
the head unit. This allows the connection o
an external ampli
er or active subwoo
er
eaturing low level outputs. Thus the volume output and/or sound quality can be upgraded. White
CA socket: Left channel output; Red RCA socket: Ri
ht channel output.
ARNIN
. Be
ore starting to use the player, read these instructions care
ully, then keep them in an accessible place
or
uture re
erence.
. Seek professional assistance if necessar
to prevent damaging the unit or motor vehicle.
. Depending on the compressed fi les, the MP3 compression program used, and the qualit
of the USB/SD memor
, anomalies ma
occur during pla
back which are not due to the unit malfunctioning.
. The playback o
copy protected DRM
les is not guaranteed
5. It is a
so possi
e to connect MP3 p
a
ers using a USB ca
e
ut avoi
connecting externa
ar
rives t
is wa
. Do not store an
additional fi les on the USB/SD device other than pla
able fi les because the
can slow down or prevent pla
back.
7. Do not connect phones, navigation devices or other equipment to the USB port
or purposes o
recharging
. Do not store data media in the vehicle if it is exposed to freezing or extremel
high temperatures
9. While underwa
, do not do an
thing that distracts
our attention from driving. Manipulating the pla
er while driving can result in accidents. If needed, stop the car while manipulating the pla
er.
0. Spend as little time as possible watching the display. Doing so can distract your attention
rom the road, and result in accidents.
1. Do not
isten to t
e p
a
er too
ou
. Set a vo
ume t
at a
ows
ou
ear externa
soun
s w
i
e
riving. Extreme vo
umes can a
so cause permanent
amage to
our ears.
2. Do not disassemble or tamper with the pla
er, as that can cause fi re, accidents, or electric shock. Incorrect use or installation renders the warrant
void
 Loading...