52
Then place the Y-Ring and Rubber Seal Ring (18) back
into the Lid (2) making sure the hole in the center of the
Y-Ring's cross-section is lined up with the metal pin i
n
t
he center of the Lid (2). Press down firmly until the Y-
Ring is secured onto the Lid (2) (Figures 1- 2).
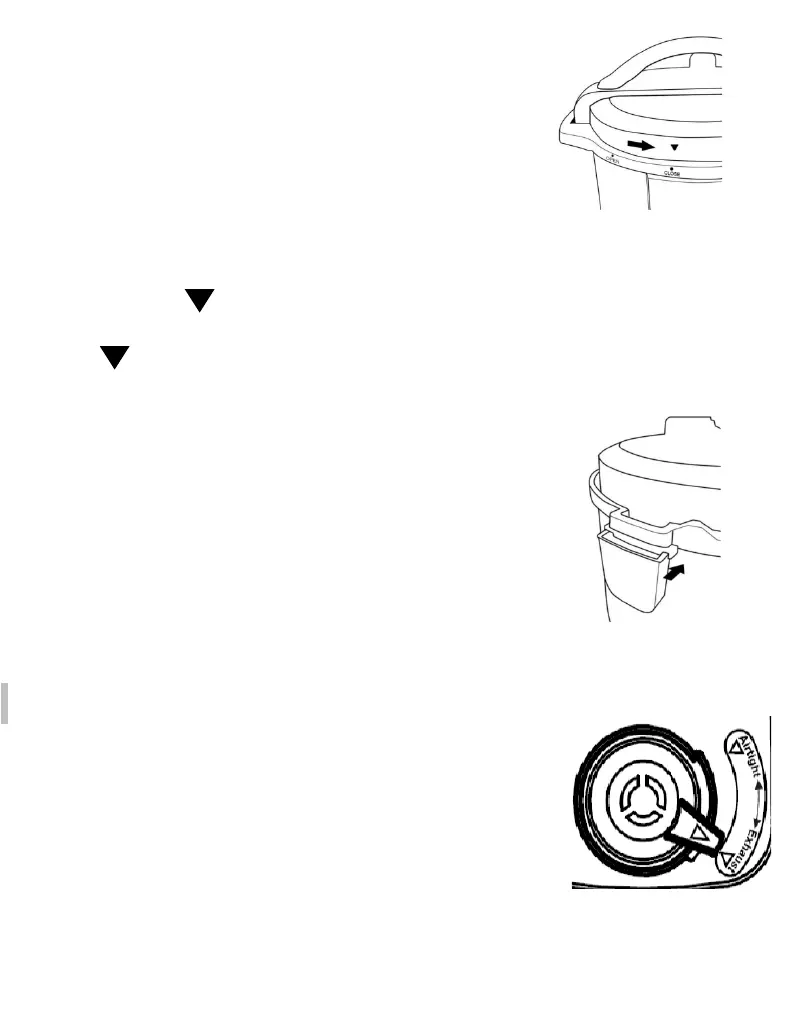
PRESSURE COOKER LID MARKINGS
Figure 3
Please note the "OPEN" and "CLOSE" markings on the rim of the pressure cooker
body (13) and the“ ”on the rim of the Lid (2). To properly close and secure the
pressure cooker Lid (2), always line up the "CLOSE" marking on the Upper Ring (9)
and the “ ”on the rim of the Lid (2) (Figure 3).
CONDENSATION CUP ASSEMBLY
The Condensation Cup is the clear plastic piece that snaps
into the back side of the pressure cooker as shown in Figure
4. Place condensation cup in rear of the unit until it locks
into place; it is part 12 in the diagram on page 6.
Figure 4
PRESSURE LIMITING VALVE WARNING
WARNING: Avoid serious injury. Always use tongs or a long
kitchen tool to set the valve to EXHAUST (Figure 5).
CAUTION HOT STEAM: KEEP HANDS AND FACE AWAY
FROM THE PRESSURE LIMITING VALVE WHEN ROTATING
TO EXHAUST.