RT300RF INSTRUCTION MANUAL
6
The RT300RF Receiver should be mounted in a suitable location that is both
accessible for the connection of mains and control wiring, and allows good
reception of the RF signal. The Receiver needs a 230V AC mains supply to
operate, and this should be fused appropriately (13A max.). The Receiver
should be mounted in a location where it will not come into contact with
water, moisture or condensation.
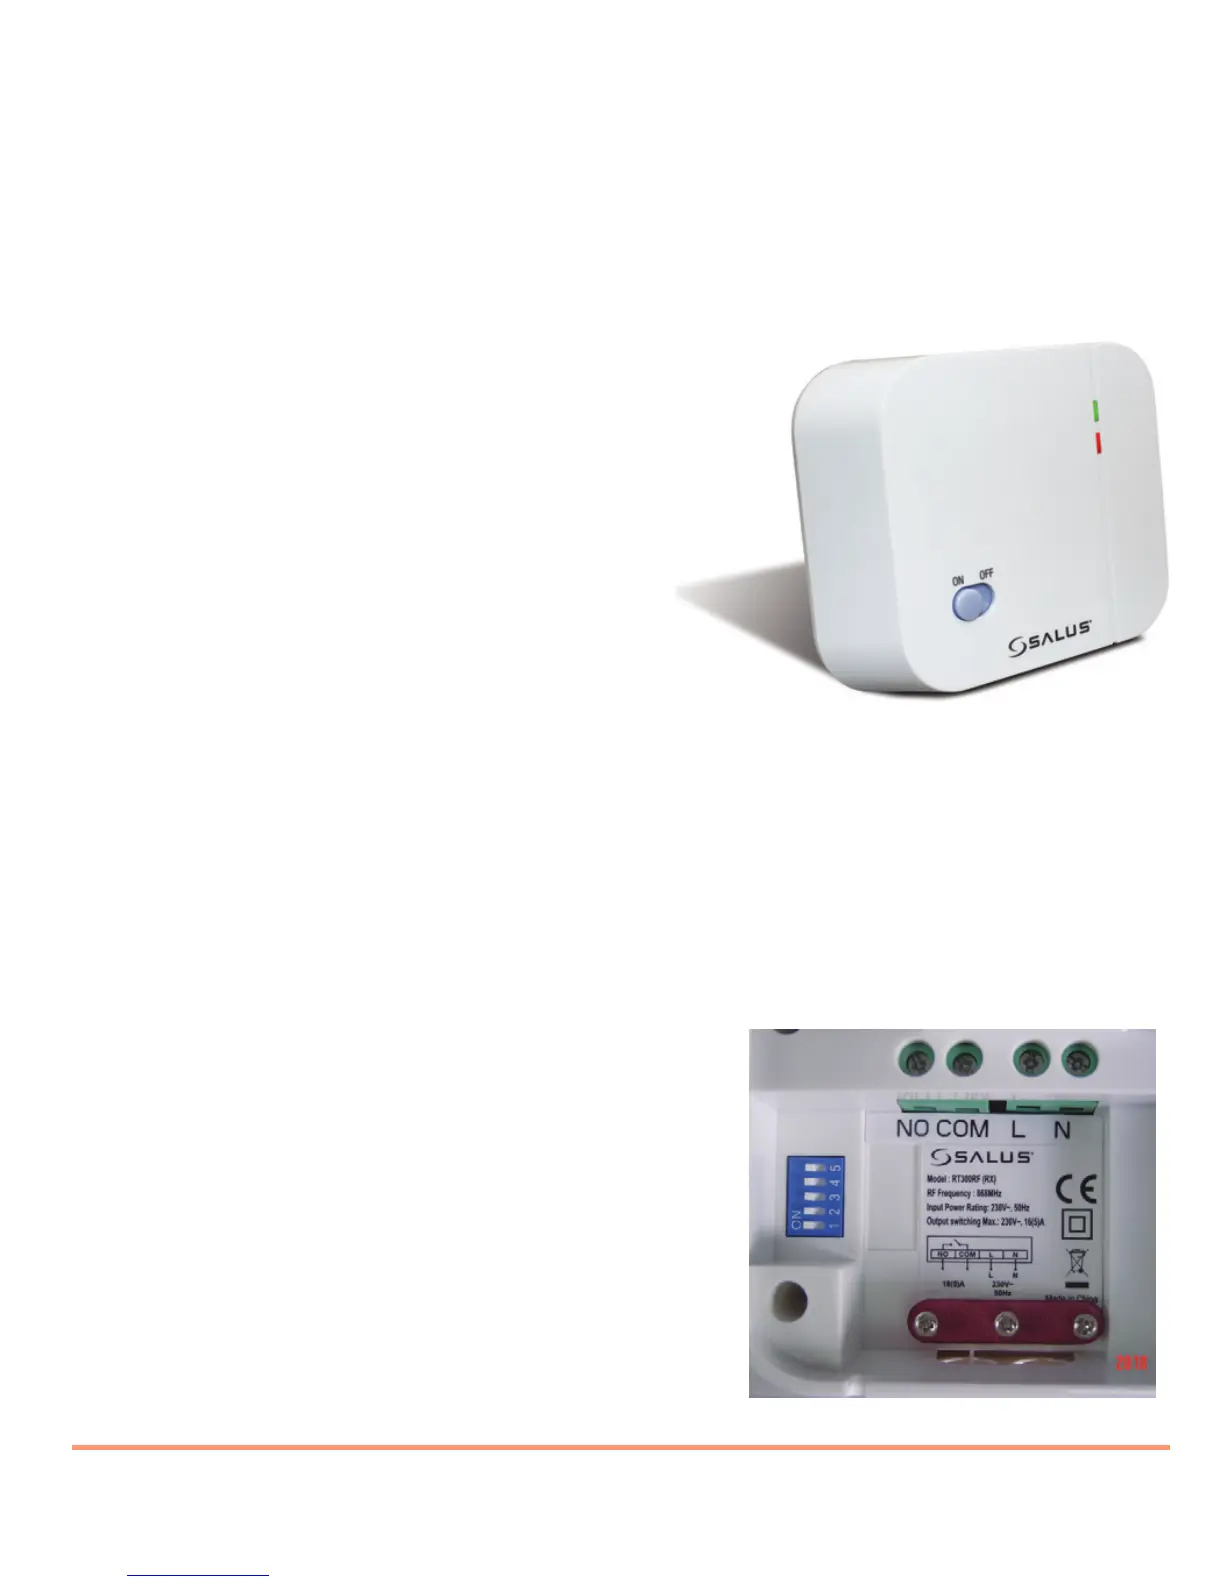
The Receiver On/Off switch is accessible
from the front face of the Receiver, as
shown in this picture:
On the front cover of the Receiver you will see that there is the On/Off switch
and two Light Emitting diodes (LEDs). The switch allows you to turn off the
Receiver if necessary to prevent it calling for heat. The top LED (red) will
illuminate when the switch is in the ‘On’ position and the unit is receiving
power. The bottom LED (green) illuminates when the Receiver unit is
receiving a heat call transmission from the Control Centre.
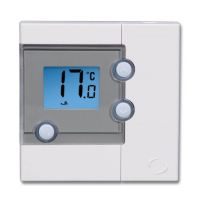
The wiring terminals and RF Address Code
setting DIP switches are located on the
rear of the Receiver, as shown in this
picture:
Salus RT300RF Manual 002_89 22/07/2013 09:19 Page 6