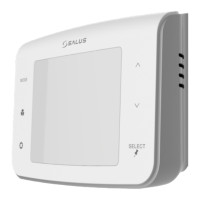
The SALUS ST101ZB is a low-voltage fan coil thermostat designed for temperature control in dry, closed living and office spaces. It operates on a 24 VAC power source and is not compatible with 120/240 VAC supplies. The device is intended for use with fan coil systems and offers various configurations for both 2-pipe and 4-pipe systems.
Function Description:
The thermostat controls the fan coil system to maintain desired temperatures. It supports different operating modes including heat only, cool only, heat or cool (manual or seasonal changeover), and heat or cool with auxiliary heat for 2-pipe systems. For 4-pipe systems, it supports heat or cool (manual changeover) and heat, cool, or auto changeover. The device can be configured as either non-programmable (for home automation systems with schedules) or programmable. It features fan operating mode selection and allows for user-accessible settings such as C/F temperature units, internal/external temperature sensor selection, setback set point setup, 12/24 hour time display, and time/date/year settings (in standalone or local mode). It also supports program schedule mode if configured as programmable and allows for setting a temperature offset. The thermostat can be paired with a home automation system via Zigbee, and it offers functions for entering installer mode, initiating pairing/unpairing from a network, and restoring factory default values.
Important Technical Specifications:
- Power Source: 24 VAC.
- System Compatibility: Low Voltage Fan Coil systems.
- Pipe System Configurations:
- 2-pipe: Heat Only, Cool Only, Heat or Cool (Manual Changeover), Heat or Cool (Seasonal Changeover - requires pipe sensor), Heat or Cool with Auxiliary Heat (requires pipe sensor).
- 4-pipe: Heat or Cool (Manual Changeover), Heat, Cool or Auto Changeover, Auto Changeover only.
- Thermostat Type (P00): 0 = Non-Programmable (default), 1 = Programmable.
- Fan Coil Type (P01): 0 = 2 Pipe (default), 1 = 4 pipe.
- Heat/Cool Configuration (P02):
- For 2 Pipe: 0 = Heat Only, 1 = Cool Only, 2 = Heat or Cool Manual changeover, 3 = Heat or Cool Seasonal changeover (Pipe sensor required), 4 = Heat or Cool with Auxiliary Heat (Pipe sensor required).
- For 4 Pipe: 2 = Heat or Cool Manual changeover, 3 = Heat, Cool or Auto changeover (default), 4 = Auto changeover only.
- Pipe Valve Type (P03): 0 = Normally open (default), 1 = Normally closed.
- External Sensor Type (P12): 0 = External sensor (default), 1 = Zigbee remote sensor.
- Pipe Sensor Type (P13): 0 = Analog input (default), 1 = Normal open, default mode is Heat; 2 = Normal open, default mode is Cool; 3 = Normal close, default mode is Heat; 4 = Normal close, default mode is Cool.
- Terminals: R (24VAC input), C (Common of AC input), WY (Hot water valve output for 4-pipe, Pipe valve output for 2-pipe), YA (Chilled water valve output for 4-pipe, Auxiliary Heat (A) for 2-pipe), Gl (Fan coil low speed control), Gm (Fan coil medium speed control), Gh (Fan coil high speed control), Ac (Accessory output - relay contact), Ac (Accessory output - other side of relay), Tp (Pipe temperature sensor input), Tx (External temperature sensor input), Ts (Setback contact input), Tc (Tx/Tp/Ts common).
Usage Features:
- Installation: Requires turning off power at the circuit breaker, removing the old thermostat, labeling wires, and attaching the wiring mount to the wall. The thermostat then attaches to the wiring mount.
- Pairing: After power-up, the thermostat displays a pairing screen. It can be paired with a home automation system. Skipping pairing immediately enters Installer Mode.
- Installer Mode: Accessed after pairing or by pressing SETTINGS during pairing. Allows configuration of operating parameters. Buttons include SELECT (save value, next parameter), ▲ or ▼ (select value options), and SETTINGS (exit Installer Mode).
- Normal Operation: After exiting Installer Mode, the device goes to the Home Screen.
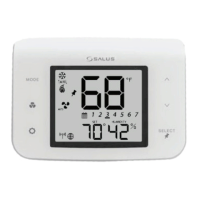
- MODE button: Selects heat/cool/auto mode.
- FAN button: Selects fan operating mode.
- SETTINGS button: Enters/Exits User Settings Mode for various adjustments (temperature units, sensor selection, setback, time display, time/date/year, program schedule, temperature offset).
- ▲ or ▼ buttons: In Home Screen, enters Set Point Change mode; in Set Point Change, increases/decreases set point.
- SELECT button: In Home Screen, selects display content (ambient temperature, time, set point, humidity); in Set Point Change, toggles permanent hold.
- Code Functions: Accessed by simultaneously pressing MODE, FAN, and SETTINGS buttons for ~2 seconds.
- Code 49: Enters Installer Mode.
- Code 55: Initiates pairing if not in a network, or confirms unpairing if already in a network. If confirmed, the device forgets the network and starts pairing. If no confirmation, returns to Home Screen.
- Code 86: Restores all parameters to factory default values and reboots. Requires confirmation; if none, returns to Home Screen.
Maintenance Features:
- Cleaning: Use a dry, soft cloth. Do not use solvents or aggressive cleaning agents.
- Placement: Avoid bathrooms or areas of excessive moisture. Do not allow the unit to get wet. Ensure vents are not covered.
- Wiring: Follow local and electricity supplier regulations. Do not connect to 120/240 VAC supply. Use wiring labels for proper identification during installation.
- Troubleshooting: The manual provides guidance on configuration and operation, and suggests consulting the User Manual at www.salusinc.com for a full list of parameters. FCC and Industry Canada compliance information is provided, including guidelines for addressing potential harmful interference.