6-4 Printer Options
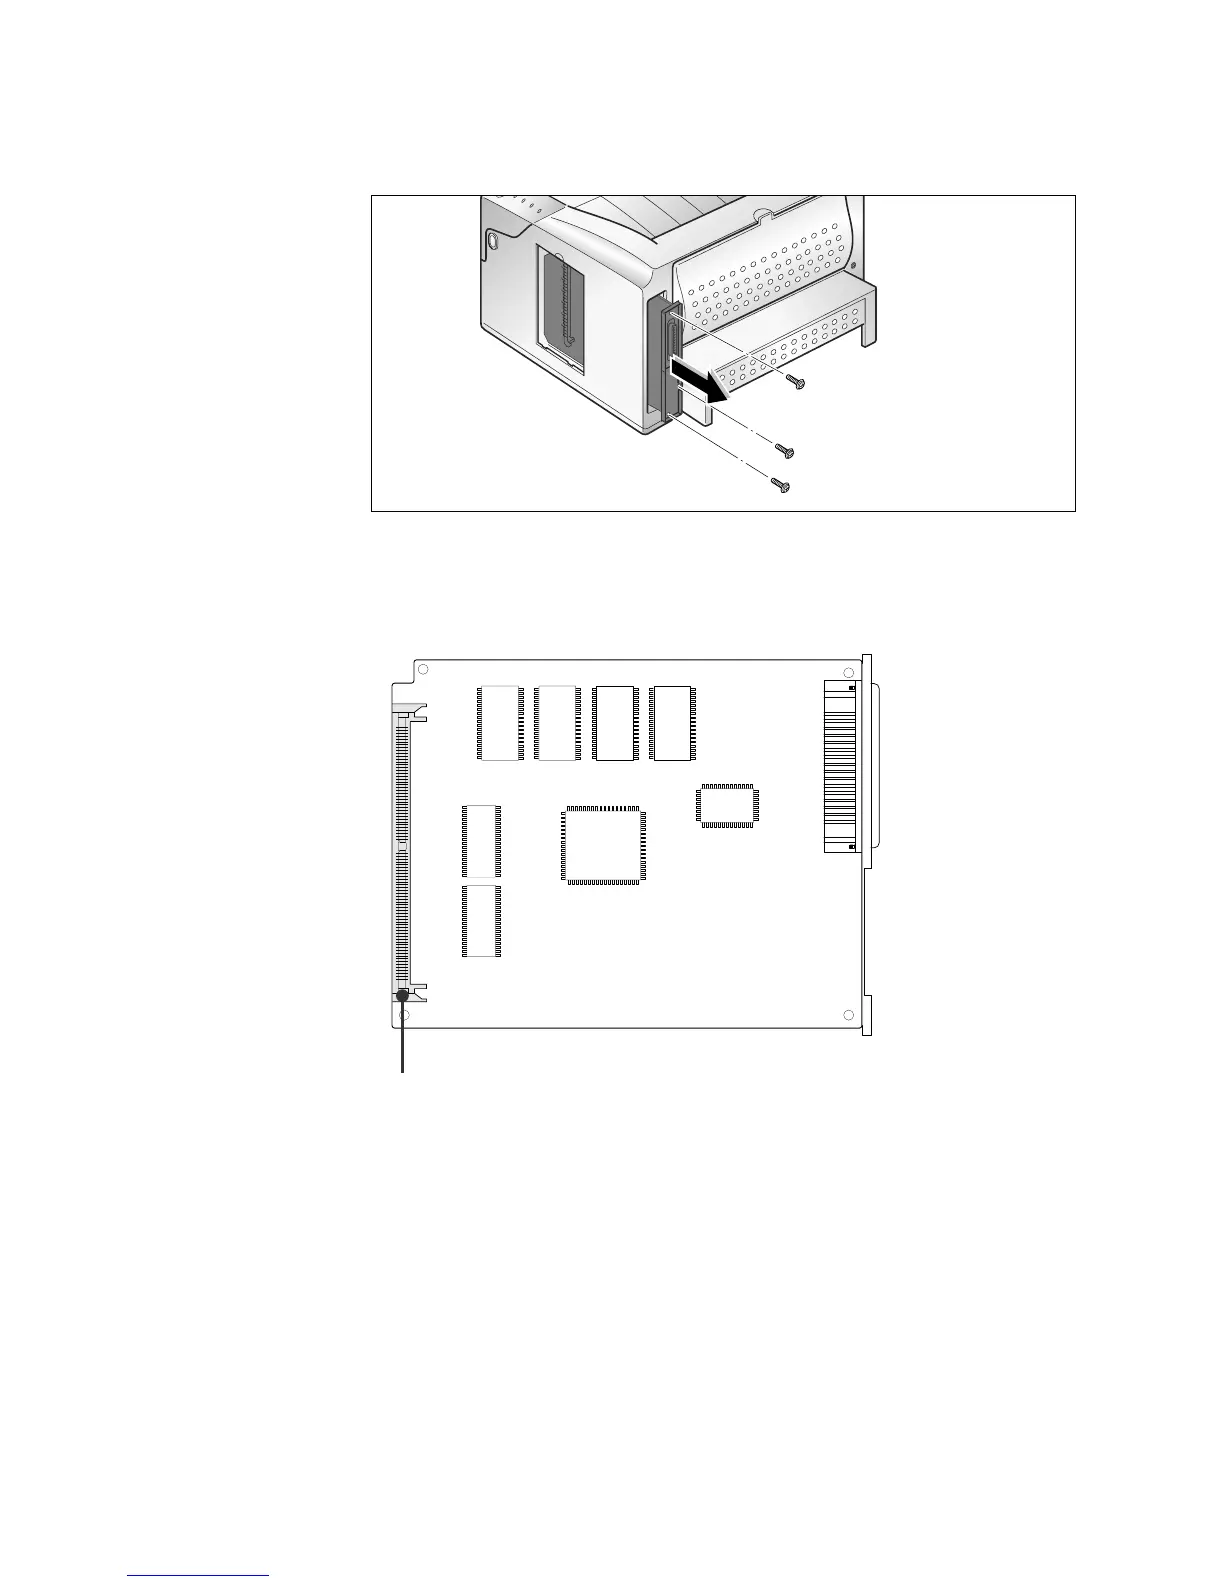
5. Remove the three screws securing the board and pull the board
out of the printer.
7. Continue to the appropriate section for installation instructions:
- See ‘Printer Memory Option’ on page 6-5.
8. After you have completed installing all of your options on the
printer control board, insert the board in place, tighten the screws,
plug the connectors, replace the shield, then close the cover. To
reinstall, reverse the removal procedure.
6. Locate the appropriate connector for the option you want to
install.
Memory connector