54
Refrigerant pipe installation
CAUTION
< H/P >
Temperature
sensor
Wet towel
Service port
Service valve
Temperature
sensor
Wet towel
Service port
Service valve
< H/R >
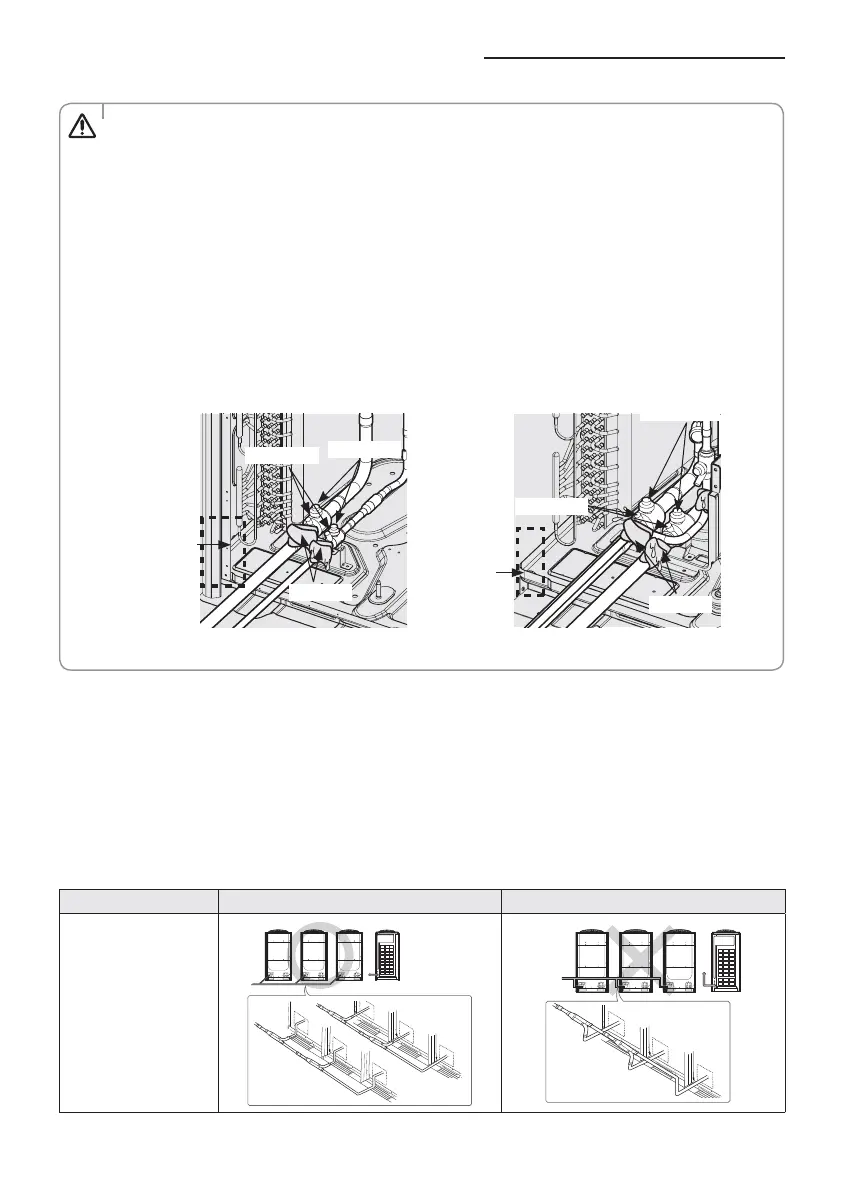
Caution for welding the pipe to an outdoor unit
࡛Ǯ˵ʪиʪʒ˝ϩ˵ʪΧΧʪࡥϩ˵ʪЇϩɇц˝ʪϩʒɇɇ˝ʪʒɵцϩ˵ʪ˵ʪɇϩɇʒѤɇʪ˙θͱиʪʒ˝Ƹϑʪɇ
ѤɇʪΧθͱͱѣ˝ʀͱϩ˵ϩͱΧθͱϩʪʀϩϩ˵ʪЇϩ˙θͱɇиʪʒ˝ѣθʪͱθѤɇʪƊʪϑͱθ˙ͱθʒʪϩʪʀϩ˝ͱЇϩϑʒʪ
temperature is located on the left side of the welding part so be extra careful not to damage the
sensor when welding.
࡛Ɵ˵ʪĮࣛθ˝ɇʒƟʪѤͱΧɇʀ˝ϑʒʪϑʪθЭʀʪЭɇЭʪɇц˝ʪϩʒɇɇ˝ʪʒɵцϩ˵ʪ˵ʪɇϩ˙θͱиʪʒ˝
Wrap the bottom side of the service valve with a wet cloth and weld it as shown in the illustration.
Also, water dripping from the wet cloth may interrupt the welding. Make sure the water does not
drip from the wet cloth.
࡛Make sure that connected pipes does not interrupt each other or make contact with the product.
(Vibration may cause damage to the pipes.)
࡛When removing the sealed pipe on the bottom side of the service valve, cut it with a pipe cutter
ѣθϑϩɇʒϩ˵ʪϑϩɇθϩϩ˵ʪиʪʒ˝Ǯ˵ʪϩ˵ʪϑʪɇʪʒΧΧʪϑиʪʒʪʒиϩ˵ͱЇϩʀЇϩϩ˝ࡥцͱЇɇц˝ʪϩ
injured by the refrigerant within the pipe.
3. Pipe installation between the outdoor units
You will need branch joints, which is an optional accessory, for connecting in between outdoor units in
order to combine outdoor units in module.
࢜
For optimal distribution of the refrigerant, you must use Y-joint as branch joint for connecting outdoor
Їϩϑ࣑UͱͱϩЇϑʪƟࣛͱϩ࣒
When you install the outdoor units in module, there is no restriction of installation order among outdoor
units.
Height of the connection pipe should be same or lower than the ones connected to the outdoor units.
A˵ʪʀϩ˵ʪʀ˵ɇ˝ʪϑʀͱΧɇθϑͱиϩ˵ϩ˵ʪUǤđࠪࡥࠫɇʒࠬ
Caution Correct installation Incorrect installation
Refrigerant pipes
should be connected
at the same or lower
level than the ones
connected to the
outdoor unit.