EasyManua.ls Logo

Samsung CE124CF - User Manual

Samsung CE124CF
26 pages
Print Icon
To Next Page IconTo Next Page
Loading...
MICROWAVE OVEN
CE124CF
SERVICE
Manual
MICROWAVE OVEN
CONTENTS
1. Precaution
2. Specifications
3. Operating Instructions
4. Disassembly and Reassembly
5. Alignment and Adjustments
6. Troubleshooting
7. Exploded Views and Parts List
8. PCB Diagrams
9. Schematic Diagrams
UHR
LEISTUNGGRILL
ZEIT/GEWICHT
AUFTAUEN
GAR-
AUTOMATIK
PLUS
HEISSLUFT MIKROWELLE
MW
+
HEISSL
MW
+
GRILL
GRILL
+
HEISSL
LÖSCHEN START
CE124CF
SCHNELLGERICHTE
1.GETRÄNKE
2.FOLIENKARTOFFEL
3.PIZZA
4.POMMES FRITES
5.HAMBURGER/FISCHSTÄBCHEN
6.REIS/NUDELN
7.POPCORN
AUFWARMEN
8.FERTIGGERICHTE
9.QUICHE/AUFLAUF
10.EINTOPF
11.SUPPE/SAUCE
12.REIS/NUDELN
GAR.AUTOMATIK
13.RIND
14.SCHWEIN
15.GEFLÜGEL
16.GEFLÜGELSTÜCKE
17.FISCH
18.GEMÜSE(FRISCH)
19.GEMÜSE (GEFROREN)
MINUS

Questions and Answers

  • M
    Matthew YoungSep 8, 2025
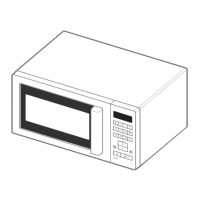
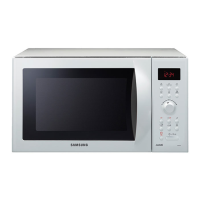
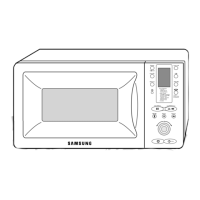
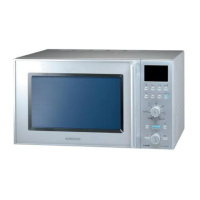
    Why Samsung Microwave Oven lamp and fan motor turn on?
    • C
      Christopher JohnsonSep 9, 2025
      If the oven lamp and fan motor turn on in your Samsung Microwave Oven, it could be due to misadjustment or loose wiring of the primary latch switch, or a defective primary latch switch. Adjust the door and latch switches.
  • M
    Michael KingSep 12, 2025
    Why Samsung CE124CF Microwave Oven does not operate and returns to plugged in mode?
    • R
      Robin HartSep 12, 2025
      If your Samsung Microwave Oven does not operate and returns to the plugged-in mode, the cause is a defective Ass'y PCB. Replace PCB main.
  • R
    Richard SchmidtSep 12, 2025
    Why is my Samsung Microwave Oven cooking unevenly?
    • I
      Ian PerrySep 12, 2025
      Uneven cooking in your Samsung Microwave Oven is due to the uneven intensity of microwave due to its characteristics. Wrap thinner parts of the food with aluminum foil. Use plastic wrap or cover with a lid. Stir once or twice while cooking foods such as soup, cocoa, or milk.
  • T
    Tracy MullenSep 14, 2025
    Why Samsung CE124CF fan motor turns on when plugged in?
    • K
      Kevin AndersonSep 15, 2025
      If the fan motor in your Samsung Microwave Oven turns on when plugged in, it is likely due to loose wiring of the door sensing switch. Check the wire of the door sensing switch.
  • D
    Desiree KellySep 16, 2025
    Why is there noise from the turntable motor when it starts to operate in my Samsung CE124CF?
    • A
      Alex StewartSep 17, 2025
      Noise from the turntable motor when it starts to operate in your Samsung Microwave Oven may result from the motor itself. Replace the turntable motor.

Summary

1. Precaution

1-1 Safety precautions

General safety precautions and warnings for handling the microwave oven during repair.

1-2 Special Servicing Precautions

Specific safety measures for technicians performing servicing on the microwave oven.

1-3 Special High Voltage Precautions

Critical safety guidelines related to high voltage components and procedures.

2. Specifications

2-1 Table of Specifications

Detailed technical specifications for the CE124CF microwave oven model.

3. Operating Instructions

3-1 Control Panel

Explanation of the microwave oven's control panel layout and functions.

3-2 Features & Accessories

Description of the microwave oven's features and included accessories.

4. Disassembly and Reassembly

4-1 Replacement of Fan Motor and HVCapacitor

Step-by-step guide for replacing the fan motor and high voltage capacitor.

4-2 Replacement of Damper, Magnetron

Instructions for removing and replacing the damper and magnetron assembly.

4-3 Replacement of Lamp

Procedure for replacing the internal lamp of the microwave oven.

4-4 Replacement of Door Assembly

Steps for removing and reinstalling the microwave oven door assembly.

4-5 Replacement of H.V.Transformer

Procedure for safely replacing the high voltage transformer.

4-6 Replacement of Fuse

Guide for locating and replacing the fuse in the noise filter assembly.

4-7 Replacement of Casing Assy and Convection Heater

Detailed steps for replacing the outer casing and convection heater components.

4-8 Replacement of Drive Motor

Instructions for removing and replacing the turntable drive motor.

4-9 Replacement of Control Circuit Board

Procedure for replacing the main control circuit board and related components.

4-6 Replacement of Control Box Assembly

Steps for removing the control box assembly to access the control circuit board.

5. Alignment and Adjustments

5-1 High Voltage Transformer

Procedure for checking the resistance and continuity of the high voltage transformer.

5-2 Low Voltage Transformer

Steps to check the continuity and resistance of the low voltage transformer.

5-3 Magnetron

Method for checking magnetron continuity to diagnose faults.

5-4 High Voltage Capacitor

Procedure for checking the continuity and resistance of the high voltage capacitor.

5-5 High Voltage Diode

Method for checking the front-to-back resistance of the high voltage diode.

5-6 Main Relay and Power Control Relay

Procedure for checking the continuity of main and power control relays.

5-7 Adjustment of Primary Switch, Door Sensing Switch and Monitor Switch

Guideline for adjusting and verifying the operation of door interlock switches.

5-8 Output Power of Magnetron

Method for measuring magnetron output power using a water temperature rise test.

5-9 Microwave Heat Distribution - Heat Evenness

Procedure to check microwave heat distribution using multiple beakers of water.

5-10 Procedure for Measurement of Microwave Energy Leakage

Steps for measuring microwave energy leakage using a survey meter.

5-11 Check for Microwave Leakage

Instructions for performing a microwave leakage check with water and a survey meter.

5-12 Note on Measurement

Important notes and precautions for accurate microwave leakage measurements.

5-13 Leakage Measuring Procedure

Guidance on recording and reporting microwave leakage test results.

6. Troubleshooting

6-1 Electrical Malfunction

Common electrical malfunctions, their causes, and correction methods.

6-1 Electrical Malfunction(continued)

Further common electrical issues, causes, and solutions for the microwave oven.

7. Exploded Views and Parts List

7-1 Exploded Views

Diagrams showing the exploded views of the microwave oven components.

7-2 Main Parts List

Comprehensive list of main parts with part numbers, descriptions, and specifications.

7-3 Exploded View & Parts List - Door Parts

Exploded view and parts list specifically for the door assembly components.

7-4 Exploded View & Parts List - Control Parts

Exploded view and parts list for the control panel and related electronic parts.

7-5 Exploded View & Parts List - Casing Parts

Exploded view and parts list for the external casing and internal structural parts.

7-6 Parts List - Standard Parts

List of standard parts, including screws, nuts, and washers, with their specifications.

8. P.C.B Diagrams

8-1 P.C.B Diagrams

Schematic diagrams and component layouts for the main and sub printed circuit boards.

8-2 P.C.B Parts List

Detailed list of parts used on the printed circuit boards with their specifications.

9. Schematic Diagram & Wiring Diagram

9-1 Schematic Diagram

Overall schematic diagram illustrating the electrical connections and components.

9-2 Wiring Diagram

Wiring diagram showing the connections between components and terminals.

Samsung CE124CF Specifications

General IconGeneral
Control TypeElectronic
ColorBlack
InstallationCountertop
DisplayLED
TimerYes
GrillNo
ConvectionNo
Number of Power Levels6

Related product manuals