4-11
Troubleshooting
4-4. Adjustment
4-4-1. Changing the Service Menu Settings
Precautions when configuring the service menu settings
1. Check that the equipment used for configuring the settings is working normally.
2. Ensure you have ample space to disassemble the set.
3. Prepare a cushioned surface on which to put the set to be disassembled.
Entering the Service Mode
Entering the mode :
Menu Brightness 0 Contrast 0
In the Main OSD, press ENTER button for 5 seconds.
Exiting the mode :
Turn the power off Turn the power on
Mandatory checklist after replacing the MAIN PBA
1. Check the color adjustment status of the PC.
2. Input DDC (including all HDMI).
3. Check if proper MCU code for the model has been entered.
4. Enter Service mode to select reset and turn off the monitor
Be aware that when resetting in service mode, all data is reset. The user's saved game settings 1/2/3 are deleted. (In
general OSD modes, users' saved game settings 1/2/3 are not deleted.)
→ Service mode reset: Set OSD menu brightness to 0, then hold the enter key for 5 sec.
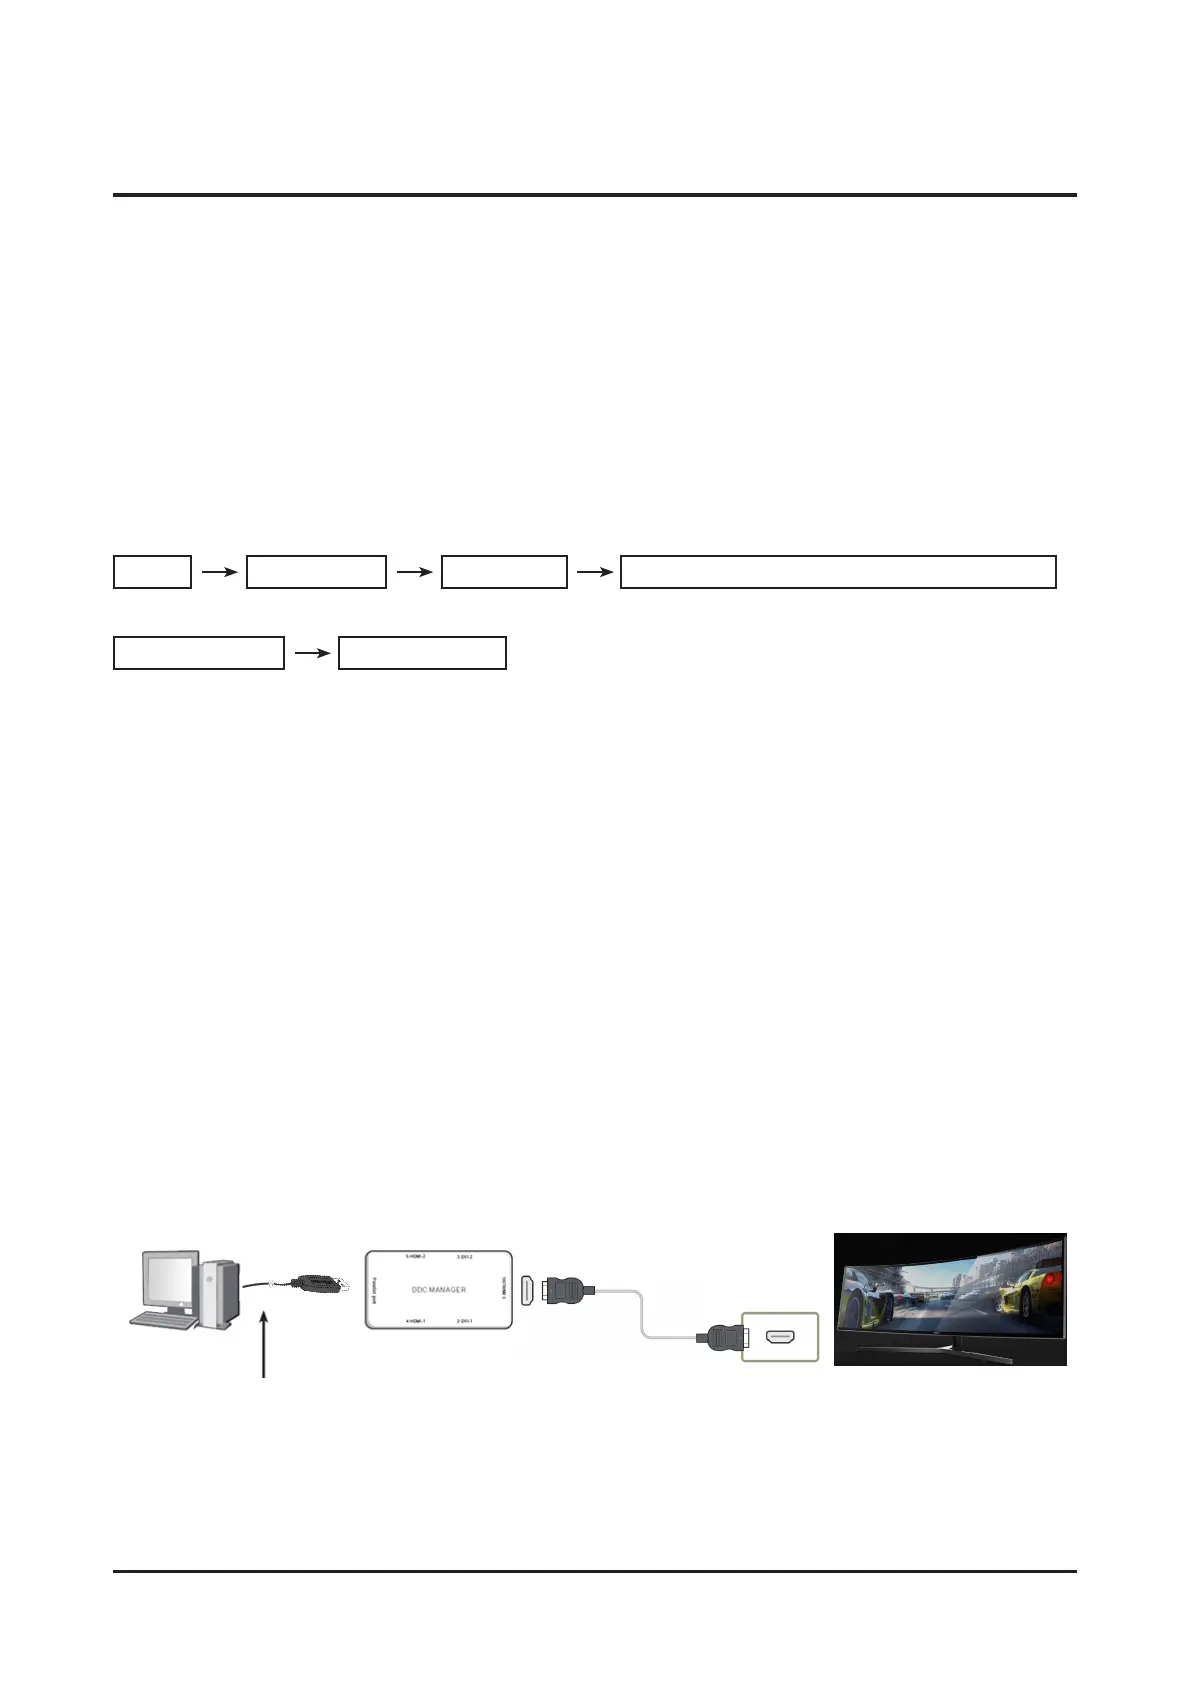
DDC EDIT Data Input
1. Use when updating the AD board code.
2. Download the WinDDC program, DDC Input program, and Hex and DDC files appropriate to the model through the Quality
Control department of Samsung Electronics. Install the jig and input the data, as shown in the figure.
HDMI
Connected to the computer USB port
• Using DDC Manager (must be connected to the Power adaptor) PC connected to the Mainboard
- Firmware Update : HDMI Port Connection
- EDID Update : HDMI(for HDMI EDID)
• Use WINDDCU program

 Loading...