English-2
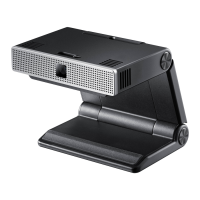
Installing the TV Camera
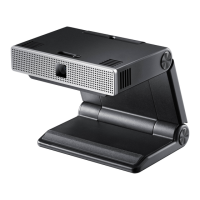
As the figure below shows, the TV camera is designed to be put on
the top of the TV.
How to install the TV camera
1 Put the TV camera on the top center of your TV as shown above.
2 Connect the TV camera to your TV with a USB cable.
3 Clutch and hold the camera’s neck, and bend its head to the
angle you prefer.
4 The TV camera is designed to be mounted. Do not apply
excessive force when manipulating it.
Operating the TV Camera
Power
LED
Shutter
switch
Slide the cover switch on the top of
the TV camera to the left to expose the
camera lens.
When you turn on the TV, the blue TV
camera operation indicator turns on and
off after a while.
✎
The indicator light turns on only
during calls.
If you start Smart Hub and log on to
Skype™ via the Smart Hub menu, you
can perform voice/video calls.
✎
During video calls, in order to use the
face tracking function, you have to start
and update Skype. After turning the TV
off and on, it will be ready to use .
To enable the Motion Control feature, select and activate the Motion
Control menu from the TV menu.
✎
For more information on the Motion Control feature, refer to TV's
Menu → Support e-Manual.
✎
Refer to the TV manual for more information about face recognition.
Checking the operating status of the camera
Power
supply
If the TV is powered on, check that the blue power
LED on the front of the TV camera is turned on.
Video
output
Connect to Skype™
Select Settings
Select
Change picture
Select Video snapshot
Check
the video display status
Audio input
Connect to Skype™
Select Contact
Select
Echo/Sound Test Service
Select Voice Call
Record following voice instructions
Check the
recording after 20 seconds.
Motion
Control
From the Menu screen, select System
Motion
Control
Motion Control Environment Test, and
follow the onscreen instructions to check the status
of the motion operations.
0 ~ 90˚
0 ~ 175˚
[VG-STC4000]IB_ZA_ZD_Rev_1.0_L16.indb 2 2014-01-14 9:16:06
 Loading...