S&C Instruction Sheet 761-515 13
Installation
Hoist the individual switch pole-units and
bolt them into position on the pole or structure
as shown on the erection drawing.
The pole-units should be carefully aligned on
the structure. Make sure the surface to which
the bases are mounted is flat, level, and plumb to
avoid twisting the bases when they are bolted to
the structure. Twisting will misalign the blades
and place undue stress on the insulators, result-
ing operating problems. Use shims as required.
Step 6
Mount the outboard bearing assembly (or
assemblies) in the position indicated on the
erection drawing.
Installing Pipe Couplings with
Piercing Set Screws
Step 7
WARNING
Failure to properly install pipe couplings with
piercing set screws can cause slippage of
operating pipe, resulting in improper opera-
tion of the switch, arcing, equipment damage,
or electrical shock.
To properly install the piercing set screws:
(a) Back the piercing set screw out of the
coupling so the tip does not protrude
into the body of the coupling.
(b) Insert the operating pipe section into
the coupling and nger-tighten the
clamp bolt(s).
(c) Adjust the operating pipe to the
correct length, and then tighten the
clamp bolt(s) to nal tightness.
(d) Tighten the piercing set screw,
piercing the pipe, and continue
turning until a rm resistance is felt.
(e) Make sure the clamp bolt(s) are tight.
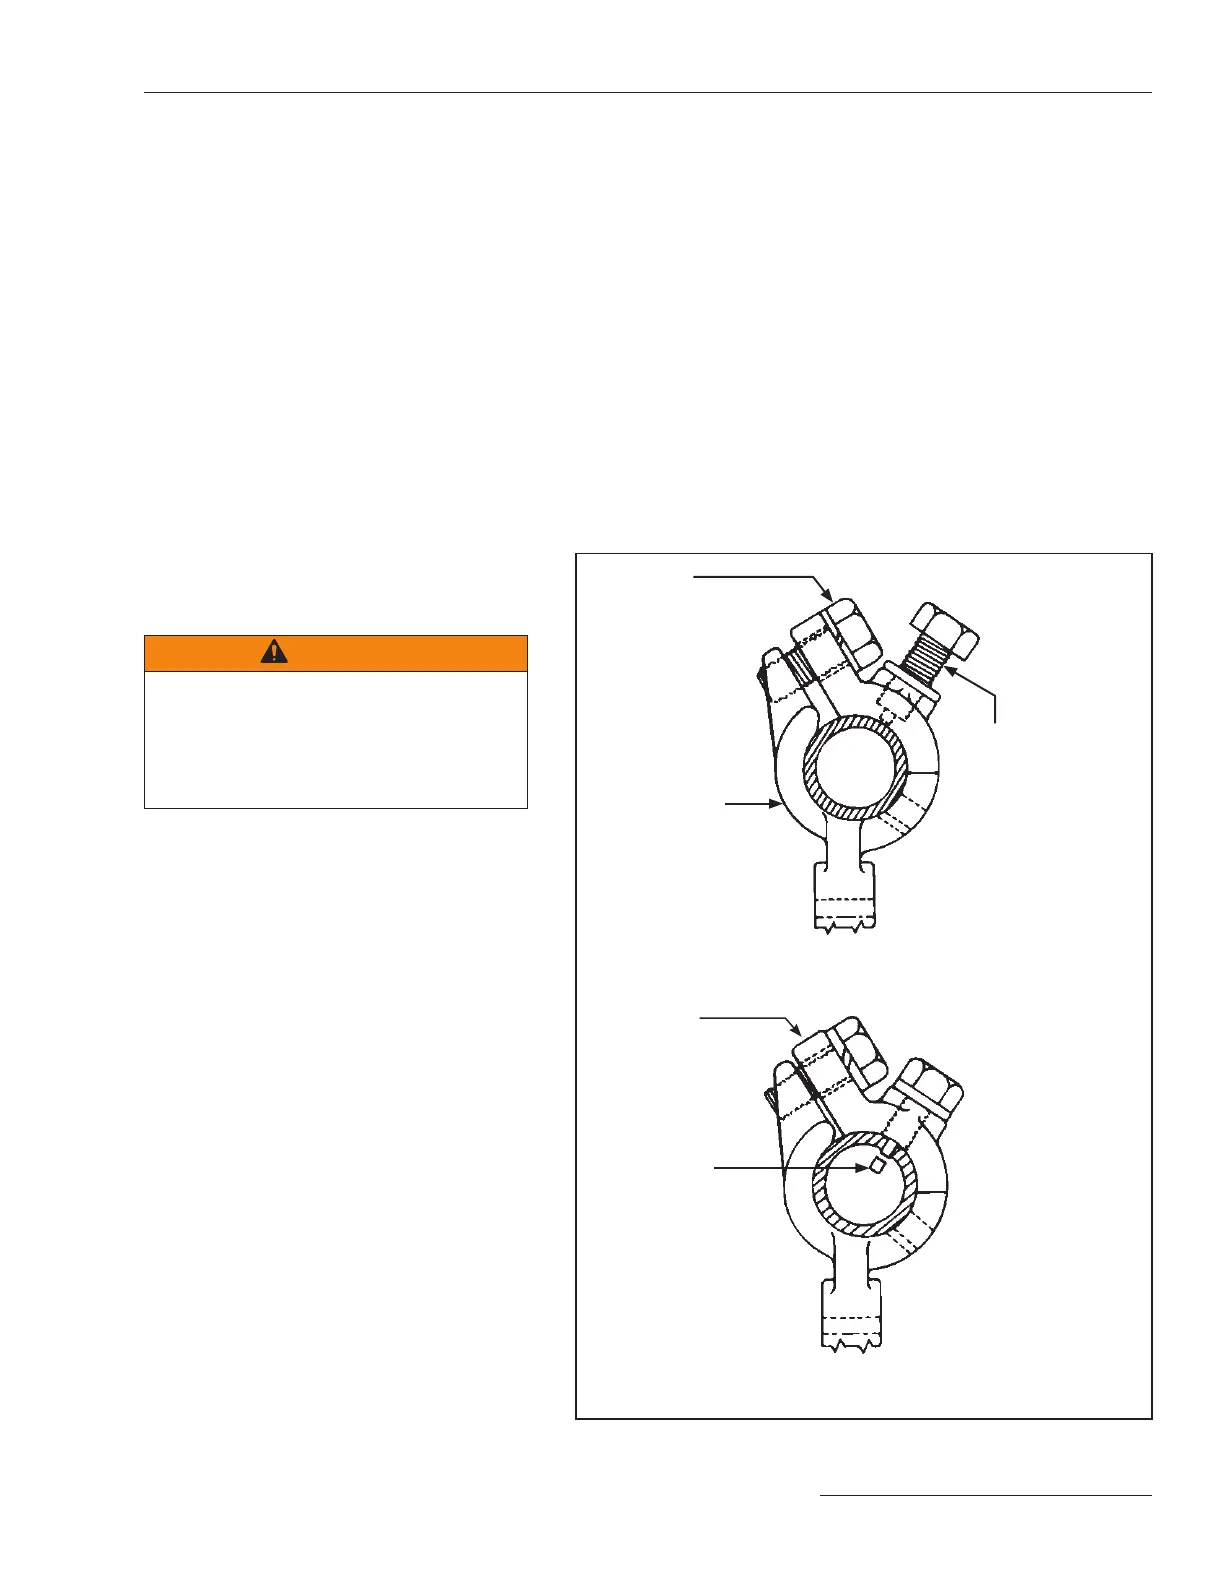
The interphase operating pipe and rotating
operating handle use piercing set screws
to couple clamps to the operating pipe. See
Figure9. Before installing the interphase pipe
sections, check that the cutting tip of each
piercing set screw does not protrude into the
body of the coupling.
Coupling body
Clamp bolt
Piercing set screw in shipping position (cutting tip does not
protrude through body of the clamp)
Slug pierced
from pipe
Operating pipe installed, clamp bolt fully tightened, and piercing
set screw in final position
Piercing set screw
Clamp
Figure 9. Install the pipe couplings with piercing set screws.
 Loading...


