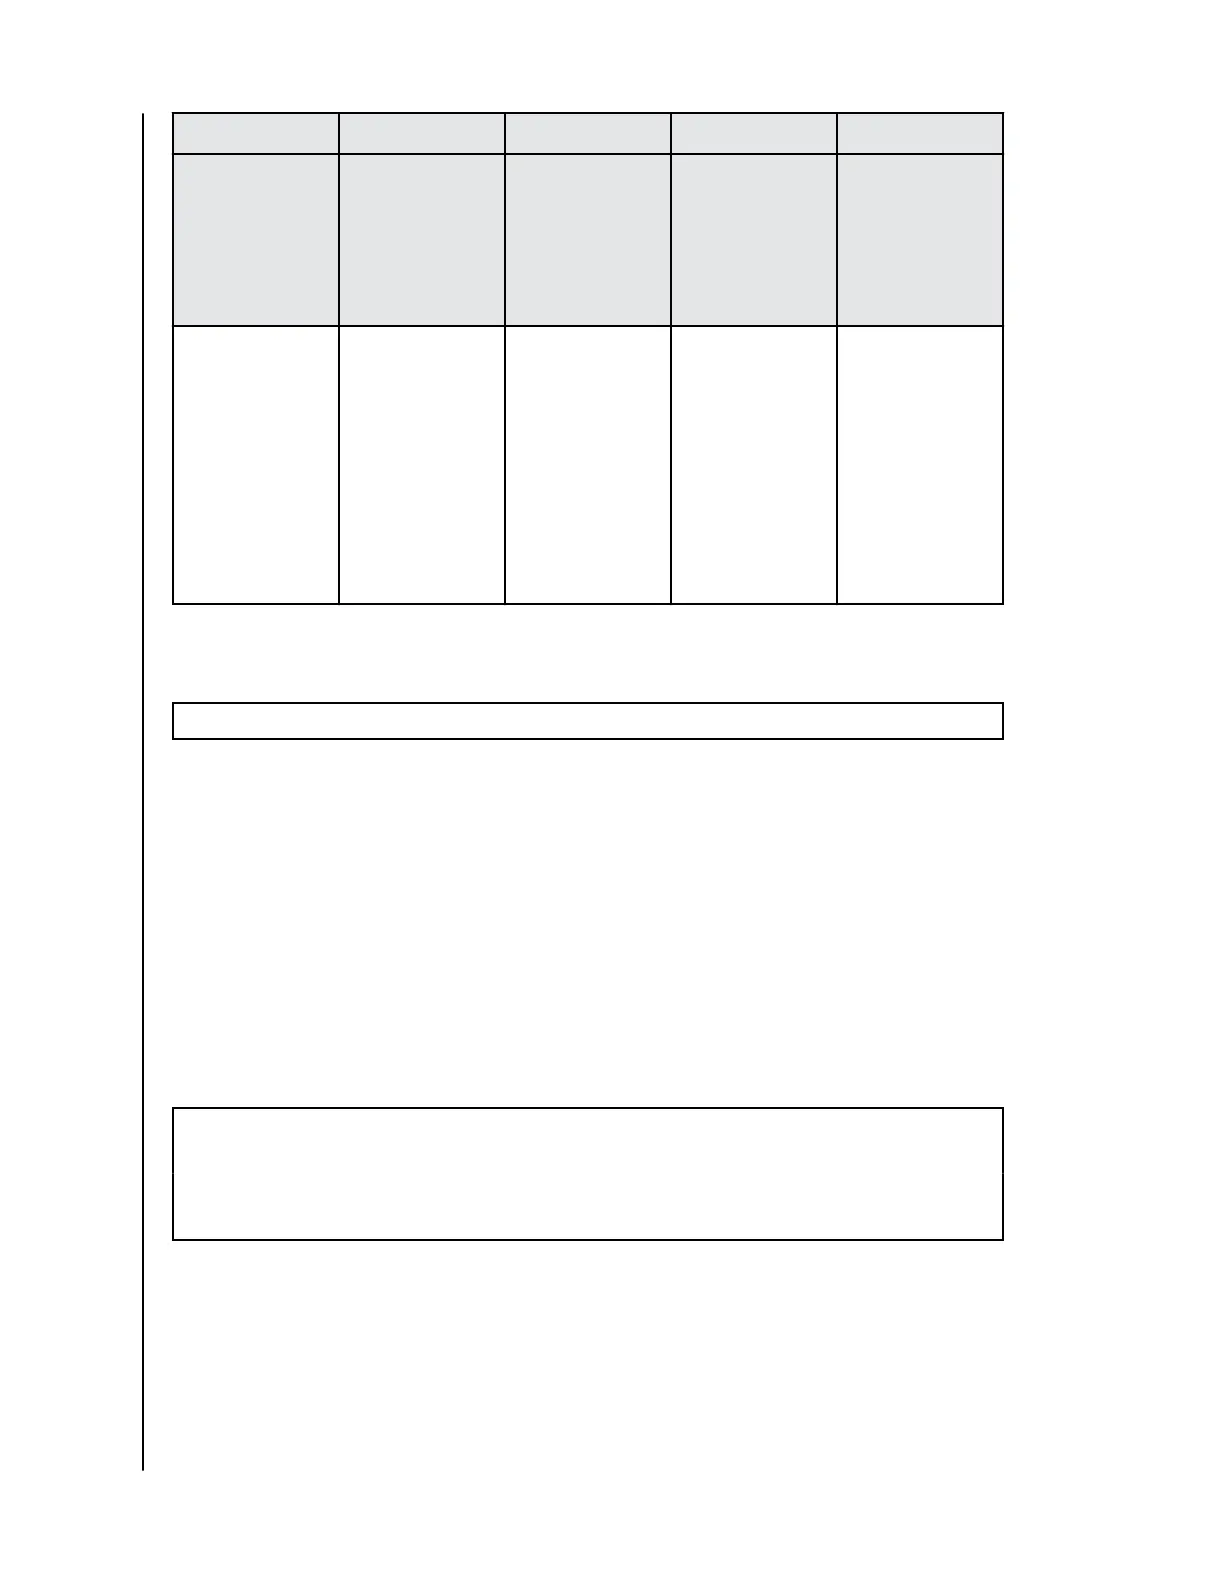
RAID Level Description Advantage Disadvantage Ideal Usage
1
(pre-configured)
Disk Mirroring Maximum level
of data
protection;
identical data is
written to both
drives.
Useable storage
space is 50% of
total available
capacity.
Data
applications
where data
security is
paramount.
JBOD One or more
logical drives.
Both disks
are recognized
as independent
drives, allowing
for 1 or
more logical
drives, resulting
in maximum
storage
utilization.
No data
protection or
fault tolerance.
Applications
where data
stored on each
drive needs to be
separated.
Changing RAID Configuration
Warning!:
Changing the RAID configuration will result in data loss.
1. Turn o the G-RAID MIRROR device.
2. Change the Dip-Switch setting to the desired RAID mode.
3. Press and Hold the RAID Mode Setting Switch and turn on the unit.
a. Continue Pressing the RAID Mode Setting Switch for 10 seconds. The front
LED blinking fast indicates that RAID mode change has registered.
4. Turn the unit o, then back on for the new RAID setting to take aect.
5. Re-initialize the drive.
Initialize G-RAID MIRROR for macOS
G-RAID MIRROR was factory-formatted for use or "Initialized" for macOS.
You can re-initialize to quickly erase the contents of the drive. Here are
the steps.
Caution:
Initializing or Re-Initializing a device will erase all data on the device. Do not
continue if you wish to retain your information.
Note: Safely disconnect and remove any PRO-BLADE SSD mag from the PRO-BLADE SSD
mag slot before beginning this process.
1. First, open the Disk Utility program located on your hard drive under
Applications/Utilities/Disk Utility. The window below will appear. Your
G-RAID MIRROR will be displayed in the left-hand column.
2.
Select the G-RAID MIRROR by clicking its drive icon in the left-side
column. Information about the device will be displayed at the bottom
of the window.
Main Activities
SanDisk Professional
User Manual
9