2
Simple To Use
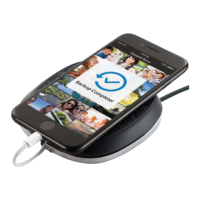
iXpand Wireless Charger Setup Select and Restore - Photos
Charging a Smartphone Select and Restore - Contacts
Automated Backup USB Connection
Free Up Space Adding Multiple Smartphones
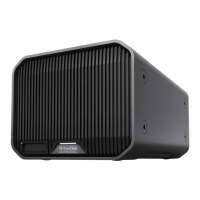
iXpand Wireless Charger Setup
Installation
Note: The setup process outlined below includes connecting your smartphone to the
iXpand Wireless Charger. However, the setup steps may vary between operating
systems and versions of an operating system.
1. Connect one end of the power adapter into the DC power connector on
the iXpand Wireless Charger device, and connect the other end of the
power adapter into an AC power outlet.
2. Download and install the iXpand Charger app from the applicable app
store.
3. Agree to the End User License Agreement by tapping the Continue button.
4. For a complete continuous backup, make sure to always allow location
access for the iXpand Charger application. This may include enabling
device location.
5. Allow the iXpand Charger app to
find the iXpand Wireless Charger.
6. After the charger is found, continue to the next screen.
7. The Bluetooth Pairing Request pop-up will open. Tap the Pair option.
8. On the Join Home Network screen, enter the password for the selected
network and select Join.
a. If a home network is not available, the iXpand Wireless Charger will
broadcast its own SSID to create a wireless-direct connection with your
smartphone.
9. Connecting to the network may take a few moments. After this begin the
PrivateAccess
™
account setup process if you plan to share your iXpand
Wireless Charger with others and wish to keep your data private. Tap the
Sign Up button or login if you already have an account.
10. Fill in the required
fields and tap Sign Up.
11. Once the account is setup the Allow Analytics screen will display. Select
either Allow or Don't Allow.
12. Next, on the Allow access for backup screen tap Continue. This will open a
dialog box requesting access to your photos. Select Ok to allow access.
13. This will open a dialog box requesting access to your contacts. Select Ok to
allow access.
14. This will open a dialog box requesting to send you
notifications. Select Ok
to allow notifications.
15. To complete this process, you will receive a PrivateAccess
™
email to
confirm your new SanDisk account. Follow the instructions noted on the
email.
Simple To Use
SanDisk
User Manual
3
 Loading...