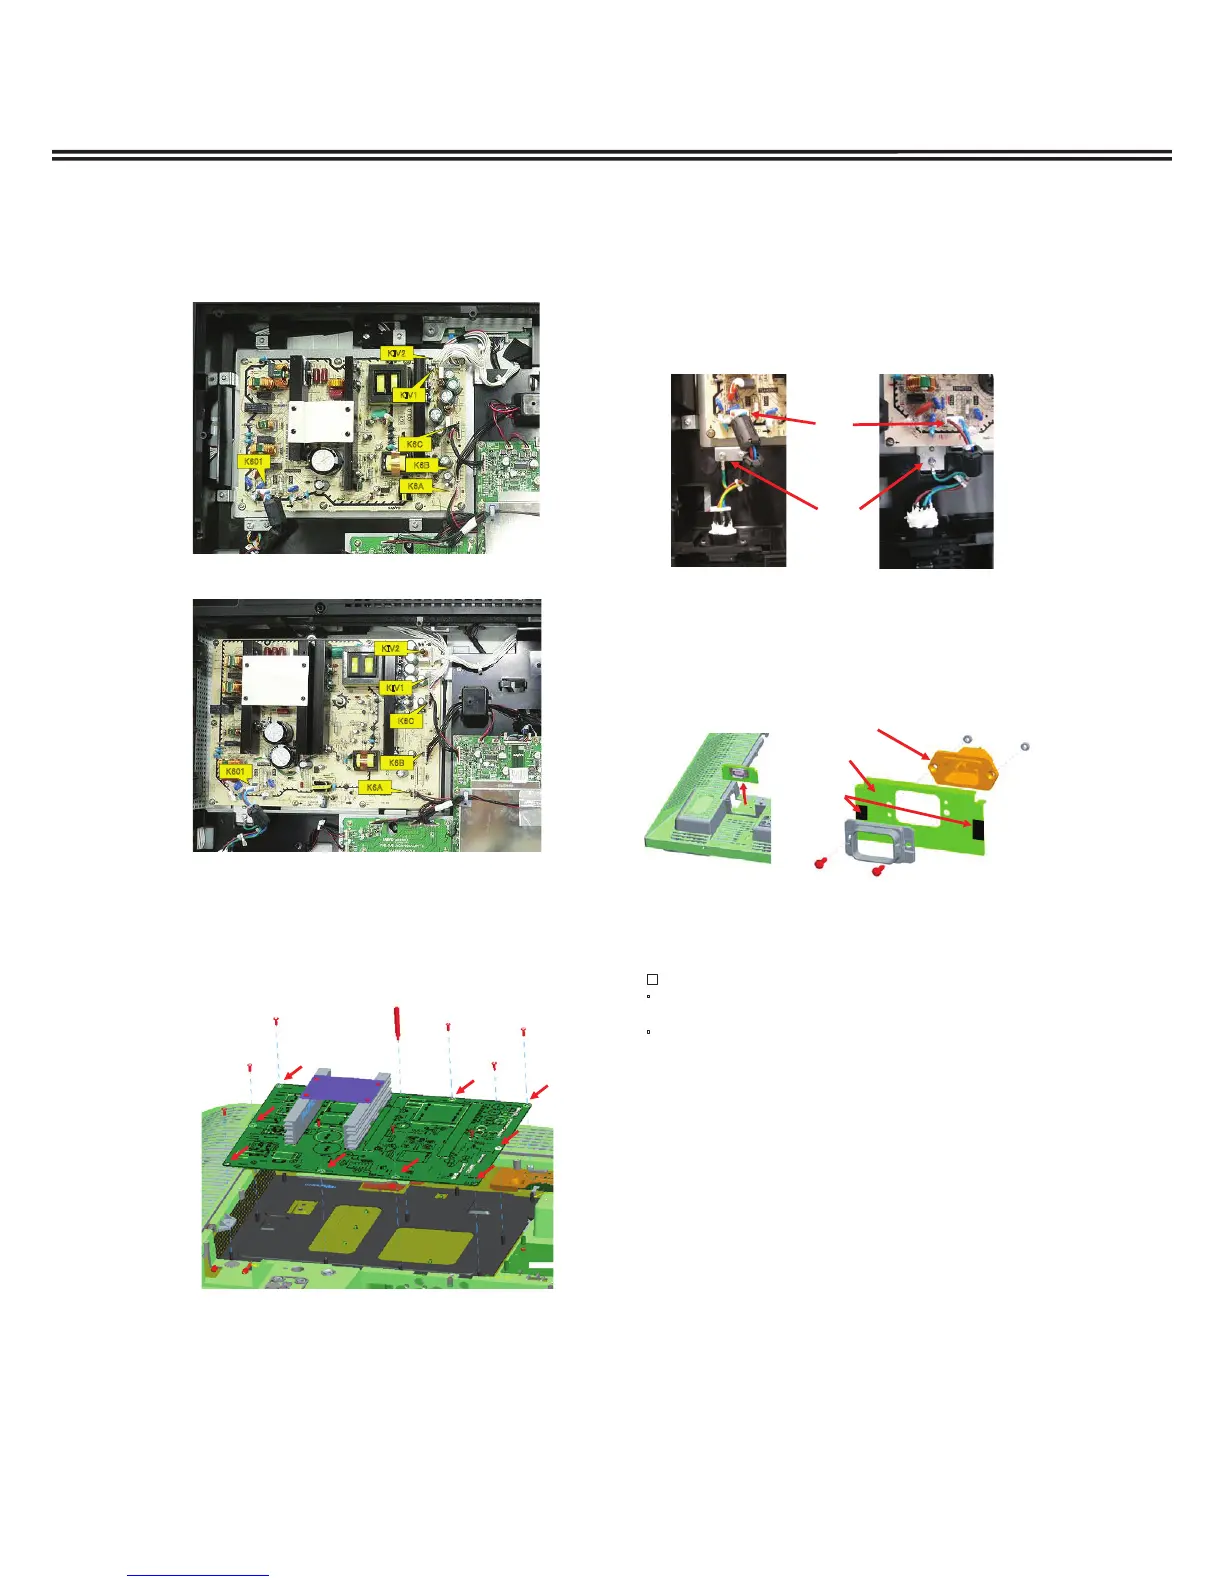
㻷㻢㻜㻝
㻷㻢㻭
㻷㻢㻮
㻷㻢㻯
㻷㻵㼂㻝
㻷㻵㼂㻞
㻷㻢㻜㻝
㻷㻢㻭
㻷㻢㻮
㻷㻢㻯
㻷㻵㼂㻝
㻷㻵㼂㻞
1. Remove the couplers that are connected to the Power board.
Couplers on the Power board: K601, KIV2, KIV1, K6C, K6B,
K6A
6. Replacement method for Power board
2. Remove the screws (47V type: 9 screws, 42V type: 8
screws) that screw the Power board in place. (SCR PAN+
SW+W 3X8) Pull out the boss (plastic) that holds the
Power board.
3. Remove the Power board carefully and replace it with the
repair board. (The repair board is equipped with a fuse.)
1. Remove the K601 connector for the AC cord bracket from
the Power board.
2. Remove 1 screw that screws in the earth wire for the
AC cord.
Screw: SCR BIN 4X6
䕔Precautions when installing
䞉 Be careful not to set the direction of the earth for
the AC inlet assembly in the wrong direction.
䞉
When replacing the Holder AC, affix the Spacer Sheet
and get it ready before replacement.
3. Pull out the AC cord bracket from the slit on the cabinet
back.
4. Remove the screws (Qty. 2) and nuts (Qty. 2) shown in
the illustration, and then remove the AC cord component.
䚷 Screw: SCR BRZ 3X10, Nut: NUT HEX 3
7. Replacement method for AC cord
bracket
42V t
 Loading...