EasyManuals Logo

Sanyo PLC-XT30 User Manual

Sanyo PLC-XT30
152 pages
To Next Page IconTo Next Page
To Previous Page IconTo Previous Page
Page #32 background imageLoading...
Page #32 background image
-32-
Mechanical Disassembly
16-3
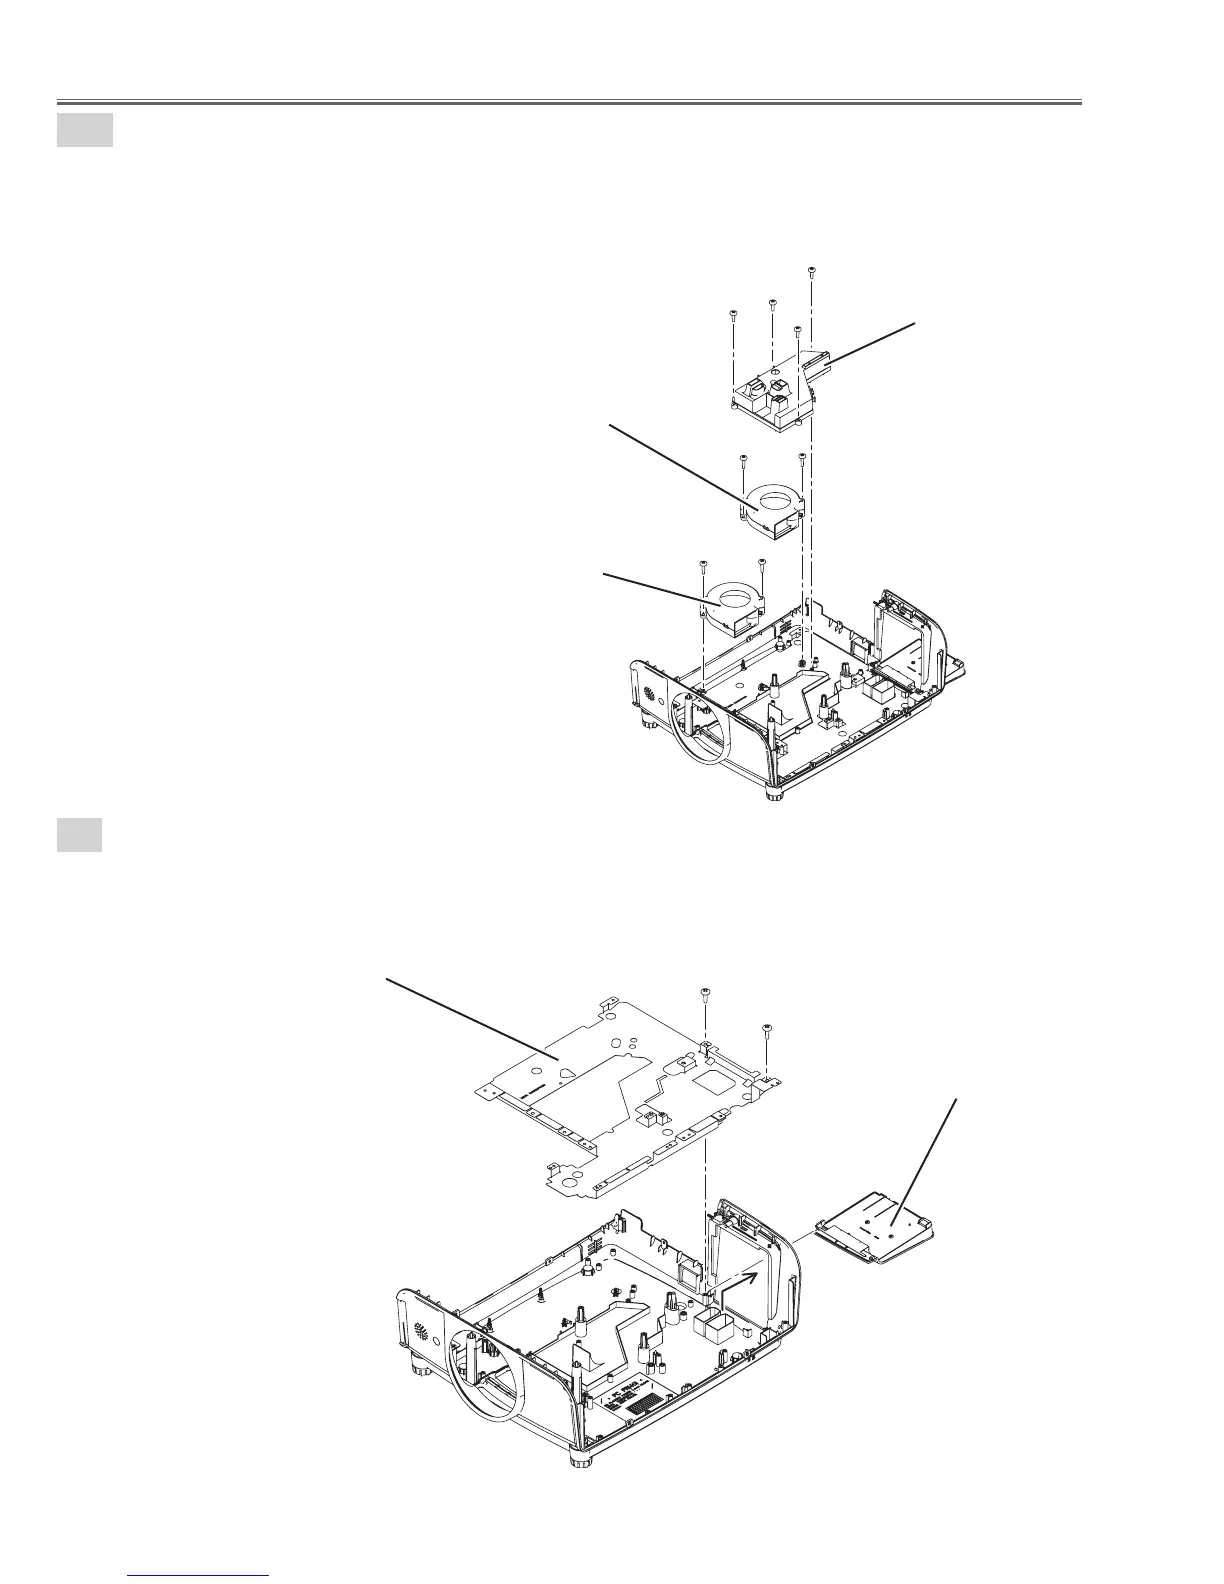
Intake Fan(FN904,FN905)removal-3.
1. Remove 4 screws-A(T3X8) and remove the Panel duct.
2. Remove 2 screws-B(T3X10) and remove the Fan(FN904).
2. Remove 2 screws-C(T3X10) and remove the Fan(FN905).
17
Shield plate BTM removal.
1. Remove 2 screws-A(T3X8) and remove the Shield plate BTM.
2. Remove the Lamp cover ass'y.
Fig.16-3
Fig.17
Panel duct
FN904
FN905
A
Lamp cover ass'y
Shield plate BTM
A
A
A
A
A
B
B
C
C

Table of Contents

Questions and Answers:

Question and Answer IconNeed help?

Do you have a question about the Sanyo PLC-XT30 and is the answer not in the manual?

Sanyo PLC-XT30 Specifications

General IconGeneral
BrandSanyo
ModelPLC-XT30
CategoryProjector
LanguageEnglish

Related product manuals