Do you have a question about the Sanyo PLC-XT35 and is the answer not in the manual?
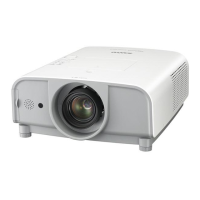
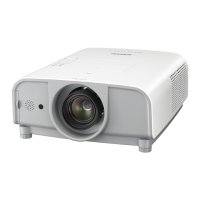
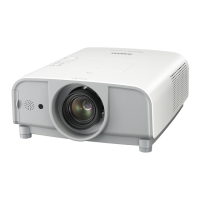
Projector is designed compact and lightweight for easy portability and installation.
Projector offers numerous functions like lens shifting, various projection modes, and lens options.
Remote control can be used wired, wireless, or as a PC mouse.
Features a Multi-scan system for broad computer signal compatibility, supporting up to UXGA.
Digital zoom helps focus on crucial information during presentations.
Ensures projector security with Key lock and PIN code functions for unauthorized use prevention.
Reduces power consumption and extends lamp life.
Operation menu available in 12 languages for user convenience.
Allows operation and control via an optional Network Manager.
Enables customization of the screen logo for startup display or between presentations.
Provides functions for better projector maintenance and care.
Offers various interface terminals to support diverse equipment and signals.
Allows selection of projection lamp brightness.
Crucial warnings regarding projector use, light exposure, installation, and ventilation.
Specific warnings and advice for projectors mounted from the ceiling.
Advises against using the projector in greasy, wet, or smoky environments.
Read all instructions, unplug before cleaning, avoid liquids, follow warnings on projector.
Includes warnings on power cords, servicing, and unauthorized modifications.
Covers safe practices for moving, placement, and avoiding damage.
Details on ventilation openings, heat exhaust, and fan operation for cooling.
Guidelines for setting up the projector perpendicularly to the screen.
Advice on avoiding improper tilting or side projection.
Instructions for safe transport, including lens cap and cooling.
Warnings about touching moving parts and avoiding physical impact.
Details on FCC regulations for digital devices and interference.
Information on power cord types for different regions and safety features.
Diagram and labels for the projector's front panel components.
Diagram and labels for the projector's rear panel connectors.
Diagram and labels for the projector's bottom panel.
Detailed explanation of each input and output terminal on the rear panel.
Further description of rear terminals like R/C Jack, Audio Monitor Out, and Control Port.
Description of buttons and indicators on the projector's top control panel.
Basic functions and buttons of the remote control.
Detailed functions of buttons like D.ZOOM, SCREEN, LENS SHIFT, etc.
Instructions for inserting batteries into the remote control.
Information on the effective range and receiver locations.
How to adjust the projector's angle using the feet.
Setting remote control codes to prevent interference between devices.
Diagrams illustrating projector placement for various screen sizes and throw distances.
Illustrates the range of lens shift for uppermost, downmost, leftmost, and rightmost positions.
Step-by-step guide for removing and attaching the projector lens.
Instructions for connecting PCs via VGA, DVI-D, and USB with relevant cables.
Instructions for connecting video sources using composite video and S-Video cables.
Instructions for connecting component video and RGB Scart sources.
Guide to connecting the power cord and outlet requirements for different regions.
Step-by-step guide to power on the projector, including indicator lights.
Procedure for entering the PIN code when the projector is locked.
Explains the purpose of the PIN code for security and unauthorized use prevention.
Steps to power off the projector, including cooling procedures and warnings.
Guide to navigating and using the projector's on-screen menu system.
Explains the structure of the menu bar and its icons based on input signals.
Using projector buttons for lens adjustments and viewing information.
Methods for adjusting volume and muting sound via direct controls or menu.
Using the remote for common functions like Freeze, Auto PC, and Zoom.
Temporarily turns the image off; press again to restore.
Activates a countdown timer function for timed operations.
Corrects keystone distortion of the projected image.
Activating and using the laser pointer feature on the remote control.
Using Spotlight or Pointer to highlight parts of the projected image.
Using the remote control as a wireless mouse for computer control.
Selecting input sources using the INPUT buttons on the remote control.
Selecting input sources using the INPUT button on the projector's top control.
Detailed selection of input sources and associated signal formats for PC and AV.
Setting video system modes like PAL, SECAM, NTSC for AV inputs.
How the projector automatically tunes PC signals using Multi-scan and Auto PC Adjustment.
Procedure for manually selecting PC system modes from the menu.
Guides for direct and menu operation of the Auto PC Adjustment feature.
Detailed steps for manually adjusting PC image parameters like sync, dots, and position.
Functions for display area, reset, mode storage, and clearing PC adjustment data.
Selecting preset image modes: Dynamic, Standard, Real, Cinema, and User images.
Adjusting Contrast, Brightness, Color, Tint, Color Temperature, and White Balance.
Fine-tuning Sharpness, Gamma, Noise Reduction, and Progressive scan settings.
Options for resetting adjustments, storing custom settings, and exiting the menu.
Function to store or reset keystone correction for projector orientation.
Settings for inverting the image for ceiling or rear screen projection.
Selecting screen sizes like Normal, True, Wide, Full screen, and Custom for PC inputs.
Enables zooming in and out of the projected image, including panning.
Selecting screen sizes like Normal, Wide, and Custom for video inputs.
Select the on-screen menu language from a list of 12 options.
Choose the background display when no input signal is detected.
Adjust screen brightness and fan speed for different operating modes.
Customize Spotlight size and Pointer patterns for emphasis.
Customize startup logo and capture projected images for display.
Set and change Logo PIN codes to prevent unauthorized logo modifications.
Configure remote control codes and RC sensor location.
Control the visibility of on-screen displays like menus and warnings.
Configure power saving settings to reduce consumption and extend lamp life.
Enable automatic projector startup upon connecting the AC power cord.
Adjust fan operation based on installation method and ambient conditions.
Configure Slant and Highland settings for optimal fan performance at different elevations.
Lock projector controls to prevent unauthorized operation.
Enable projector security by setting a PIN code for operation.
Change the projector's PIN code and manage security settings.
Utilize built-in test patterns for setup and alignment.
Review recorded operational anomalies and diagnostic messages.
Reset the lamp usage counter after replacing the projection lamp.
Set the frequency for filter cleaning notifications.
Restore projector settings to their original factory defaults.
Exit the projector's setting menu.
Procedure for cleaning dust from the projector's filter to ensure optimal cooling.
Steps to reset the filter counter after cleaning or replacing the filter.
Detailed steps and safety precautions for replacing the projector's lamp.
Instructions to reset the lamp counter after lamp replacement.
Critical safety warnings regarding lamp usage, potential explosion risks, and handling.
Explanation of projector status indicators and troubleshooting steps for abnormal conditions.
Procedures for gently cleaning the projection lens and the projector's exterior cabinet.
A comprehensive guide to identifying and resolving common projector problems.
A visual representation of the projector's menu hierarchy and options.
Mapping of indicator lights to projector operating conditions and states.
Specific indicators for filter status (warning) and lamp replacement needs.
List of supported computer resolutions, frequencies, and dot clock limits.
Comprehensive details on mechanical, optical, interface, audio, power, and environmental specs.
List of included accessories and available optional parts like lenses.
Information regarding PJLink Standard Class 1 compliance for projector control.
Detailed pinouts and descriptions for Analog RGB, DVI-D, USB, and Control Port terminals.
A section to securely record the projector's PIN and Logo PIN codes.
Diagrams showing the projector's physical dimensions and ceiling mount screw holes.
| Brightness | 3500 ANSI Lumens |
|---|---|
| Contrast Ratio | 2000:1 |
| Lamp Life | 2000 hours (Normal Mode), 3000 hours (Eco Mode) |
| Weight | 3.5 kg |
| Display Technology | LCD |
| Resolution | 1024 x 768 pixels (XGA) |
| Projection Size | 30 to 300 inches |
| Lamp Type | UHP |
| Input Ports | HDMI, Composite, S-Video |