-36-
Optical Parts Disassembly
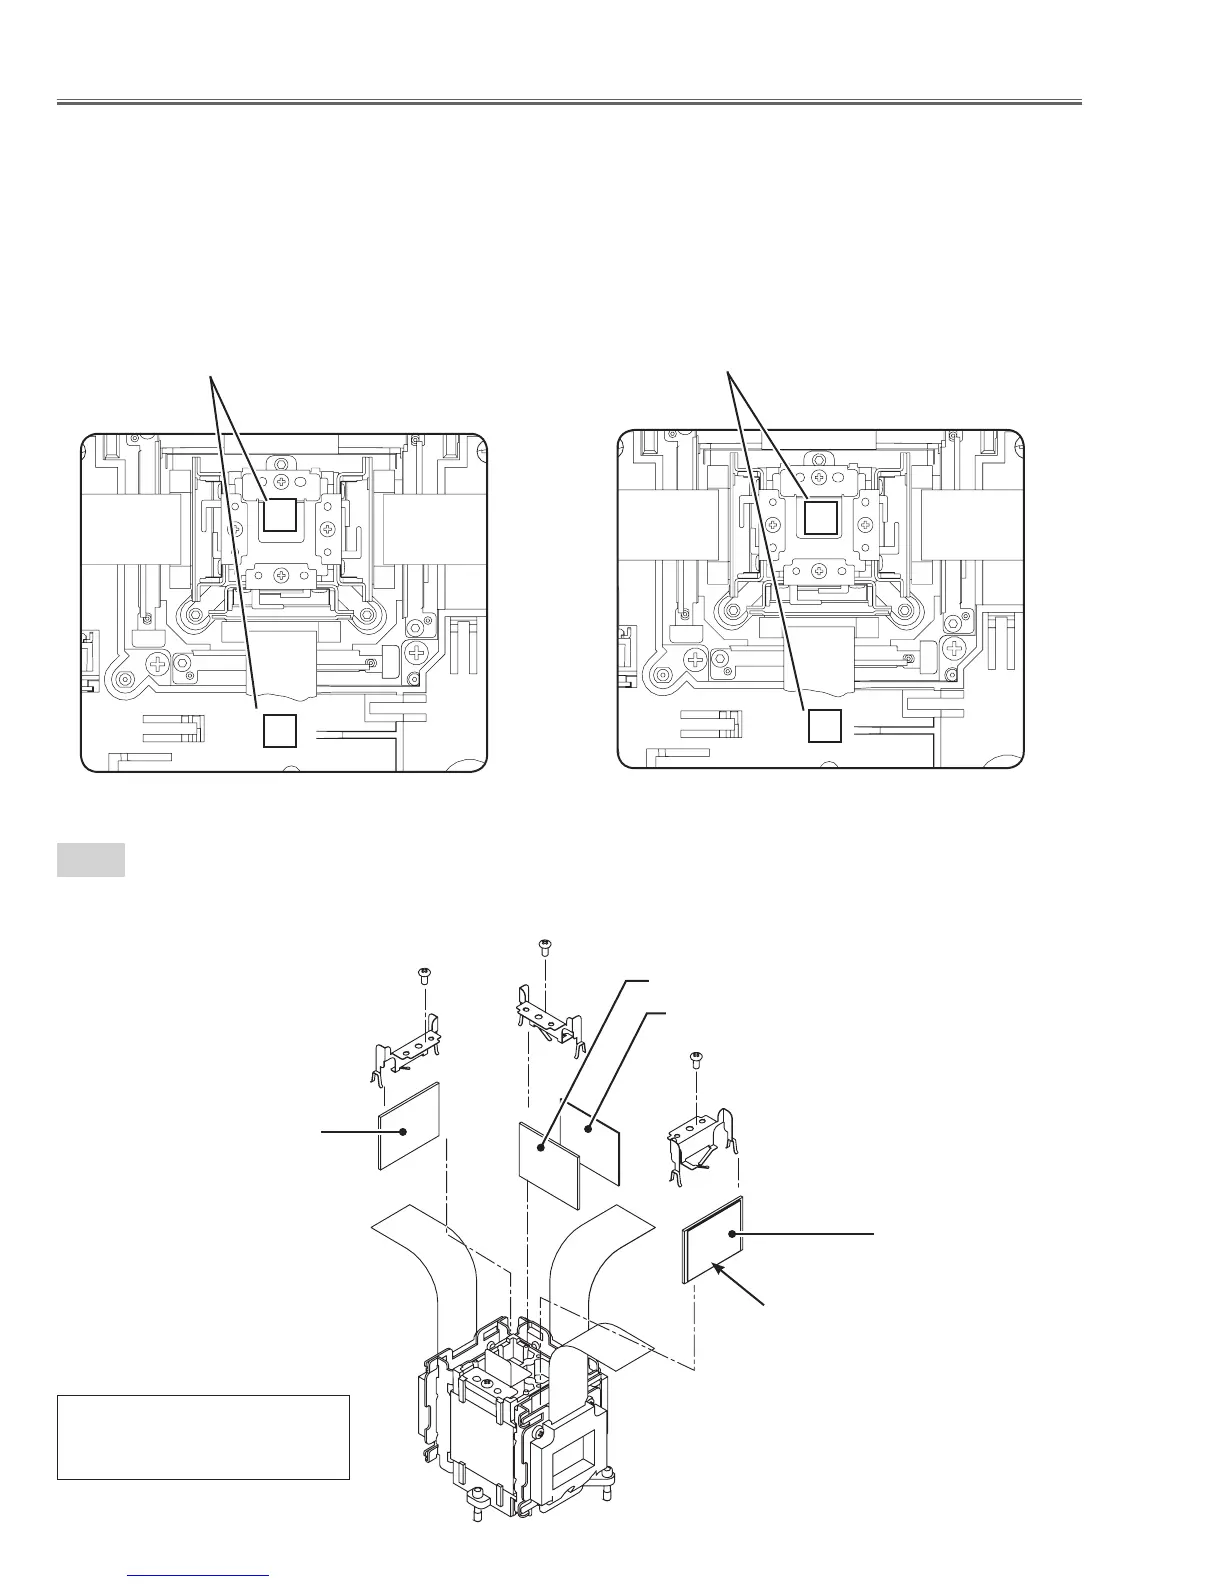
LCD Panel Type Check
There are 2 types combination of the LCD panel/prism assembly and the optical unit, named Type-R and Type-L.
Since both have no compatibility, each type should be combined with the same type, and the specific parts should
be used. If not, the poor optical characteristics may degrade the quality of a projected image.
Confirm the "R" label or "L" label on top of the LCD panel/ prism assembly and the optical unit.
NOTE:
LCD panel/prism assembly should be used with the same type of the optical unit.
Confirm that both marking "R" is matched.
LCD Panel/Prism Ass'y Type-R
Confirm that both marking "L" is matched.
LCD Panel/Prism Ass'y Type-L
R
R
L
L
21-2
Polarized glass, Pre-Polarized glass removal
1. Remove each screw (M2X4) and holder.
(Blue)
(Green)
Red
Polalized glass (B)
Polalized glass (R)
Polalized glass (G)
Pre-Polalized glass (G)
Film
* Mount the glass as the film
attached side comes to the LCD
panel side.
 Loading...