Do you have a question about the Sartorius GPA5202 and is the answer not in the manual?
Please read these operating instructions carefully before using your balance to prevent damage to the equipment.
Make sure the voltage rating on the AC adapter is identical to your local line voltage.
Do not expose the balance to extreme temperatures, moisture, shocks, blows or vibration.
After unpacking, please check it immediately for any external damage.
Choose a location that is not subject to heat, drafts, vibrations, or excessive moisture.
Condition the balance for about 2 hours at room temperature after transfer to a warmer area.
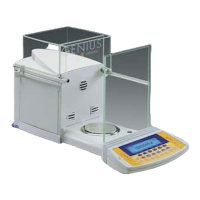
Remove adhesive tape and place interior draft shield and weighing pan inside the chamber.
Install interior draft shield and filter pan or standard weighing pan.
Check sliding lock on draft shield and position it carefully on the balance.
Plug the male connector on the cable into the female connector on the electronics box.
Place draft shield on balance with cover opening in front, turn clockwise until firm.
Use only original Sartorius equipment and plug the AC adapter into the balance/outlet.
Connect the angle plug to the balance, select power cord, and plug into wall outlet.
Unplug balance from AC power before connecting/disconnecting peripherals.
Allow balance to warm up for specified time (e.g., 4 hours for CPA2P) for exact results.
Fasten a chain or lock to the lug on the rear panel for securing the balance.
Adjust the 2 front feet until the air bubble is centered in the level indicator.
Adjust leveling feet until the air bubble is centered within the circle on the level indicator.
Identifies and explains the function of each display segment and operating element.
Basic function for weighing, taring, assigning IDs, and printing weights.
Requires steady hand; perform test measurements to adjust chamber temperature.
Open cover plate and attach sample using the built-in hanger.
Remove brass screw and suspend the below-balance weighing hook.
Determine difference between readout and true weight, or correct displayed value.
Conditions for calibration/adjustment and error messages.
External calibration/adjustment is blocked by a seal on the menu access switch.
Activate calibration by pressing CAL; internal weight is applied automatically.
Configure whether calibration is followed by automatic or manual adjustment.
Automatic calibration and adjustment based on temperature changes or time intervals.
Permitted operating temperature range is restricted for legal metrology use.
Switch balance off and on, then press TARE briefly while segments are lit.
Print current menu settings from the 1st, 2nd, or 3rd menu level.
Configure serial communication parameters like baud rate, parity, and stop bits.
Set handshake mode (software/hardware) and communication mode (SBI/Universal).
Configure manual/auto printing, stop printing, and tare settings after printout.
Create printouts with weights, values, and identification codes for documentation.
Configure manual/automatic printout, line format, and application parameters.
Output ambient characteristics and data before/after weighing series.
Connect computer/device via serial port (RS-232C) for control and monitoring.
Non-verified digits are identified by brackets in printouts with specific settings.
Details for female DB25S and male connectors, including warnings for RS-232 cables.
Detailed pinout for signal ground, data I/O, ground, control signals, and voltage.
Lists display errors, their causes, and recommended solutions for common issues.
Remove weighing pan/draft shield, place parts in kit, secure doors with rubber band.
Remove filter pan cover/weighing pan, place parts in kit or packaging.
Sartorius offers service contracts; repairs must be by trained technicians.
Unplug balance, clean with mild detergent, wipe dry, avoid liquid entry.
Clean parts with damp cloth/sponge, use suitable household agent, rinse, dry.
Details technical specifications for CPA2P and CPA2P-F models.
Lists optional accessories like data printer, remote display, battery pack, and carrying case.
Directive 90/384/EEC regulates mass determination in legal metrology.
Sartorius offers EC verification services for metrological compliance.
Identifies key plates and markings on BC BL, BD BL, and BF BL balance types.