37
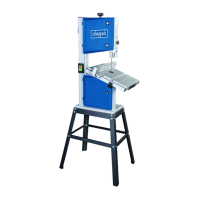
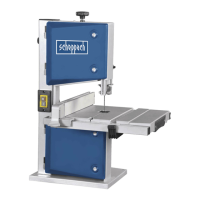
Angled cuts (Fig. 1, 4, 5, 13)
• In order to execute angled cuts parallel to the saw
band (Fig. 1, B), it is possible to tilt the saw bench
(6) forwards from 0° - 45°.
• Release the locking handle (Fig. 4, F).
• Tilt saw bench (6) forwards, until the desired angle is
set on the degree scale. (Fig. 4)
• Retighten the locking handle (Fig. 4, F).
• Attention: With a tilted saw bench (6), the longitudinal
fence (5) must be positioned on the downward facing
side to the right of the saw band in the working direc-
tion (Fig. 1, B) (if the workpiece width allows this), in
order to secure the workpiece against slipping.
Attention! After every new setting, we recommend per-
forming a test cut, in order to check the dimensional
settings.
• With all cutting processes, the top band guide (Fig.
1.1, 4) must be positioned as close as possible to the
workpiece.
• The workpiece must always be guided with both hands
and kept flat against the band saw bench (6), in or-
der to prevent a jamming of the saw band (Fig. 1, B).
• Forward feeding should always take place with an even
pressure, which is just sufficient for the saw band to
cut through the material with ease without becoming
blocked.
• Always use the longitudinal fence (5) for all cutting
processes that it can be used for.
• It is better to perform a cut in a single working step
than in multiple steps, which may require that the
workpiece be drawn back. However, if it is not possib-
le to avoid drawing the workpiece back then the band
saw must be switched off first, and the workpiece only
drawn back once the saw band (Fig. 1, B) has come
to a standstill.
• When sawing, the workpiece must always be guided
by its longest side.
Attention! When processing narrower workpieces it is es-
sential to use a push stick. The push stick (S) must al-
ways be stored within reach, on the hook provided for
this purpose on the side of the saw (Fig. 1.1).
Performing longitudinal cuts (Fig. 14)
Here, a workpiece is cut in its longitudinal direction.
• Position the longitudinal fence (5) on the left side (if
possible) of the saw band (Fig. 1, B), in accordance
with the desired width.
• Lower the saw band guide (4) onto the workpiece.
• Switch on the saw.
• Press one edge of the workpiece against the longitudi-
nal fence (5) with the right hand, whilst the flat side
lies on the saw bench (6).
• Slide the workpiece at an even feed rate along the
longitudinal fence (5) into the saw band (Fig. 1 B).
• Important: Long workpieces must be secured against
tipping at the end of the cutting process (e.g. with
reel-off stand, etc.)
Coupes en biais (Fig. 1, 4, 5, 13)
• Pour pouvoir réaliser des coupes en biais parallèlement
au ruban de la scie (Fig. 1, B), on peut incliner la table
de menuisier (6) de 0° à 45° vers l’avant.
• Débloquez la poignée de blocage (Fig. 4, F).
• Incliner la table de menuisier (6) vers l’avant jusqu’à
ce que la cote d’angle désirée soit réglée sur l’échelle
de base. (Fig. 4)
• Resserrez à fond la poignée de blocage (Fig. 4, F)
• Attention: Lorsque la table de menuisier (6) est inc-
linée, placer la guide parallèle (5) sur le côté tourné
vers le bas dans le sens du travail, à droite du ruban
de la scie (Fig. 1, B) (dans la mesure où la largeur de
la pièce à usiner le permet) pour empêcher que la pi-
èce ne glisse.
Attention ! Après chaque nouveau réglage, nous vous re-
commandons d’effectuer une coupe d’essai pour vérifier
les cotes réglées.
• Il faut maintenir le guidage de ruban supérieur (Fig.
1.1, 4) le plus proche possible de la pièce à usiner
pour toutes les coupes
• Il faut toujours maintenir des deux mains la pièce à
usiner et la garder à plat sur la table (6) afin d’éviter
que le ruban de scie (Fig. 1, B) ne se bloque.
• L’avance doit toujours se faire avec la même pression.
Celle-ci doit juste être suffisante pour que le ruban
de scie coupe sans problème dans le matériau mais
sans bloquer.
• Utilisez toujours la guide parallèle (5) pour toutes les
coupes pour lesquelles il est possible de l’utiliser.
• Il est préférable de réaliser une coupe en une opérati-
on qu’en plusieurs fois nécessitant souvent de repous-
ser la pièce à usiner vers l’arrière. S’il est impossible
d’éviter de devoir tirer une pièce vers l’arrière, il faut
alors tout d’abord mettre la scie à ruban hors circuit
et repousser la pièce que lorsque le ruban de la scie
(Fig. 1, B) s’est complètement arrêté.
• Il faut toujours guider la pièce par son côté le plus
long lorsque l’on scie.
Attention ! Utilisez absolument un poussoir lorsque vous
sciez des pièces minces. Le poussoir (S) doit toujours
être gardé à porté de main à son crochet prévu à cet effet
sur le côté de la scie (Fig. 1.1).
Exécuter des coupes longitudinales (Fig. 14)
La pièce à usiner est coupée en longueur.
• Réglez la guide parallèle (5) sur le côté gauche (dans
la mesure du possible) du ruban de scie (Fig. 1, B)
conformément à la largeur désirée.
• Abaissez le guidage du ruban de scie (4) sur la pièce.
• Mettez la scie en circuit.
• Poussez un bord de la pièce à usiner de la main droite
contre la guide parallèle (5) pendant que le côté plat
se trouve sur la table de menuisier (6).
• Poussez la pièce régulièrement le long de la guide pa-
rallèle (5) dans le ruban de la scie (Fig. 1, B).
• Important : Il faut bloquer les pièces à usiner pour les
empêcher de basculer à la fin de la coupe (p. ex. avec
un support de dérouleur etc.)