Important Troubleshooting Advice
Performing a Cold Test:
A. Turn the Biostar on. Make sure the platform is in place. Clamp a sheet of 2mm (or thicker)
hard material onto the pressure chamber. Secure the clamping frame.
B. Enter 5 seconds of heating time. Swing the heating element over the material to activate
the heat. Immediately return the heating element to the rest position.
C. Swing the pressure chamber over the model platform. Activate the air pressure.
D. If you hear a constant rush of air during pressurization (air leak), contact your Great Lakes
Customer Support Specialist immediately.
For fabrication videos, tips, and techniques, visit our website:
GreatLakesDentalTech.com/techniques
Biostar With LCD Display Codes
220°C | 427°F
Standard
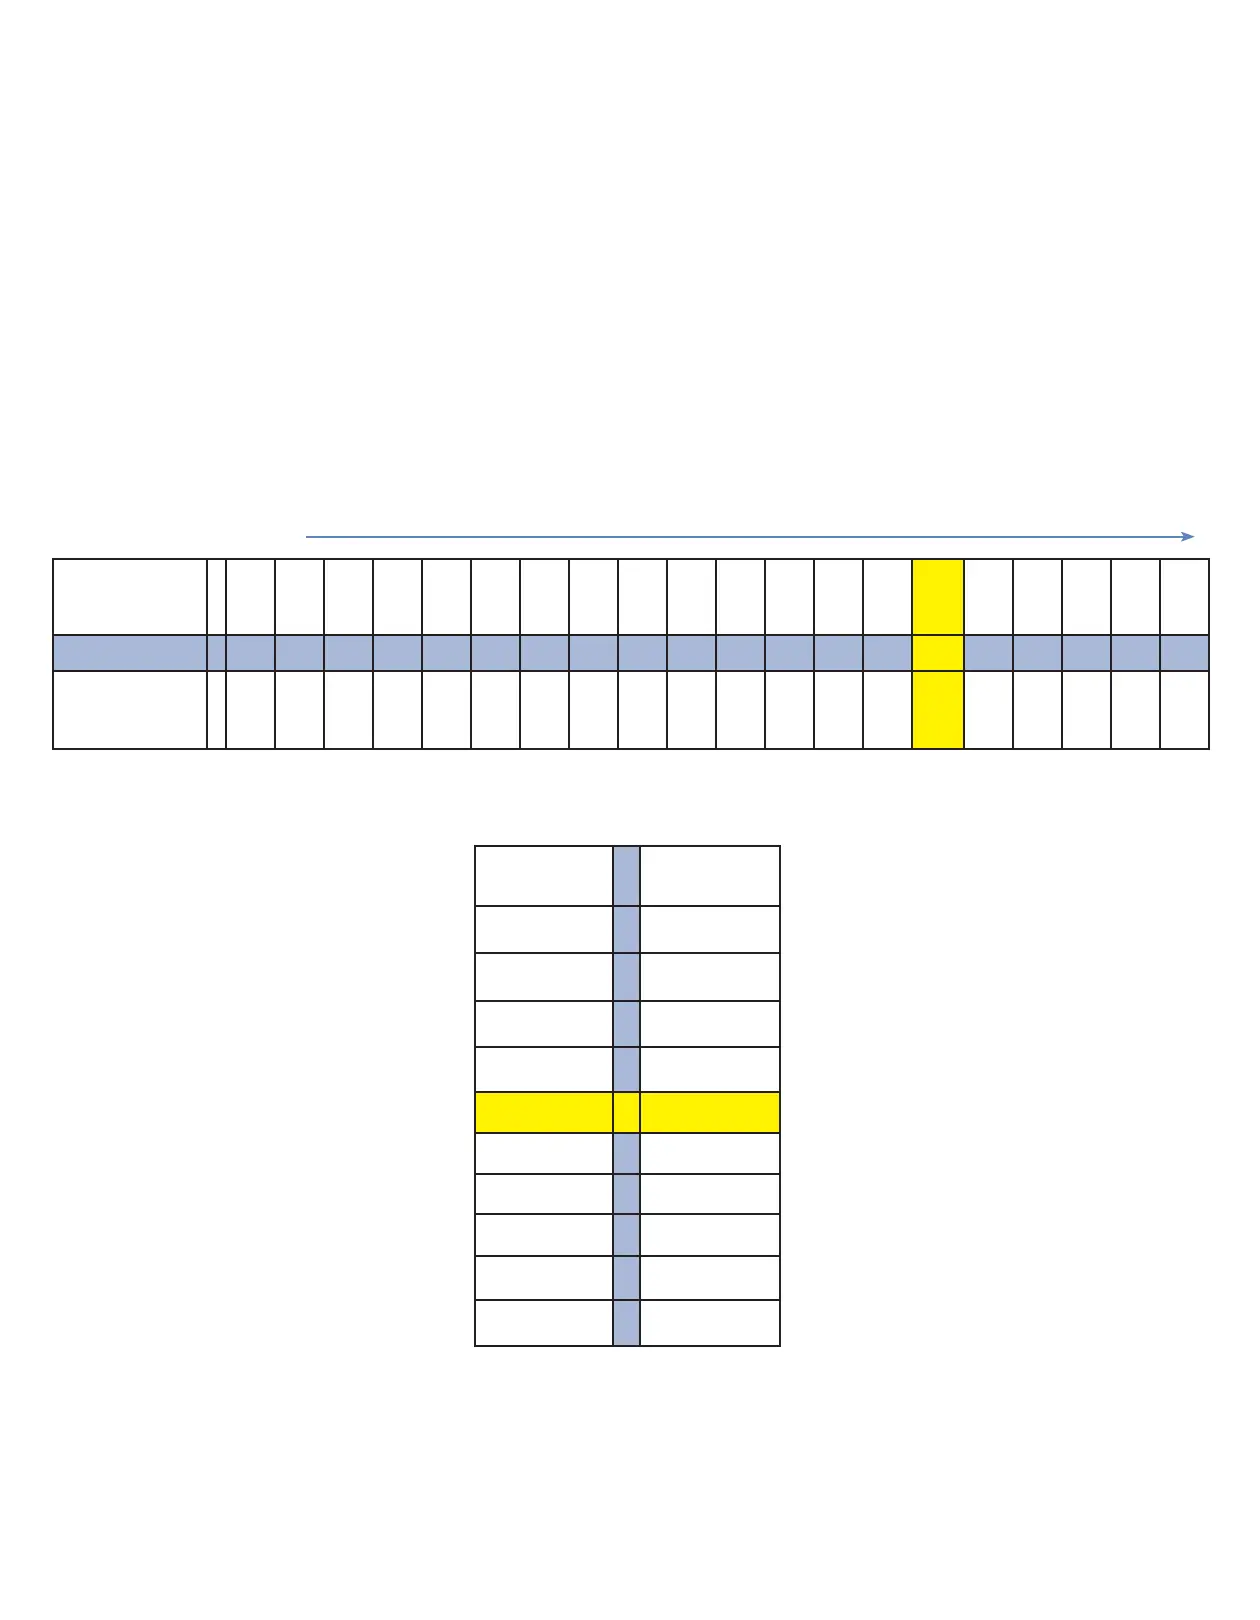
10 11 12 13 14 15 16 17 18 19 20 21 22 23 24 25 26 27 28 29
Heating Time
Seconds
20 25 30 35 40 45 50 55 60 65 70 75 80 90 100 110 120 140 150 160
Chart 2: Cooling Phase
Code Time
(seconds)
0 0
1 20
2 60
3 120
4 150
5 180
6 240
7 300
8 360
9 420
Chart 1: Heating Phase
Codes
Example: CODE #244CODE #244 = 220°C | 427°F Temperature
2424 = = 100100 seconds Heating Time
44 = = 150150 seconds Cooling Time
Understanding 3-Digit Codes:
• The rst two digits represent the operating temperature of the heating element,
and the length of heating time required prior to the thermal-forming process.
• The third digit represents the cooling phase and the length of time that the
thermal-formed material should be held under pressure.
• All heating and cooling times are in seconds.