Do you have a question about the Schlage BE468 and is the answer not in the manual?
Adjust the deadbolt length if the door backset is 2 3/4 inches (70 mm).
Replace the faceplate if the door preparation is not mortised.
Insert the deadbolt into the door, ensuring correct orientation.
Secure the strike plate to the door frame for proper bolt engagement.
Attach the touchscreen unit to the outside of the door.
Secure the support plate to the inside of the door.
Detach the battery cover from the interior assembly.
Connect the internal cable to the inside assembly's circuit board.
Attach the interior assembly to the door, aligning tabs and routing the cable.
Fasten the inside assembly to the support plate using screws.
Insert four AA batteries into the battery tray and connect it.
Attach the battery cover to complete the lock installation.
This document outlines the installation process for the Schlage BE468 smart deadbolt. It covers pre-installation notes, required tools, lock component terminology, and a step-by-step guide for installing the bolt, strike, touchscreen assembly, and inside assembly, concluding with battery installation and lock reset.
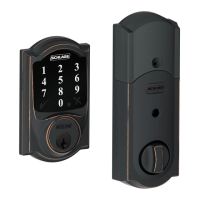
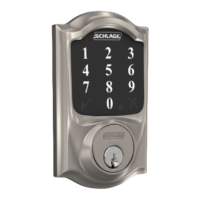
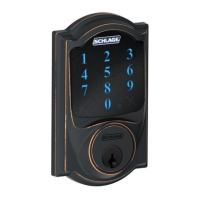
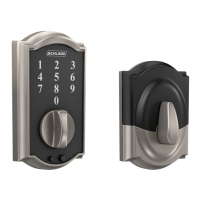
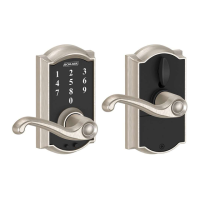
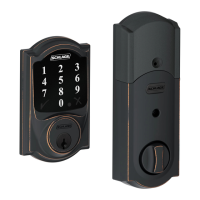
The Schlage BE468 is a smart deadbolt designed to provide secure access to your home. It features a touchscreen keypad for keyless entry and can be integrated with smart home systems, such as Frontpoint, for remote control and monitoring. The deadbolt automatically extends and retracts when the touchscreen is used, offering convenience and enhanced security. For emergency situations, a traditional cylinder and key are included, allowing manual unlocking. The interior assembly includes a thumbturn for manual locking and unlocking from the inside. The lock is preconfigured to fit standard door frames, simplifying the installation process for most users. Its design emphasizes ease of use with a clear keypad for entering access codes.
The primary usage feature of the Schlage BE468 is its keyless entry system via a touchscreen keypad. Users can program and manage access codes, providing flexible entry options for family members, guests, or service providers. The Schlage button on the exterior assembly is used in conjunction with the touchscreen for various functions, including programming and resetting the lock. From the interior, the thumbturn allows for quick and easy manual locking and unlocking, ensuring convenient egress. The bolt automatically extends and retracts when the touchscreen is operated, streamlining the locking and unlocking process. In case of power failure or other issues, the traditional cylinder allows for manual key access, serving as a reliable backup. The lock is designed to integrate with smart home systems, enabling remote management of access codes, lock status monitoring, and potentially other smart functionalities depending on the connected system. The system uses a 6-digit programming code, which is important to note for initial setup and panel pairing, especially if the unit is purchased separately from a primary system order.
Maintenance for the Schlage BE468 primarily involves ensuring proper installation and battery replacement. The installation guide emphasizes the importance of correct door and frame alignment to ensure the deadbolt operates smoothly, as it extends automatically. Users are advised to check door/frame alignment before installation and adjust if necessary to prevent issues with the bolt's movement. When installing, it's crucial to avoid over-tightening screws, as this can impede the deadbolt's free movement. The guide also highlights the need to ensure the touchscreen and support plate are straight on the door before tightening screws to prevent the lock from moving. Battery replacement is a straightforward process, involving unsnapping a connector, removing the battery tray, installing four fresh AA alkaline batteries, and then carefully replacing the tray and reconnecting the batteries while holding the Schlage button for a reset. This reset procedure ensures the lock functions correctly after battery replacement. Users are warned to avoid contact with the circuit board during battery installation to prevent electrostatic discharge. For doors thicker than 1 ¾ inches, a thick door kit is required, which can be obtained by contacting customer service, indicating a specific maintenance or adaptation requirement for certain door types. The installation instructions also provide a link to a video for additional guidance, offering a resource for troubleshooting or clarification during the setup process. Contact information for customer support is provided for further assistance.
| Lock Type | Electronic Deadbolt |
|---|---|
| Keyless Entry | Yes |
| Connectivity | Z-Wave |
| Battery | 4 AA batteries |
| Material | Metal |
| Keypad | Yes |
| Wireless | Yes |
| Technology | Z-Wave |
| ANSI Grade | Grade 2 |
| Strike Plate | Included |
| Voice Alerts | No |
| Finish | Satin Nickel |
| Compatibility | Z-Wave compatible systems |
| Power Source | Battery |
| Keyway | Schlage C |
| Auto-Lock | Yes |
| Lock Type Detail | Single Cylinder Deadbolt |