Do you have a question about the Schlage FE695 and is the answer not in the manual?
Lists required tools like screwdrivers and tape measure, and optional items like a wood block.
Advises against using a power drill and to test the lock with the door open.
Checks door dimensions for latch and deadbolt, and guides faceplate changes if needed.
Ensures the latch angle faces the door jamb correctly.
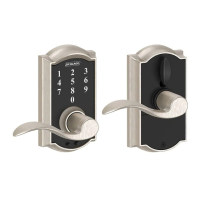
Guides pressing levers onto posts with the tip pointing down.
Instructs to unscrew and lift off the battery cover from the interior assembly.
Installs the touchscreen, ensuring the bar slides smoothly through the latch.
Routes the wire and secures the interior assembly with screws.
Connects the wire from the exterior to the interior assembly and battery.
Places batteries in the holder and tucks wires behind tabs.
Angles and screws the battery cover back into place.
Installs the strike plate onto the door jamb using screws.
Provides steps to remove and switch levers if the orientation is incorrect.
Guides unlocking with User Code A and checking latch retraction/extension.
Provides solutions for latch binding or no response after installation.
Refers to the Schlage Touch User Guide for programming instructions and resources.
Instructs to reverse installation steps and disconnect cables for removal.
| Lock Type | Electronic |
|---|---|
| Keyless Entry | Yes |
| Number of User Codes | 19 |
| Material | Metal |
| Finish | Satin Nickel |
| Style | Modern |
| Power Source | Battery |
| Number of Batteries | 4 |
| Key Override | Yes |
| ANSI Grade | Grade 2 |
| Door Thickness | 1-3/8" to 1-3/4" |
| Keyway | Schlage C |
| Handing | Reversible |
| Programming | Keypad |
| Compatibility | Z-Wave |
| Backset | 2-3/8" or 2-3/4" |
| Warranty | Limited Lifetime |
| Battery Type | AA (4) |


 Loading...