EasyManua.ls Logo

Schlage XE360-M Series - User Manual

Schlage XE360-M Series
14 pages
Print Icon
To Next Page IconTo Next Page
Loading...
*47570180*
47570180
Mortise
XE360-M Series
Installation Instructions
Deadbolt Model Shown
Important installation notes
WARNING
Warnings indicate potentially hazardous conditions, which if
not avoided or corrected, may cause death or serious injury.
CAUTION
Cautions indicate potentially hazardous conditions, which if
not avoided or corrected, may cause minor or moderate injury.
Cautions may also warn against unsafe practices.
NOTICE
Notices indicate a condition that may cause equipment or
property damage only.
L Bags of fasteners are labeled to match the labels in the
installation steps. Look for the labels on the steps before
opening bags of fasteners.
CAUTION
Install with door open to avoid lockout.
Tools
Required
#2 Phillips
Lever Hex Tool (included)
Optional
Star Driver, T-15
Hex Driver (⁄ ")
⁄ " Drill Bit
Locking Pliers
DPS (Optional)
DPS (Optional)
Scan for user guide,
interactive instructions,
warranty and more!
alle.co/XE360
Question and Answer IconNeed help?

Do you have a question about the Schlage XE360-M Series and is the answer not in the manual?

Overview

The provided document is an installation manual for the Schlage XE360-M Series lock, specifically for a mortise deadbolt model. It details the steps for installation, required tools, and important safety and maintenance notes.

Function Description

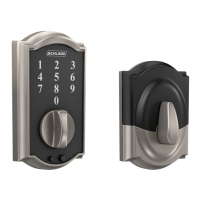
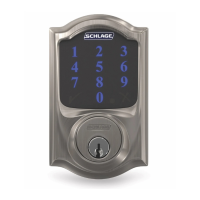
The Schlage XE360-M Series is a mortise lock system designed for secure access control. It features a deadbolt mechanism and can optionally integrate a Door Position Switch (DPS) for enhanced monitoring. The lock system is designed for both interior and exterior use, with distinct components for each side of the door. It operates with batteries, indicating electronic functionality, and includes levers for manual operation. The system is capable of handing changes, allowing it to be adapted for different door orientations (LH/LHR or RH/RHR).

Important Technical Specifications

  • Model: XE360-M Series (Mortise Deadbolt Model Shown)
  • Door Preparation: Requires specific drilling for the chassis, strike, and optional DPS. A 3/4" (19 mm) hole, 1 1/2" (38 mm) deep, is needed for the jamb side of the DPS.
  • Fasteners: Bags of fasteners are labeled to match installation steps, ensuring correct screw usage.
  • Lever Set Screw Torque: Approximately 15 in-lb (2 Nm) for both interior and exterior levers. Hand tightening is recommended.
  • Power Source: Battery-operated. The lock initializes when batteries are connected.
  • Door Handing: Adjustable (180° rotation of the latch) to accommodate different door orientations.
  • DPS Integration: Optional, requiring specific wiring and installation steps.

Usage Features

  • Electronic Operation: The lock is battery-powered, suggesting electronic control over locking and unlocking mechanisms.
  • Lever Operation: Features levers for manual engagement or disengagement of the lock.
  • Door Position Switch (DPS) (Optional): When installed, the DPS provides information about the door's open or closed status, indicated by blue flashes and beeps. This feature can be used for monitoring and potentially for advanced access control functions.
  • Factory Default Reset (FDR): The lock can be set to factory mode, which is important for initial setup and troubleshooting.
  • Initialization Sequence: Upon battery connection, the lock undergoes an initialization process, indicated by three green flashes on the exterior unit.
  • Handing Change: The ability to change the handing of the lock (pulling out and rotating the latch 180°) makes it versatile for various door configurations.
  • User Guide/Interactive Instructions: The product provides a QR code and URL (alle.co/XE360) for accessing a user guide, interactive instructions, and warranty information, enhancing user experience and support.

Maintenance Features

  • Installation Notes: The manual emphasizes important installation notes, including warnings and cautions, to prevent injury, damage, or unsafe practices.
  • Tool Requirements: A list of required and optional tools is provided, including a #2 Phillips screwdriver, Lever Hex Tool (included), Star Driver (T-15), Hex Driver (3/32"), 3/4" Drill Bit, and Locking Pliers.
  • Fastener Management: Fastener bags are labeled to correspond with installation steps, simplifying the assembly process and reducing errors.
  • Handing Check: Users are instructed to check lock handing before installation and to adjust it if necessary, ensuring proper functionality from the start.
  • Troubleshooting Guide: The manual directs users to a detailed user guide (alle.co/XE360UG) for troubleshooting and problem resolution.
  • Lever Removal Caution: A notice warns that repeated lever removal may lead to failure of the set screw, highlighting a potential maintenance concern and advising caution.
  • Cable Management: Instructions emphasize carefully pulling cables through gaskets and avoiding pinching them, which is crucial for the longevity and proper functioning of the electronic components.
  • Open Door Installation for Lockout Prevention: A caution advises installing the lock with the door open to avoid accidental lockout, a key safety and maintenance practice.
  • Basic Operation Test: A section on "Basic Operation" provides steps to test the lock's functionality after installation, including checking battery installation, system initialization, indicator flashes, and smooth lever operation.
  • DPS Test: Specific steps are provided to test the DPS functionality, including verifying installation, checking for factory mode, canceling announcements, and observing indicator flashes for door open/close states.

Schlage XE360-M Series Specifications

General IconGeneral
BrandSchlage
ModelXE360-M Series
CategoryDoor locks
LanguageEnglish

Related product manuals