24
Removal
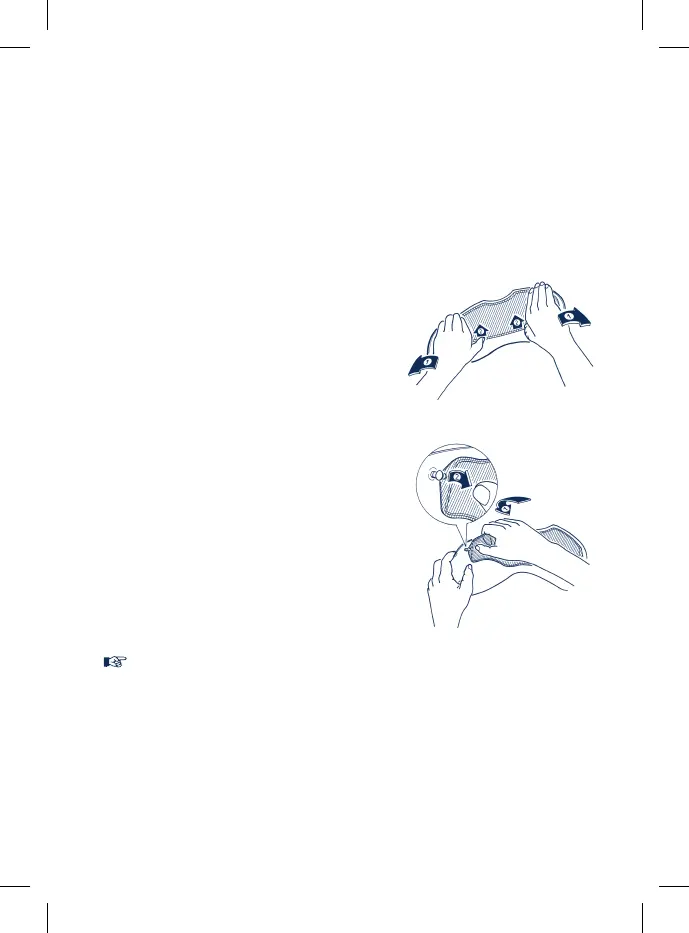
1. Before starting to remove the
replacement lense, first lay the
Face Shield on a soft, clean cloth
so that its top edge is facing you.
2. To reduce the pretensioning of
the Pinlock
®
-lense slightly if
necessary, use the balls of your
thumbs to carefully bend the
Face Shield sufficiently apart
while applying pressure with your
thumbs to release the replacement
lense and move it approx. 2 - 3 mm
forward.
3. Now grip the back of the
replacement lense with your
index and middle fingers and
lift it off the Face Shield. In this
position you can easily remove
the replacement lense from the
locking pin with your thumb.
4. You can now remove the
replacement lense from the
Face Shield.
Note:
• toavoidscratchingthefaceschield,neverremoveortthe
replacement lense unless the visor unit is clean and dry.
• Whenttingthereplacementlense,checkthatneither
dust nor moisture are able to get between the two plates.
• Whenremovingorttingthereplacementlense,itisalways
best to lay the face schield unit on a clean, dry cloth.
• Checkregularlytoensurethatthetofthesiliconeseal
between the Face Shield and the Pinlock
®
-lense is tight
and even.
D. the helmet