washMaster Installation guide
539715.AB Page 20 / 21 07.2019
7.1.3 Positioning the washMaster module
Position the washMaster module with a spacer.
Note:
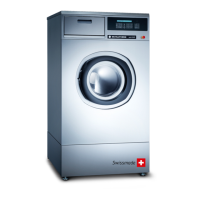
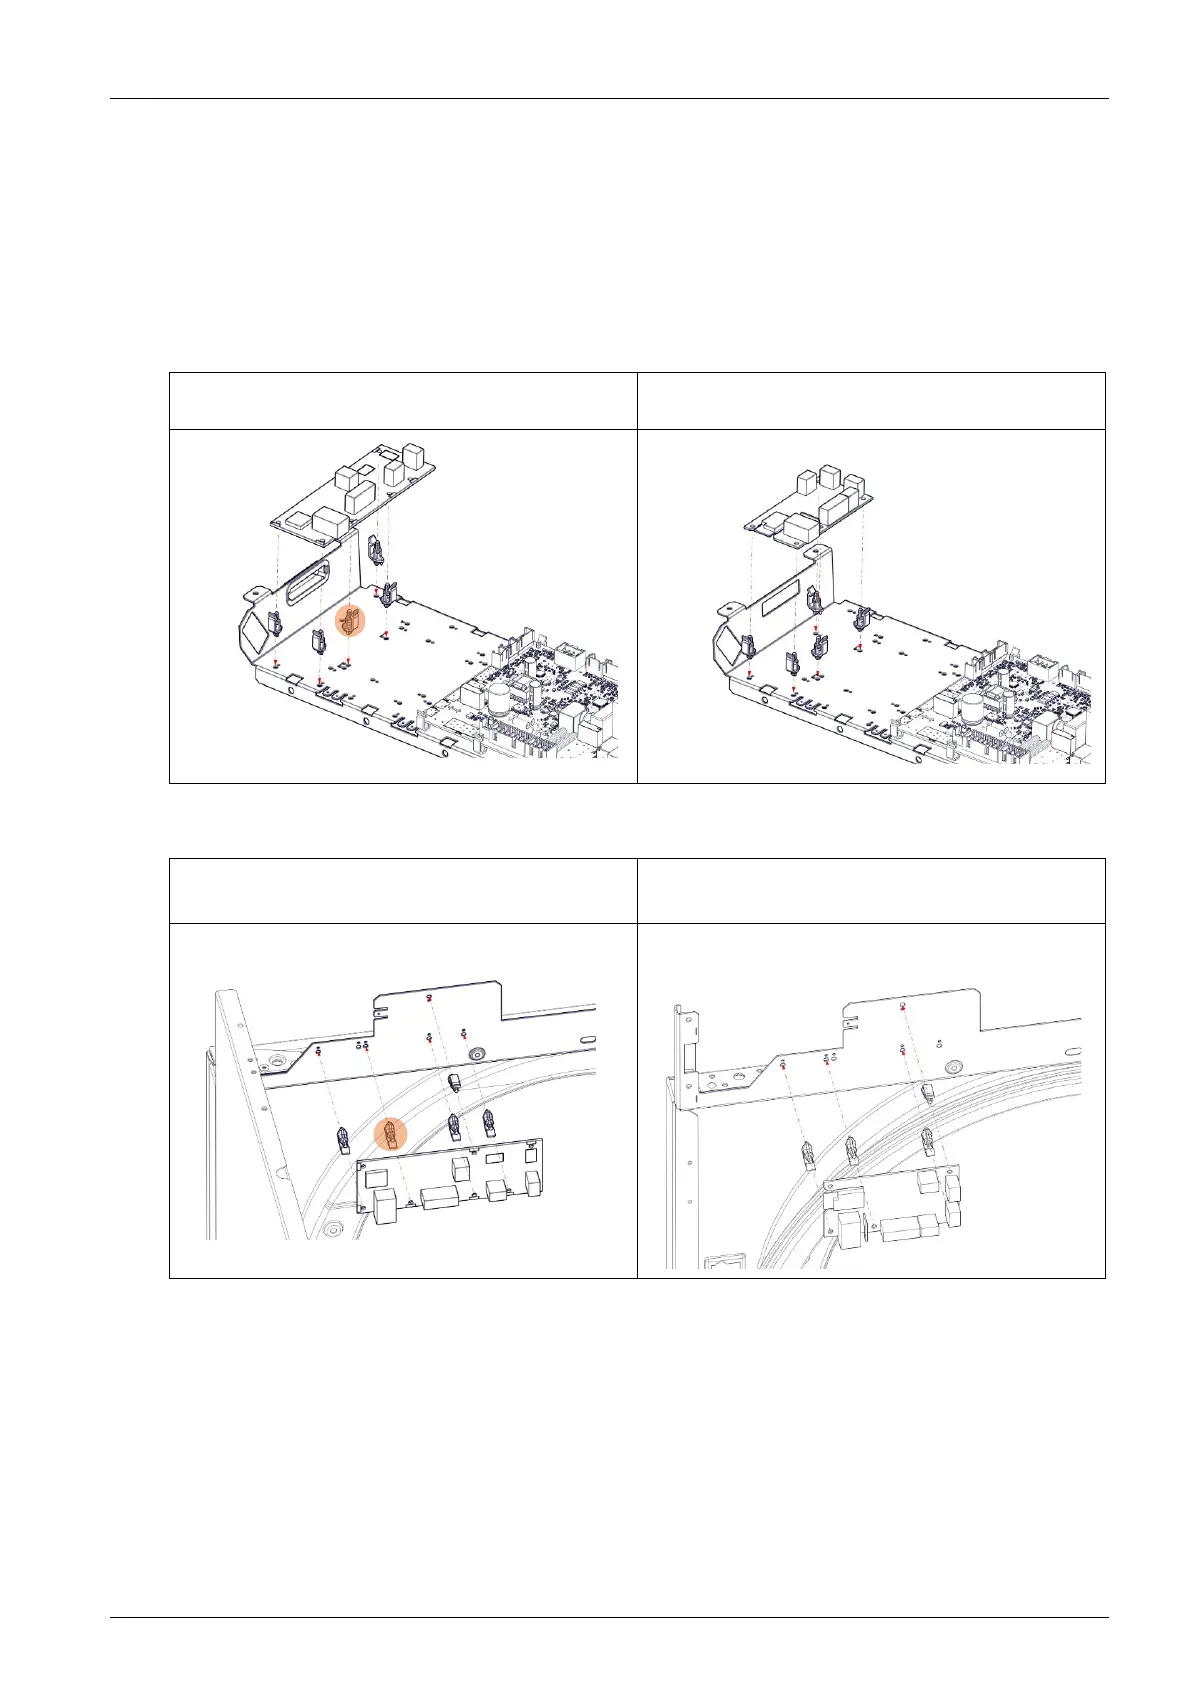
If a washMaster module V1 big (539 669) is replaced with a washMaster Modul V2 small (539
671), a print fastening clip must be removed and refitted in washing machines as well as dryer
(see illustrations).
Washing machine
WashMaster module V1 big (539 669) WashMaster module V2 small (539 671)
Dryer
WashMaster Modul V1 gross (539 669) WashMaster Modul V2 klein (539 671)
Then the antenna can then be plugged onto the washMaster module. Wiring must be carried out
as described in the next chapter: “Connecting the washMaster module”.
7.2 Procedure for appliances with machine number < 0xxxx 18 38 xxx
If the machine is older than the machine number described above, you must also replace the
control and power unit as well as the crossbeam.
After that you can proceed as described in the section above.