42
Use Instructions:
1. Check whether the guide fence has been mounted correctly (when using the machine in the table saw po-
sition).
2. Do not saw any other materials than wood.
3. Turn on the machine only after all adjustments have been made.
4. Do not exert pressure on the saw blade. Allow the machine enough time to cut the workpiece.
5. Never try to slow the saw blade down by exerting pressure on the side.
6. lf the saw blade comes to a standstill or decelerates, the machine is being overloaded. lmmediately
stop sawing and let the motor cool down by leaving the machine running idle for some time.
7. Do not perform any design, assembly or construction activities on the table while the machine is switched
on.
Residual risks:
The following hazards may occur during the operation of this machine:
• Danger of injury to the ngers and hands while changing the saw blade.
• Danger of injury through ying debris from lhe workpiece
• Danger of hearing damage. Take appropriate measures for the protection of hearing.
The sound levels stated are emission levels; they are not necessarily safe working levels. Even though
the measured values are related to exposure levels, this information does not allow to determine if additional-
measures are required.
• Health risk due to inhalation of airborne particles.
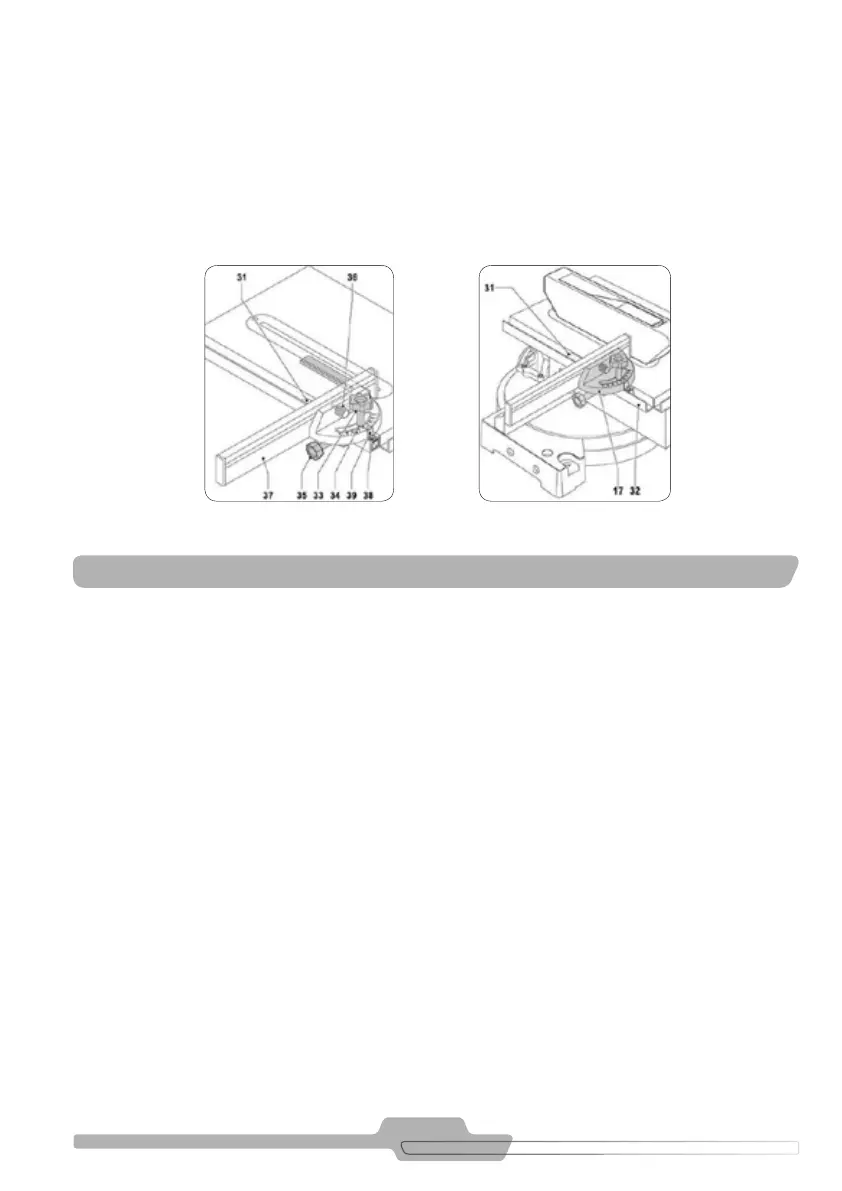
FIGURE 8.9 FIGURE 8.10
9. Adjusting the combined parallel guide and mitre fence
The guide fence is used for parallel guiding or sawing mitre cuts with the machine set up in the table saw posi-
tion.
• Position the guide (31) in the horizontal and vertical rails, and slide to the desired position and tighten the
knob (35).
• Attach the fence (37) on the screws (36) and tighten.
• Rotate the angle scale as needed and tighten the knob (33).
Note: Never position the fence (37) in front of the blade, adjust the fence until it is beyond the reach of the blade.
9. OPERATION