Do you have a question about the SCHUNK KSC3 and is the answer not in the manual?
States the purpose of the document and its validity for installation, commissioning, operation, servicing and maintenance.
Explains the meaning of danger, warning, and note symbols used in the document.
Specifies device usage for milling machines and lists technical specifications like torque and force.
Lists forbidden applications, potential misuses, and requirements for spare parts.
Addresses potential risks, jaw tightening, and notes on clamping technology.
Covers duties of organization/operators, PPE requirements, and warranty conditions.
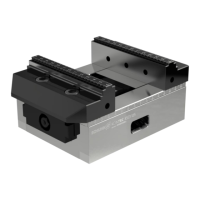
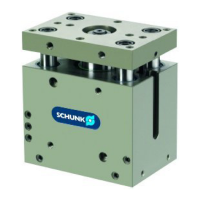
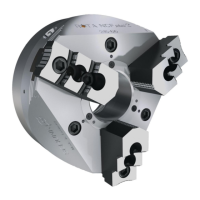
Explains the KSC3 vise's direct mechanical drive, force generation, and suitability for internal/external clamping.
Details the procedure for clamping and aligning workpieces, including notes on palleting systems.
Explains jaw replacement, correct tightening torque, and limitations on carriage opening to prevent contamination.
Provides instructions for cleaning, oiling, and lubricating the clamping device for optimal function.
Addresses issues like a hard-to-operate device and outlines the removal process for carriages.
Details steps for cleaning, greasing, inserting carriages, and checking the central position.
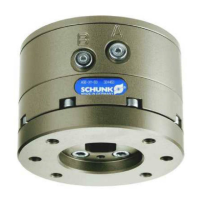
Describes how to fit swivel and adapter plates, including notes on workpiece clamping positions.
Guides on positioning and tightening 6-fold reversible jaws for optimal clamping results.
Provides steps to resolve issues with a stiff swivel plate, including checking for damage and lubrication.
Explains the use of aluminium jaws for workpiece-specific contour milling and pre-clamping.
Notes that spare parts for carriages, base plates, and spindles are not supplied; repairs by manufacturer.
States that the clamping device and accessories can be disposed of as scrap metal safely.
The SCHUNK KSC3 is a centric vise designed for precise clamping of raw and finished workpieces. It operates with a mechanical drive via a capsuled thread, generating force linearly across its entire clamping range without a force amplifier. Both jaws and carriages close and open synchronously and symmetrically with respect to the position holes in the base plate. This design also allows for workpiece clamping from both the inside and outside.
The KSC3 series offers various models with different clamping forces and torque requirements:
Exceeding the maximum pull-in torque can lead to spindle damage.
All tolerances are without a nickel layer of 5µm per surface.
Intended Use: The clamping device is designed for stationary application on milling machines in an industrial environment. Proper use includes adherence to commissioning, installation, operating instructions, and environmental/service conditions specified by the manufacturer. Non-intended use voids manufacturer liability for damage.
Jaw Change: The reliable function of the clamping device is significantly influenced by the selection of the correct top jaws. Insufficiently tightened system jaws can lead to damage. When changing jaws or moving them in the carriages, the cylinder screws must be tightened to the prescribed torque:
Clamping: The clamping force must be adapted to the jaw width and workpiece width. The operator is responsible for ensuring that the clamping geometry and forces are suitable for the intended processing. Using a torque wrench for clamping is recommended to achieve consistent results. Clamping forces are only achieved if the device functions correctly and the workpiece is properly held. Regular servicing and cleaning are essential for correct function. When clamping thin-walled or elastic workpieces (e.g., tubes), the clamping force may be significantly reduced due to yielding. High-force clamping can also reduce clamping force due to increased frictional forces in the carriages.
Maximum Carriages Opening: The clamping range depends on the vise type and selected system/top jaws. Carriages have a marking indicating the maximum opening. Exceeding this range can lead to contamination of the encapsulated area and bearing area by chips. Workpiece clamping outside these markings can result in workpiece loss and damage to the vise.
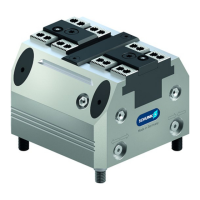
Determine the best mounting positions for the 6-fold reversible jaws, achieving optimal clamping results when clamping parts as far out as possible. Move cover screws to the selected clamping position. Loosely insert cylinder screws into the 6-fold reversible jaws. Turn the jaws to the required clamping faces and slightly pre-clamp the workpiece to ensure parallel contact. Tighten cylinder screws to 80 Nm. If clamping faces are not aligned parallel to the workpiece surface, the jaws may loosen due to clamping force.
Aluminium Jaws: These are designed for producing workpiece-specific clamping contours. For maximum contour precision, contour milling should be performed with pre-clamping of the aluminium jaws. A narrow spacer piece can be clamped at the bottom, and the pre-clamped aluminium jaws can then be milled to achieve the desired contour. The system jaw should be milled to a maximum depth of the screw head, ensuring sufficient clamping cross-section.
Servicing, Cleaning, and Maintenance: Ensure the sliding surface between system jaws and the spindle is free of chips when adjusting the clamping range. For cleaning under the carriages, KSC3 80 and KSC3 125-160 vises can be opened beyond the maximum and flushed. Regularly clean and oil the running surfaces and guides (e.g., with MOTOREX Supergliss 68 K to ISO VG 68). The KSC3 160 has a lubrication nipple in the carriage groove; monthly application is recommended, with carriages completely closed.
Warranty: The warranty period is 24 months from the date of delivery, subject to intended use, compliance with concurrent documents, environmental/operating conditions, specified maintenance/lubrication intervals, and maximum service life. Parts in contact with workpieces are not covered. Maximum service life is 24 months or 50,000 clamping cycles.
Spare and Wear Parts: Only use original parts or manufacturer-approved parts. Using third-party parts may lead to risks. Spare parts for carriage, base plate, and spindle are not supplied separately as they are designed and fitted at the factory to work together. Repairs can only be carried out by the manufacturer or an authorized service agent.
Taking out of Service: The clamping device and all accessories can be disposed of as scrap metal without risk.
| Brand | SCHUNK |
|---|---|
| Model | KSC3 |
| Category | Industrial Equipment |
| Language | English |