7
2. Place the weight or sample near the center of the balance pan. A small offset from center can have a pro-
nounced effect and introduce undue variation.
3. Take special care not to breathe onto the weight or into the balance chamber. Back away from the instru-
ment. This will prevent any thermal transfer of heat from your breath or body to the balance, the weight,
or the sample.
4. Time your measurements. Consistent sample times will provide more consistent measurement.
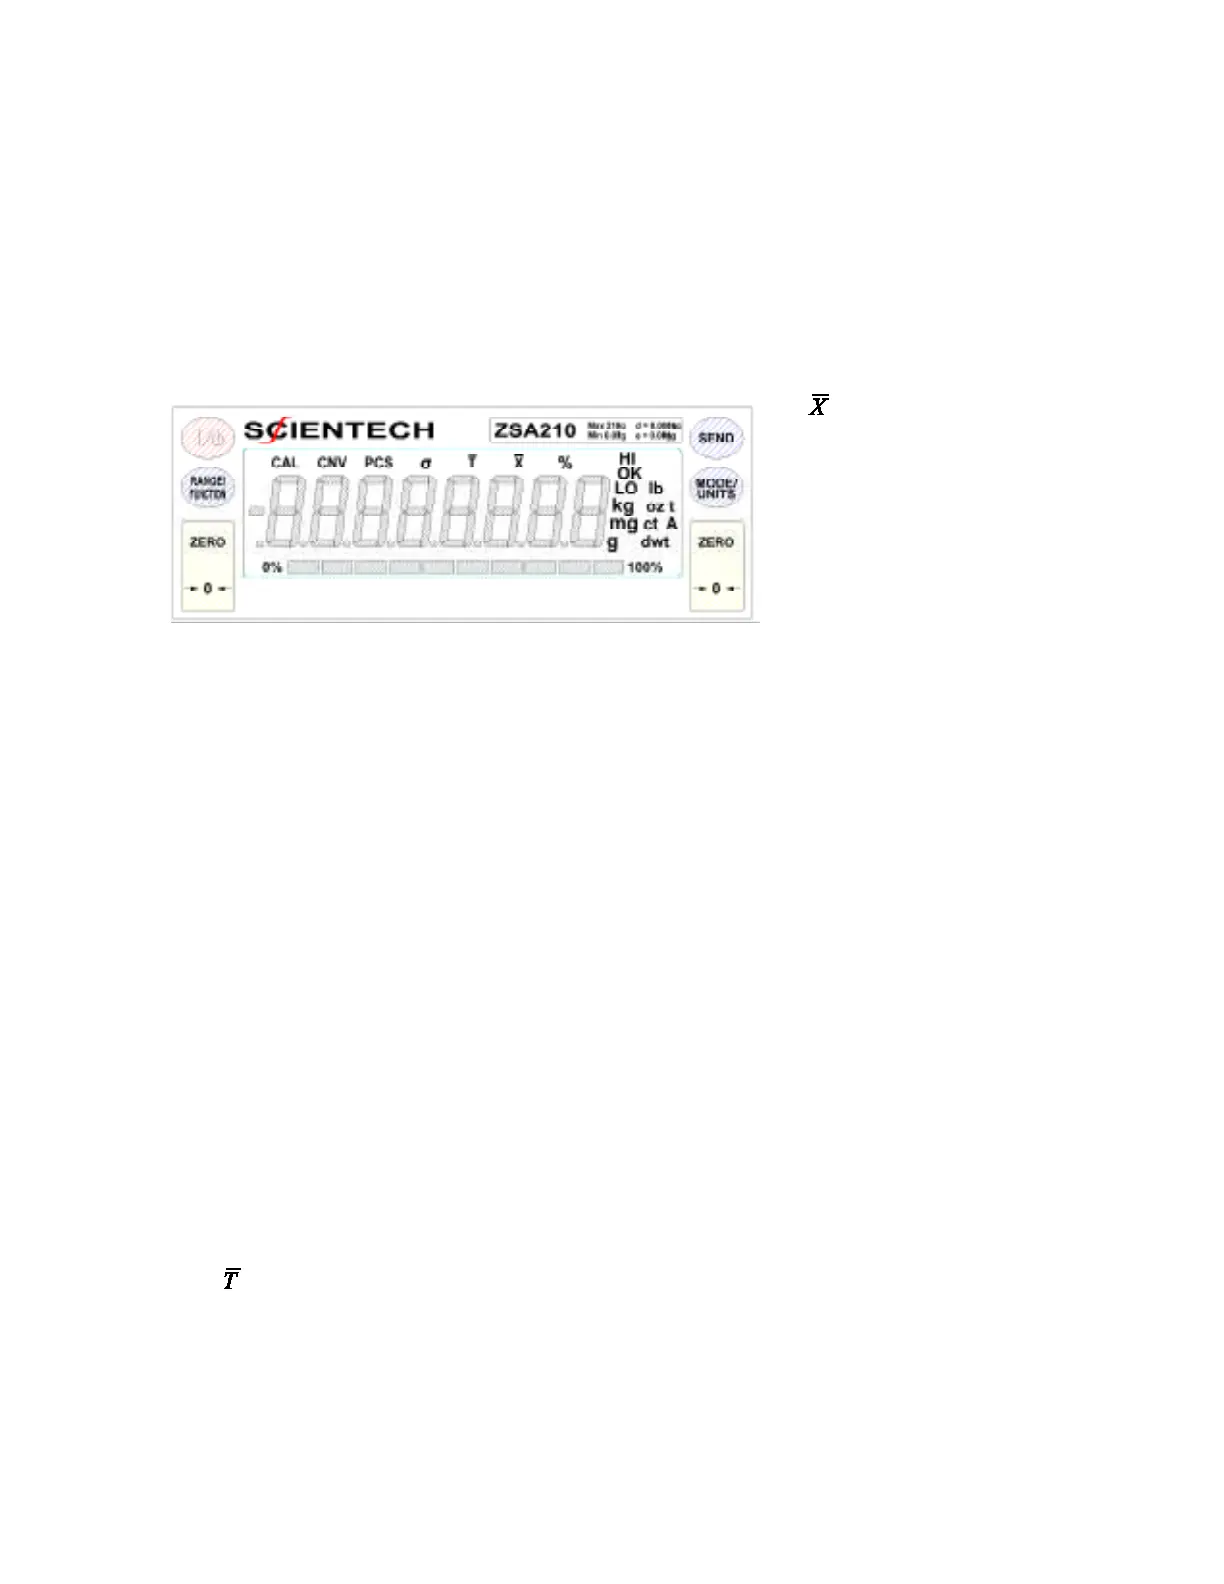
Front Panel Controls:
The ON/OFF (I/O) Button:
When the balance is off, pressing the ON/OFF button will start the turn on sequence shown in Figure 4. During
this sequence the balance is doing an automatic systems checkout to insure it is functioning properly.
If your balance was purchased with the optional motorized internal calibration weight it will have a suffix of IW
after the model number. All objects on the stainless steel pan must be removed before turning on the balance
using the front panel ON/OFF switch. Press the ON/OFF button and observe the turn on sequence shown in
Figure 4. For internal weight (-IW) models, the balance will then load the internal weight on and off the weigh-
ing sensor in order for the internal weight to be positioned correctly. Please wait until all weight readings have
stopped changing, the “OK” annunciator appears, and the motor is silent before zeroing the balance and starting
weighing operations.
When the balance is on, pressing the ON/OFF button will turn off the display.
The RANGE/FUNCTION Button:
Single Range Balance Models:
Pressing the RANGE/FUNCTION button begins the following menus cycle:
• PCS – Front panel parts counting
• HI OK LO – Checkweighing
• CAL 1 – Autocalibration
• CAL 2 – Linearity
• – Live animal weighing
• % - percent weighing
To select the desired function, press the MODE button when it appears on the display.
The annunciators CAL,CNV, σ
and are shown in but are not
available through any front panel
controls. However, these functions
along with all other front panel
functions are available through
RS-232 commands. These com-
mands are discussed later in the
RS-232 section of the manual.