Do you have a question about the Scosche ITCLS01B and is the answer not in the manual?
Disconnect vehicle negative battery terminal before installation to prevent electrical damage.
Refer to vehicle instructions for special tools and stereo instructions for wiring.
Use PRT to remove side trim panels on each side of the center console.
Unscrew the shift knob.
Use PRT to remove the center console top panel and disconnect wires.
Extract 2 screws securing the ashtray to the center console and remove it.
Push locking tabs on A/C vents to release the vent panel and unplug wires.
Remove (4) 10mm bolts securing the radio and A/C panel to the dash.
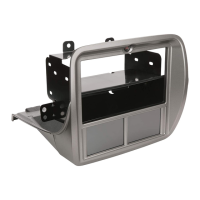
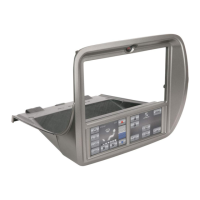
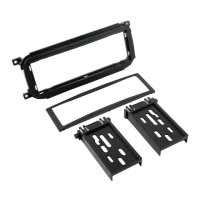
Mount provided brackets (Left 7440 & Right 7439) to the back of the Scosche panel 7438.
Adjust and secure the aftermarket radio to the panel assembly using supplied screws.
Mount the factory TPMS and its bracket to the back of the left bracket using factory screws.
Mount radio & TPMS, connect wiring, and secure the panel assembly to the vehicle.
Diagram (FIGURE 1) showing steering wheel control buttons and their functions.
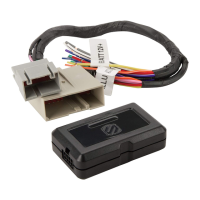
Explanation of the SWC harness retaining vehicle's OEM steering wheel capabilities.
Diagram (FIGURE 2) and chart for connecting the SWC steering wheel connector harness.
Samples of SWC harness wiring for different stereo brands.
Diagram detailing the main ITC radio wiring connections.
Wiring harness connections for hazard, airbag, and seatbelt indicators.
Wiring connections for the LSAAB Antenna Adapter.
Key to wire colors used in the installation and their corresponding functions.
Diagram (FIGURE 4) and explanation of the left screen A/C button layout and functions.
Instructions on adjusting vehicle air temperature and fan speed using the touch screen.
Guide to using the vent directional control icon and its airflow patterns.
Diagram (FIGURE 5) and explanation of the right screen A/C button layout and functions.
Instructions on accessing and using the menu for configuration settings.
Explanation of recirculation, defrost, and micro dust/pollen filter modes.
Diagram (FIGURE 6) illustrating navigation within the main menu settings.
Diagram (FIGURE 7) illustrating navigation within sub-menu settings.
Legend (FIGURE 8) for configuration options and selection methods.
Chart detailing available vehicle settings and their options.
Chart detailing options for screen brightness and theme settings.
Options for selecting the display language.
Information about the module's software and resource versions.
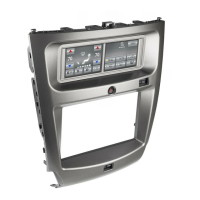
The Scosche ITCLS01B is an ISO Double DIN In-Dash Installation Kit with a pocket, designed specifically for 2006-2013 Lexus IS models without navigation. This kit facilitates the installation of an aftermarket head unit into the vehicle's dashboard, while also integrating climate, convenience, and personalization controls through a touch screen interface.
The primary function of the ITCLS01B kit is to provide a seamless and integrated solution for replacing the factory radio in compatible Lexus IS vehicles with an aftermarket double DIN head unit. It includes all necessary components for mounting the new head unit and retaining essential vehicle functions. A key feature is the Scosche Touch Screen Interface, which replaces the factory climate, convenience, and personalization controls that were originally built into the Lexus radio/dash panel. This interface offers improved ergonomics and touch screen capabilities, along with steering wheel control functionalities.
The kit's components include:
The integrated touch screen interface allows users to control various aspects of the vehicle's climate system, including:
Beyond climate control, the interface also provides access to a Configuration Menu for various settings, including:
| Brand | Scosche |
|---|---|
| Model | ITCLS01B |
| Category | Automobile Accessories |
| Language | English |