ENGLISHENGLISH
41 |
MOUNTAIN BIKE AND MOUNTAIN BIKE-PEDELEC | ORIGINAL OPERATING INSTRUCTIONS 2017ORIGINAL OPERATING INSTRUCTIONS 2017 | MOUNTAIN BIKE AND MOUNTAIN BIKE-PEDELEC
| 40
b ca e fd
DANGER!
G
After wheel mounting test the brakes in stationary. You should reach the
pressure point of the brake before the brake lever reaches the handlebars.
In the case of hydraulic brakes pump them, if necessary, until you reach a pre-
cise pressure point. To check it compress the suspension fork several times.
CAUTION!
A
To mount the axle only use the tools recommended by the manufacturer.
Make it a rule to use a torque wrench. Tighten carefully by approaching the
prescribed maximum torque value in small steps (0.5 Nm increments) and check
in between the proper fit of the component. Never exceed the maximum torque
value indicated by the manufacturer! A too tight fixing of the axle can damage
the axle, the fork leg or the rear frame.
NOTE!
I
Before mounting or replacing a fork/wheel combination with thru-axle
system, be sure to read first the manual of the respective suspension fork
or wheel manufacturer on this SCOTT info CD.
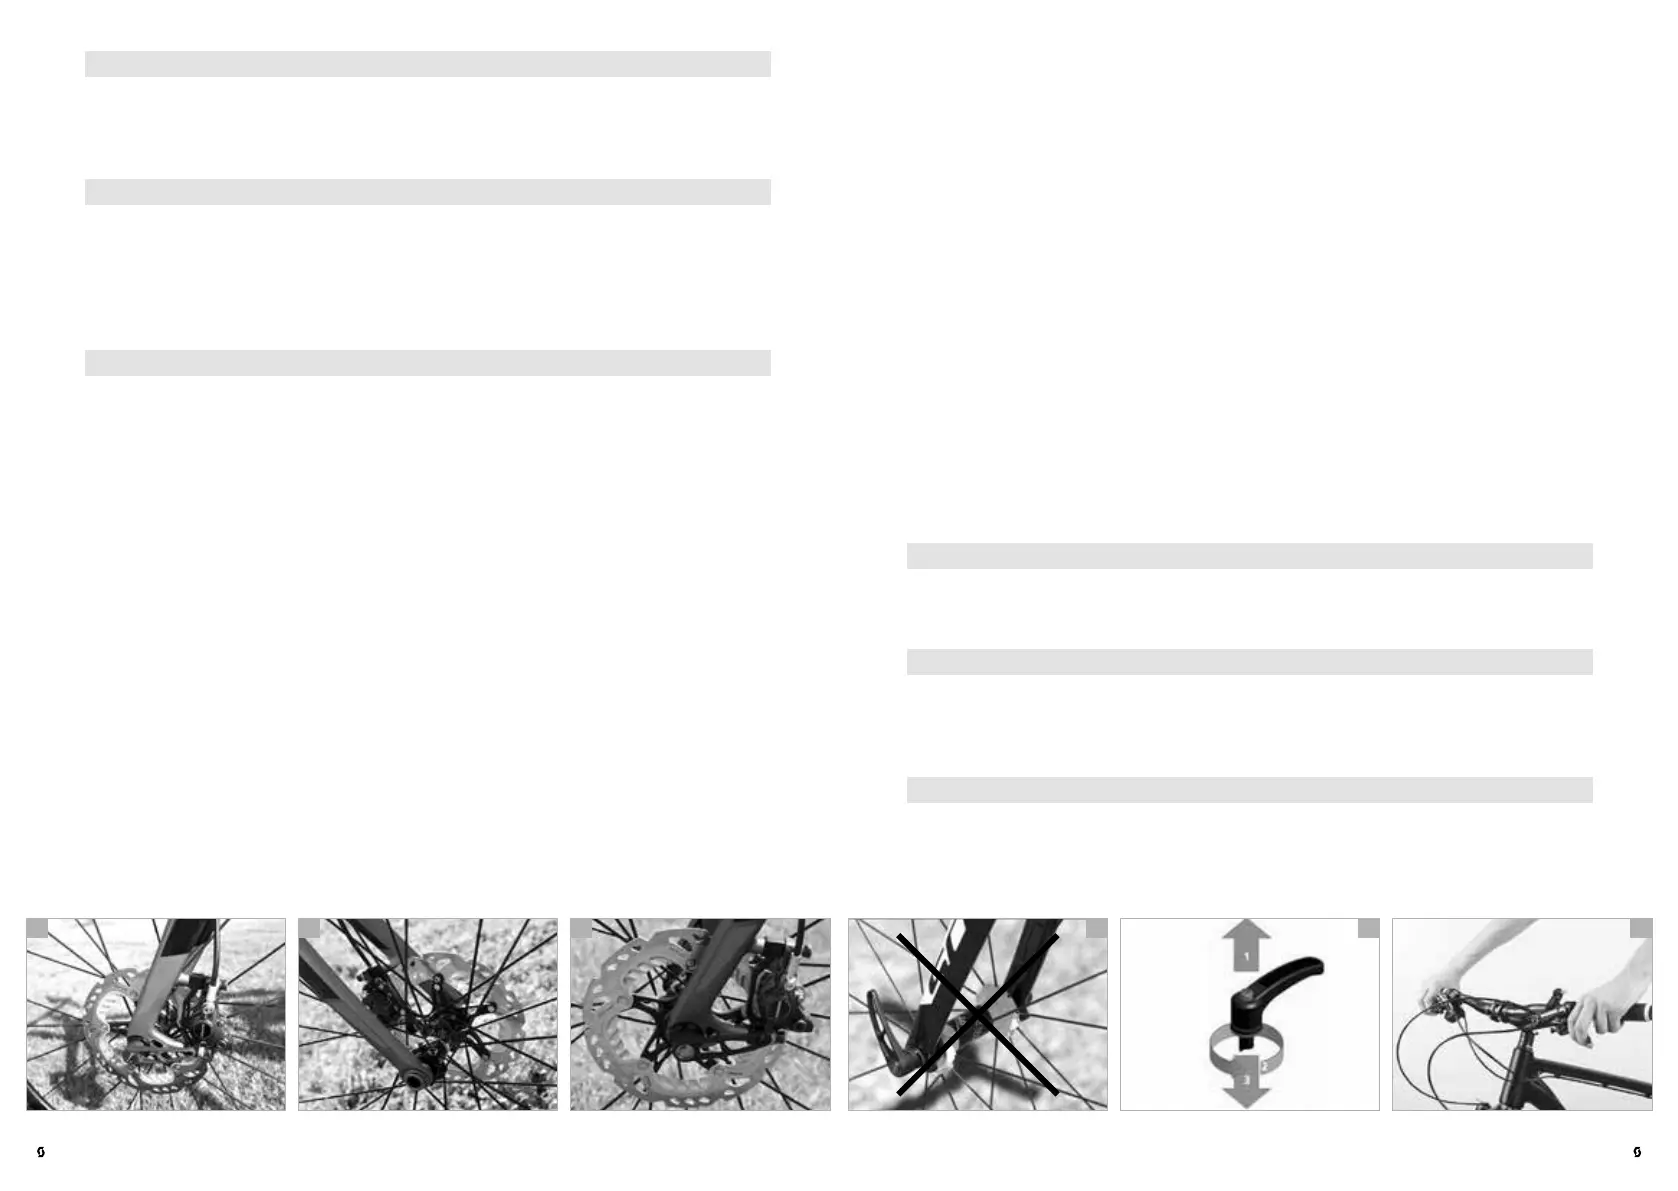
RWS system from DT Swiss (a-c)
Wheel mounting
Put the wheel into the fork or the rear frame and mount the rotor simultaneous-
ly, if necessary, in the brake calliper. Make sure that in the area of the rear wheel
the chain runs over the sprockets and over both pulleys of the rear derailleur.
Bring the front wheel into the right position between the drop-outs and slide
the thru axle with open quick-release lever from the left side through the drop-
out and the hub.
As soon as you have reached the opposite side, turn the thru axle clockwise
into the nut on the right side. Do not apply force, but make sure the axle thread
engages properly with the nut on the other side.
During the first turn you should be able to turn the RWS quick-release lever of
the thru axle nearly without resistance. If everything fits, turn the RWS quick-re-
lease lever all in all two and a half turns clockwise to pre-tighten the RWS
system.
You will feel an increasing resistance at the lever. Only turn the axle until it is
hand-tight.
Make sure the RWS quick-release lever does not stand out to the front (d).
Open the RWS quick-release lever a little (e, position 1) to bring it into a favour-
able position. Turn the RWS quick-release lever then into the desired position (e,
position 2) and re-close it towards the hub (e, position 3).
Actuate the brake lever to make the brake ready-to-work.
Lift the wheel and give it a strong tap from above. The wheel must be securely
fixed and must not rattle.
Wheel removal
Turn the quick-release lever anticlockwise to open the RWS system. Release the
thru axle completely by two and a half turns, hold the wheel in its position and
remove the axle from the hub.
DANGER!
G
Improperly mounted wheels may throw you off your bike or result in
serious accidents! Therefore, if you have the slightest doubt, contact your
SCOTT dealer and ask him to explain the system of your SCOTT bike to you.
DANGER!
G
After wheel mounting test the brakes in stationary. You should reach the
pressure point of the brake before the brake lever reaches the handlebars.
In the case of hydraulic brakes pump them, if necessary, until you reach a pre-
cise pressure point (f).
DANGER!
G
Do not open the red screw to open or close the RWS system.