Do you have a question about the Scytek electronic G5.2W SERIES and is the answer not in the manual?
Two Way Pager upgrade kit for a complete two way system, increasing range.
Smart phone upgrade via system antenna port for 2 Way confirmation, Arm/Disarm, Remote Start On/Off, Trunk Release, Alert Notification.
GPS upgrade that works with MobiLink 100 for Easy Plug and Play GPS Tracking.
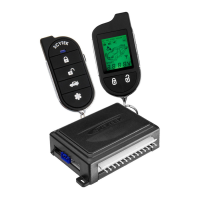
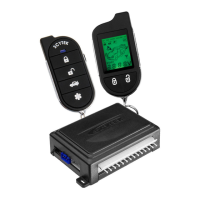
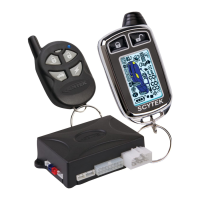
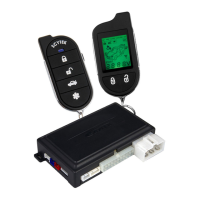
Lists the main unit, remote transmitters, shock sensor, and siren included with the system.
Details optional inputs/outputs for personalized security and convenience, like Mobilink for smartphone operation.
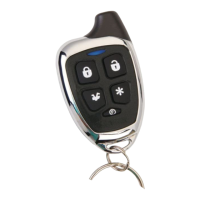
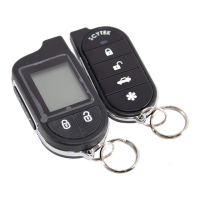
Description of buttons and functions for G Series and A Series standard remote transmitters.
Explains functions accessed by pressing the Shift button (Button 5) before other buttons.
Step-by-step guide to program one or more one-button remote transmitters.
Describes the functions of Lock, Unlock, and Remote Start/Stop for the one-button remote.
Procedure for entering system programming mode to change settings using the valet switch and transmitter.
Instructions for programming transmitters to operate two vehicles with the same remote.
Guide on how to replace the batteries in the T5 remote transmitter.
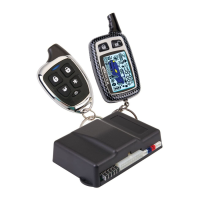
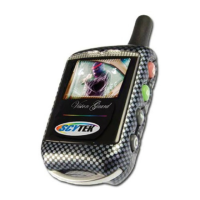
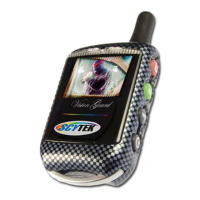
Details functions of buttons 1 through 5 on Page 1 of the LCD transmitter.
Details functions of buttons 1 through 4 on Page 2 of the LCD transmitter.
Procedure for replacing the AAA battery in the LCD pager remote transmitter.
Instructions for setting the 12-hour clock on the LCD transmitter.
Procedure to set the unit's internal clock for the automatic daily start function.
How to set the daily start time via the pager, allowing automatic remote start daily.
Sets the temperature threshold for automatic start in cold weather conditions.
Sets the temperature threshold for automatic start in hot weather conditions.
Explains how to enable/disable power save mode to conserve transmitter battery.
How to activate the LCD backlight on the transmitter for use in the dark.
How to display the current vehicle status (armed, disarmed, etc.) on the 2-way transmitter.
Displays enabled starter autostart features and their status.
Synchronizes the pager's time with the internal remote starter clock.
Synchronizes the remote starter's clock with the pager.
Enables/disables the cold temperature auto start activation mode.
Enables/disables the hot temperature auto start activation mode.
Enables/disables the daily auto start activation mode for scheduled starts.
Selects between tone or vibration mode for transmitter confirmation.
Procedure to arm the system and lock the vehicle doors using the remote transmitter.
Procedure to disarm the system and unlock the vehicle doors using the remote transmitter.
LED flash codes indicate which zone triggered the system after disarming.
How to arm/disarm the system without audible chirp/honk confirmations.
Automatic system arming when ignition is off and doors are closed.
Instructions to activate the alarm/panic feature using the remote transmitter.
Procedure to disarm the system if the transmitter is lost or inoperable.
Information on the optional coded override feature for enhanced security.
System automatically rearms 30 seconds after disarming, unless ignition is turned on.
Temporarily disables security and remote start for service or parking attendants.
Allows paging the LCD transmitter if it is misplaced or lost.
Step-by-step guide to start the vehicle's engine remotely using the transmitter.
Actions that will automatically shut down the vehicle's engine during remote start.
Allows exiting the vehicle while keeping the engine running for quick stops.
Details three modes: Timer Only, Low Temperature, and High Temperature auto start.
Allows turbocharged engines to run for cool-down after ignition key removal.
Procedure to prepare the vehicle for remote starting with a manual transmission.
Steps to remotely start the engine on manual transmission vehicles.
Actions that will shut down the engine during manual transmission remote start.
Automatically locks doors when the ignition is turned on.
Automatically unlocks doors when the ignition key is turned off.
Turns on the dome light when the system is disarmed.
Details the 3 auxiliary channel outputs for expanded system features.
Allows automatic system disarm when the trunk is opened using the transmitter.
Temporarily bypasses sensor inputs to prevent false alarms from disturbances.
Lists the main unit, remote transmitters, shock sensor, and harnesses included.
Locating and mounting the hood pin switch for safety and remote start operation.
Confirming optional features and programming requirements with the owner.
Using a Volt/Ohm meter for testing and performing function tests before/after installation.
Protecting wires with tape/loom and using grommets when routing through the firewall.
Properly fusing additional accessories separately from the alarm module.
Guidelines for selecting a secure and accessible location for the main control unit.
Instructions for choosing an optimal mounting location for the siren.
Recommendations for mounting the shock sensor for best coverage and performance.
Detailed pinout and connection guide for the 6-pin starter harness.
Detailed pinout and connection guide for the 20-pin main harness.
Continuation of the 20-pin main harness pinout and connection details.
Description and function of the 4-pin, 2-pin, and 3-pin plug-in connectors.
Instructions for separating the unit case and setting the parking light polarity jumper.
Explains how to select the correct polarity (+/-) for the parking light relay output.
Procedures for entering programming mode using either remote transmitter.
Steps to reset all system programming parameters to factory default settings.
Selects between Manual Arming and Passive Arming modes.
Configures the system to automatically re-arm 30 seconds after disarming.
Selects between normal audible chirps and silent operation for arming.
Configures ignition door locking and sets the optional emergency override code.
Configures automatic door unlocking when the ignition is turned off.
Selects single or double pulse operation for the door unlock output.
Sets the duration (0.1, 1, or 3 seconds) for door locking and unlocking pulses.
Configures automatic door locking during Passive Arming and Auto Rearming.
Enables or disables audible chirps before the starter is activated.
Bypasses open zone warning chirps for vehicles with residual dome light circuits.
Selects momentary, timed, or latched operation for Auxiliary 1 output.
Selects momentary, timed, or latched operation for Auxiliary 2 output.
Selects Channel 3, Factory Rearm output, or third Ignition output.
Configures doors to automatically lock after remote starting.
Configures doors to automatically lock after remote shutdown.
Sets the duration (15 or 25 minutes) for the remote start run cycle.
Selects interval (1 or 2 hours) for automatic engine starting.
Disables the unit's internal automatic start time function.
Configures crank times for tachless mode or selects specific crank times.
Details tachless mode operation, which uses software to determine engine status.
Adjusts crank time automatically to compensate for temperature variations.
Enables/disables smart sense monitor or selects DataBus RPM sense.
Sets engine mode (Gas/Diesel) and learns vehicle's RPM threshold.
Selects operating mode for the Ignition 2 relay output (Ignition 2, Accessory 2, Starter 2).
Sets the horn honk mode to Normal, Louder, or Loudest.
Enables the turbo timer feature for engine cool-down after emergency brake application.
Configures parking lights to remain on for 30 seconds after disarming.
Enables or disables Warn-Away reports to be sent to the pager.
Selects between Active, Passive, or Full-Time modes for anti-carjacking protection.
Enables the anti-carjacking protection feature for the system.
Enables or disables trigger inputs via the data port.
Selects between G5/A4 Series or G2/A1 Series system modes.
Enables ignition output pulsing before the door unlock command.
Configures doors to unlock automatically before the remote start sequence.
Enables vehicle start mode upon engaging the hand brake for manual transmissions.
Description of the antenna's integrated LED light, override, valet, and call switch.
Interprets parking light flash codes to diagnose starter and system issues.
Wiring diagram for negative trigger door lock systems.
Wiring diagram for positive trigger door lock systems.
Wiring diagram for reverse polarity door lock systems.
Wiring diagram for vacuum-operated door lock systems.
Wiring diagram for adding aftermarket actuators to door lock systems.
Wiring diagram for two-stage negative trigger door lock operation.
Wiring diagram for two-stage positive trigger door lock operation.
Wiring diagram for two-stage reverse polarity door lock systems.
Wiring diagram for adding actuators to two-stage door lock systems.
Pinout and connection details for the starter harness wires.
Pinout and connection details for the main harness wires.
Wiring connections for the door lock system.
Wiring connections for the shock sensor.
Notes on required connections for manual transmission systems.
| Type | Car Alarm |
|---|---|
| Series | G5.2W |
| Remote Control | Yes |
| Remote Start | Yes |
| Shock Sensor | Yes |
| Keyless Entry | Yes |
| Panic Mode | Yes |
| Engine Immobilizer | Yes |
| Door Trigger | Yes |
| Hood Trigger | Yes |
| Trunk Trigger | Yes |
| Valet Mode | Yes |
| Battery Backup | No |
| LED Indicator | Yes |
| Display Type | LCD |
| Number of Buttons on Remotes | 5 |
| Number of Remotes | 2 |
| Siren | Yes |
| System Type | Two-Way |