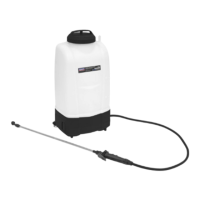
5.11. ATTACHING THE BACK STRAP
5.11.1. Feed the back strap through the xed link pin (g 10).
5.11.2. Feed the back strap through the upper slot of the plastic buckle (g 11), and then through the lower slot of the plastic buckle and
pull tight (g 12).
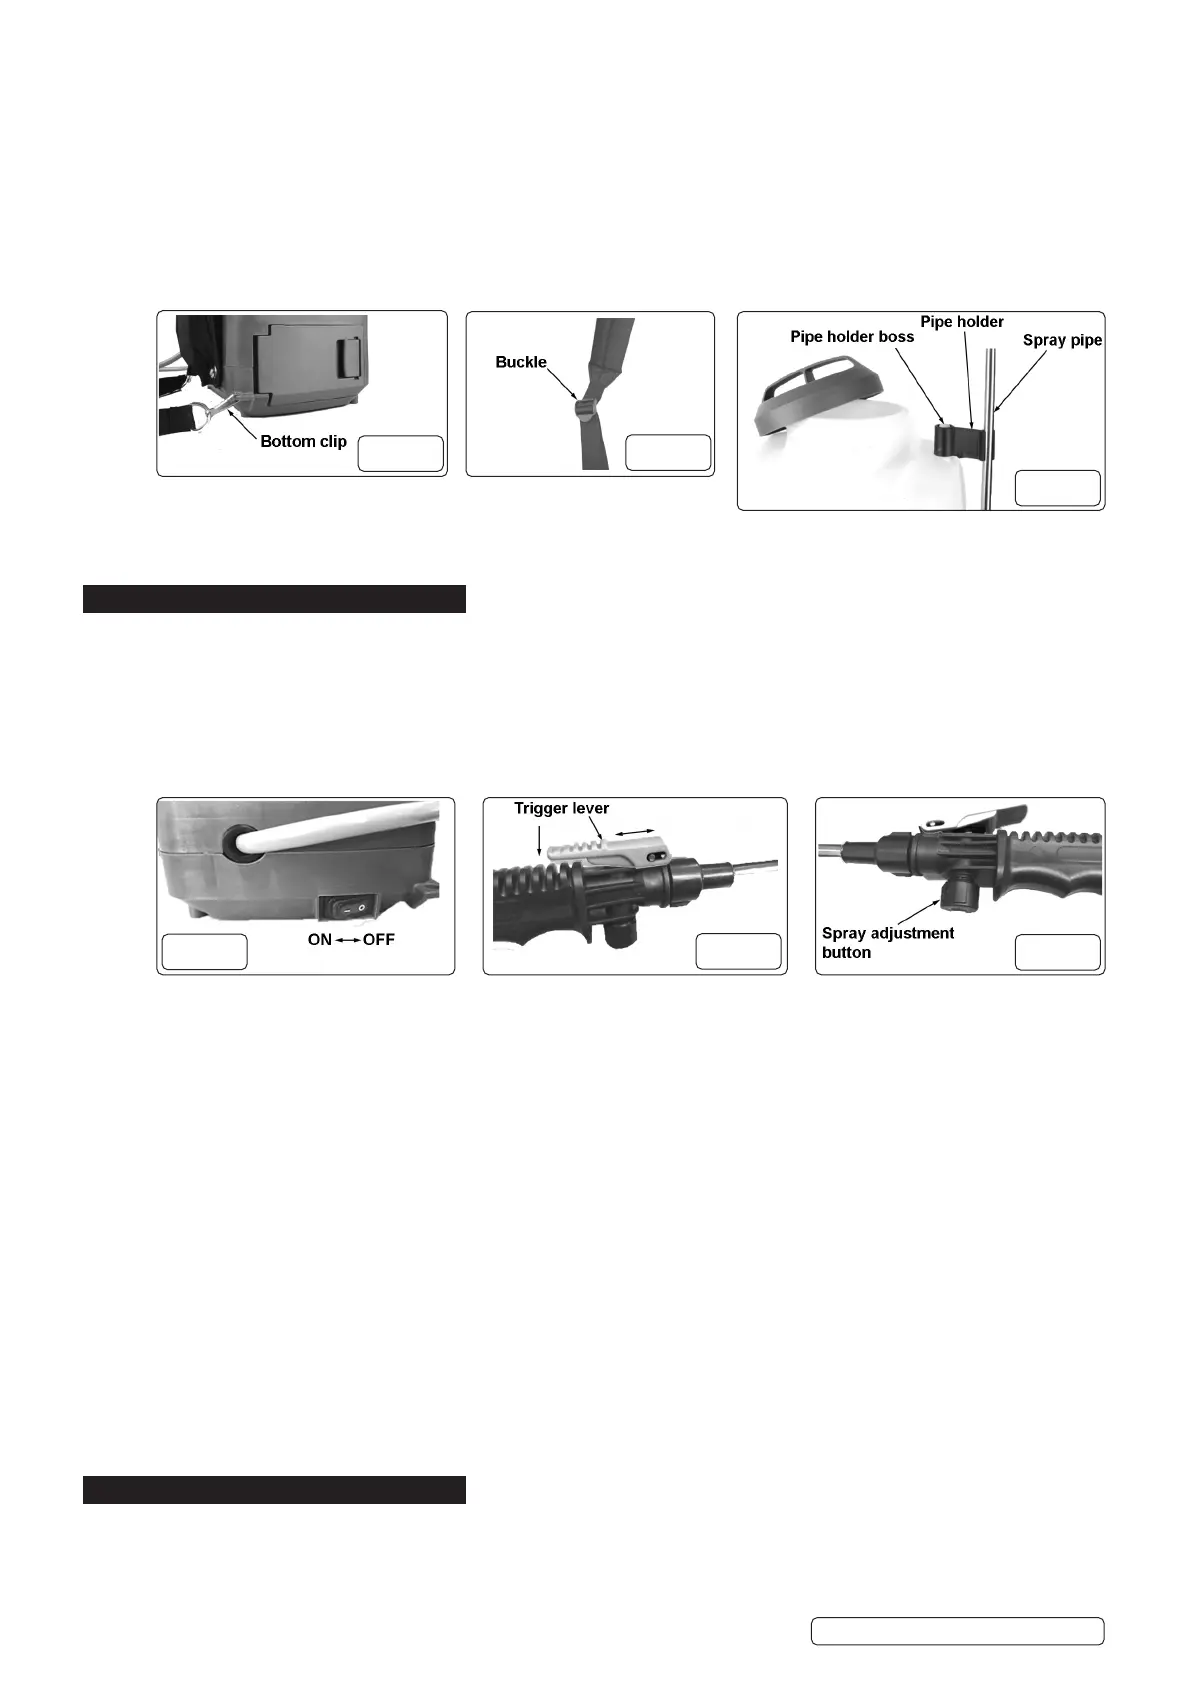
5.12. ATTACHING THE BOTTOM CLIP
5.12.1. Hook each bottom clip onto it’s corresponding tab at the base of the sprayer (g 13).
5.13. BACK STRAP ADJUSTMENT
9 Adjust the back strap so that the sprayer is in a comfortable position and as close as possible to the body.
5.13.1. To lengthen the strap, lift up the buckle (g 14), and pull the belt through from the side connected to the sprayer.
5.13.2. To shorten the strap, lift up the buckle (g 14), and pull the belt through on the free side.
WARNING! Ensure that the back strap is securely attached to the sprayer.
5.14. ATTACHING THE SPRAY PIPE HOLDER
5.14.1. Fully slide the pipe holder over the pipe holder boss (g 15).
5.14.2. Insert the spray pipe into the pipe holder (g 15).
5.14.3. To remove the pipe holder lift it up and o the pipe holder boss and place in a secure location.
6. OPERATION
NOTE: Ensure all Safety Instructions in Section 1 are read and understood and carried out before use and save the instructions and
warnings for future reference.
6.1. POWER SWITCH
WARNING! Ensure that the sprayer power switch is in the OFF position prior to installing the battery cartridge.
WARNING! To prevent sudden spraying ensure that the trigger lever is in the stop position and the power switch is in the OFF
position.
6.1.1. To turn the sprayer on, press down the I (ON) on the power switch (g 16).
6.1.2. To turn the sprayer o, press down the O (OFF) on the power switch (g 16).
6.2. OPERATING THE SPRAYER
6.2.1. To operate the sprayer depress the trigger lever to spray, then release the trigger lever to stop (g 17).
6.2.2. For continuous spraying depress the trigger lever and while it’s depressed push forward to lock on.
6.2.3. To lock o pull the trigger lever back and release (g 17).
6.3. SPRAYING
6.3.1. When using the sprayer rmly grip the control handle.
6.3.2. Once spraying is complete release the trigger lever to stop and turn the power switch to OFF.
6.4. SPRAY ADJUSTMENT
6.4.1. To adjust the intensity of the spraying turn the adjustment button clockwise to increase and anticlockwise to decrease (g 18).
8 DO NOT operate the sprayer with an empty tank. Turn OFF immediately.
8 DO NOT use the sprayer with the battery cover open or with the back pad removed.
WARNING! Prolonged continuous use of the sprayer will drain the battery and may cause damage to the pump. Switch OFF the
sprayer whenever possible.
WARNING! If the sprayer starts to make abnormal noises and/or the spray splutters this indicates that the tank is empty.
Switch OFF immediately.
6.5. FILLING THE TANK
WARNING! Ensure that the sprayer power switch is in the OFF position prior to lling the tank.
6.5.1. When lling the tank ensure the tank lter is tted into the top of the tank (g 23).
6.5.2. Fill the tank with the required volume utilising the level indicators on the tank.
6.5.3. Firmly tighten the tank lid after lling.
NOTE: Maximum volume of tank = 15L.
WARNING! When lling the tank wear appropriate PPE.
WARNING! DO NOT ll tank in a poorly ventilated area.
7. MIXING CHEMICALS
WARNING! Ensure that all chemical mixtures are thoroughly dissolved prior to use.
WARNING! Take extreme care when handling chemicals. Wear appropriate PPE. Wash thoroughly away any chemicals that comes
into contact with bare skin.
WARNING! Chemicals are harmful. Always read and fully understand the manufacturers instructions before use.
Original Language Version
© Jack Sealey Limited
Fig.14
Fig.13
Fig.15
Fig.16
Fig.17
Fig.18
CP20VGBS Issue 2 (2,3) 18/02/22
 Loading...