5. ASSEMBLY
5.1. CLAMP ASSEMBLY
5.1.1. Remove the thread protector (#6) from the roof hook bar (#1).
5.1.2. Place the clamp bar (#2), pre-fi tted with ladder stops (#3), over the roof bar hook.
5.1.3. Fit the washer (#4) over the roof bar hook and onto the ladder stop.
5.1.4. Thread the lock bar (#5) onto the roof bar hook.
5.1.5. Replace the thread protector.
6. SECURING LADDER TO RACK
6.1. Inspect the roof bars/rack to ensure they are fi tted and assembled correctly to the manufactures instructions and are in a safe,
usable condition.
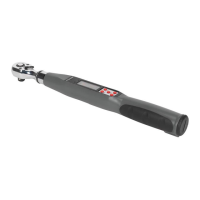
6.2. Load the ladder onto the roof bars/rack. Seek the assistance of another person for heavier or longer ladders.
6.3. Position the ladder on the roof bars/rack evenly ensuring that there is not excessive overhang.
6.4. If a long ladder is carried it should be secured to the front and rear of the vehicle. Any rear overhang should have a visible warning
indicator.
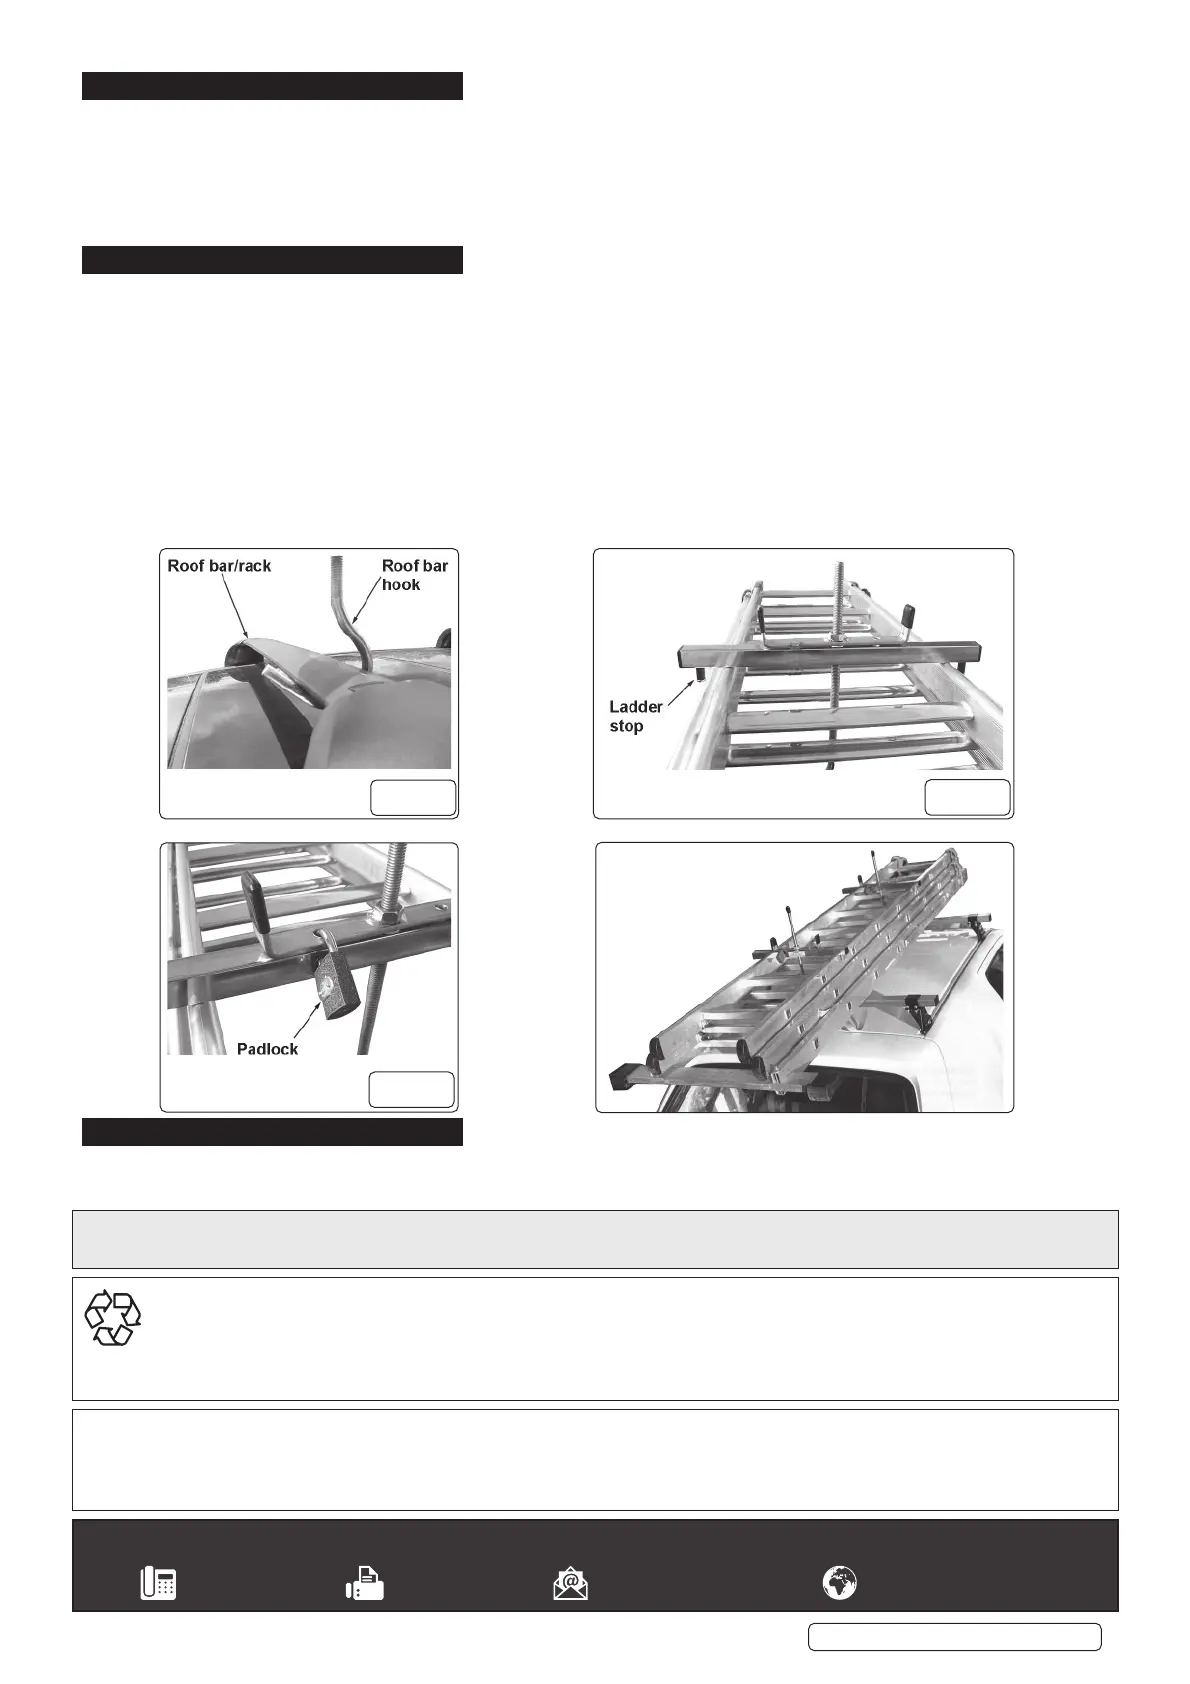
6.5. Pass the roof bar hook through the ladder and under one of the roof rack bars (fi g 1).
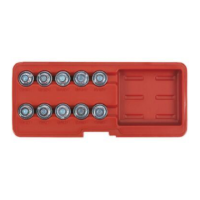
6.6. Screw down the lock bar onto the clamp bar (fi g 2).
DO NOT over tighten.
NOTE: Ensure that the ladder is located between the ladder stops.
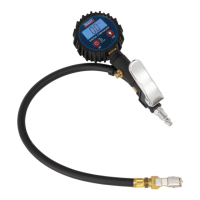
6.7. When the ladder is secure pass the padlock through the lock down bar and the clamp bar locking them in place (fi g 3).
7. MAINTENANCE
7.1. Periodically grease the hook bar thread.
SLC2 Issue 2 (H,F) 08/11/21
Original Language Version
© Jack Sealey Limited
Sealey Group, Kempson Way, Suffolk Business Park, Bury St Edmunds, Suffolk. IP32 7AR
01284 757500 01284 703534 sales@sealey.co.uk www.sealey.co.uk
Note: It is our policy to continually improve products and as such we reserve the right to alter data, specifications and component parts without prior
notice.
Important: No Liability is accepted for incorrect use of this product.
Warranty: Guarantee is 12 months from purchase date, proof of which is required for any claim.
ENVIRONMENT PROTECTION
Recycle unwanted materials instead of disposing of them as waste. All tools, accessories and packaging should be sorted, taken to
a recycling centre and disposed of in a manner which is compatible with the environment. When the product becomes completely
unserviceable and requires disposal, drain any fluids (if applicable) into approved containers and dispose of the product and fluids
according to local regulations.
fi g.1
fi g.2
fi g.3
Parts support is available for this product. To obtain a parts listing and/or diagram, please log on to
www.sealey.co.uk, email sales@sealey.co.uk or telephone 01284 757500