Fuses and bulbs
Remove the lid, levering it with the flat
s
ide of
a screwdriver into the recess
››› Fig. 108
1
.
R
emo
ve the bulb connector.
Unscrew the light securing bolt by hand
or using a screwdriver ››› Fig. 108
2
.
R
emo
ve the light from the body, gently
pulling it toward you, and place on a
clean, smooth surface.
Disassemble the bulb holder unlocking
the securing tabs ››› Fig. 109
1
.
Ch
an
ge the damaged bulb.
To refit follow the steps in reverse order,
taking special care when fitting the bulb
holder. The securing tabs must click into
place.
CAUTION
Take care when removing the rear light unit to
mak
e sure there is no damage to the paint-
work or any of its components.
Note
●
Mak
e sure you have a soft cloth ready to
place under the glass on the rear light unit, to
avoid any scratches.
●
In the case of LED lights, change only the
turn signal bulb.
3.
4.
5.
6.
7.
8.
9.
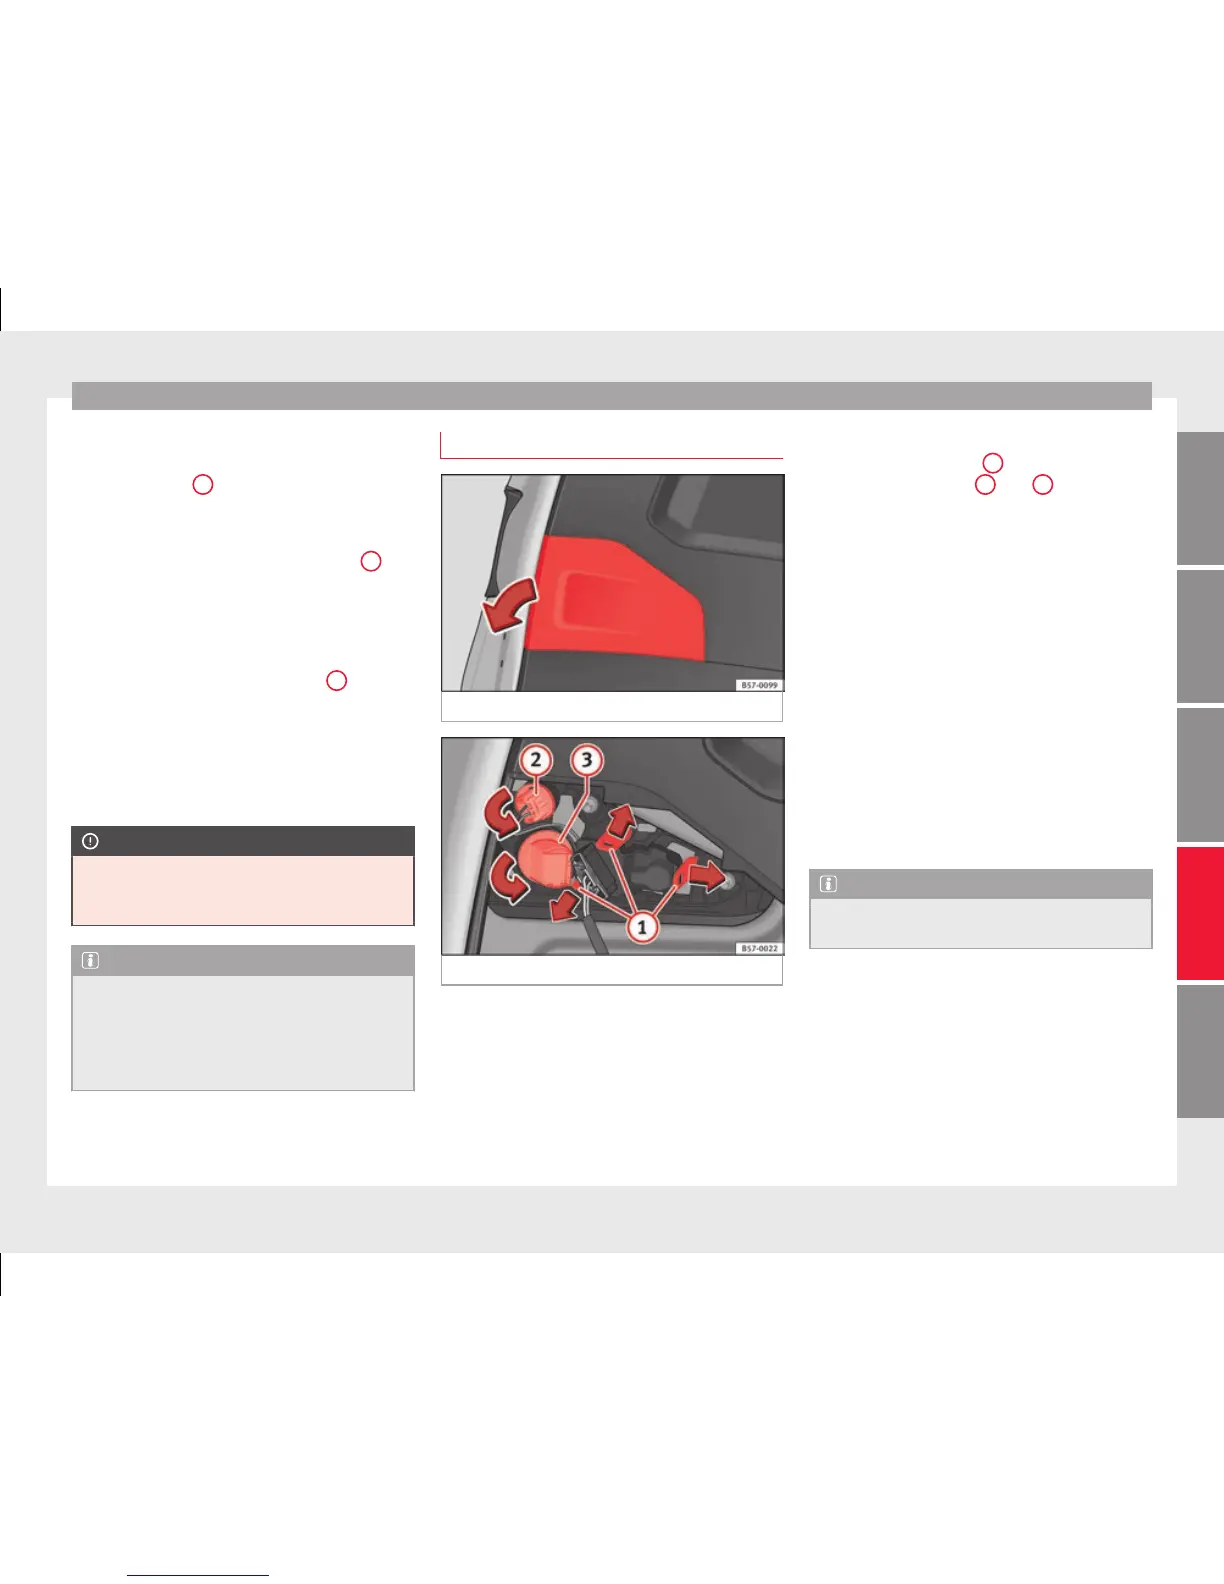
Rear lights (in the rear lid)
Fig. 110 Rear lid open: remove the lid.
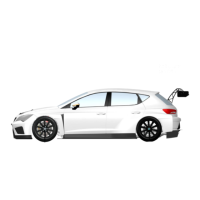
Fig. 111 Remove the bulb holder.
The rear lid must be open to change the
b
u
lbs.
Follow the steps indicated:
Remove the rear lid cover in the direc-
tion indicated ››› Fig. 110.
1.
Unlock the securing tabs from the bulb
holder ››› Fig. 111
1
or turn the bulb
ho
l
der to the left
2
and
3
.
R
emo
ve the bulb holder from its loca-
tion.
Lightly press the defective bulb into the
bulb holder, then turn it to the left and
remove it.
Fit the new bulb, pressing it into the
bulb holder and turn it to the right as far
as it will go.
Use a cloth to remove any fingerprints
from the glass part of the bulb.
Check that the new bulb works properly.
Carry out the same actions in reverse or-
der for assembly and pay special atten-
tion to placing the bulb holder, ensuring
that the tabs are properly secured.
Note
For LED pilots, you can only change the re-
ver
se bulb.
2.
3.
4.
5.
6.
7.
8.
97
Technical dataAdviceOperationEmergenciesSafety