Segway Personal Transporter SE Service Manual
4–2
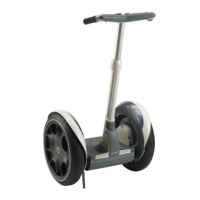
Tire/Wheel Assembly
i2 SE Wheel Assembly
NOTICE
Support your Segway PT by means other than resting it
on its wheels. Support of the unit from below the batteries
is recommended. As an alternative, the Segway PT can be
positioned on its side on the opposite wheel. Do not rest the
Segway PT on an exposed gearbox.
Removal
Tool Required: 13 mm socket wrench
1. Make sure the PT is powered off and unplugged.
2. Support the PT or turn it on its side.
3. Remove the wheel cap. Push a screwdriver into the
notch on the side of the wheel cap and pry the wheel
cap off. See Figure 4–1.
4. Using a 13 mm socket wrench, remove the three
wheel nuts and discard.
5. Remove the i2 SE Wheel Assembly.
Installation
Tools required: 13 mm socket wrench
Torque wrench
1. Make sure the PT is powered off and unplugged.
2. Support the PT or turn it on its side.
3. Place the i2 SE Wheel Assembly on the gearbox
flange. See Figure 4–1.
4. Using a 13 mm socket wrench, install the three wheel
nuts. Torque to 30 N-m (22 ft-lbf).
5. Install the wheel cap. Press the cap onto the wheel
until it snaps into place.
6. Perform post-service tests (page A–1).
Figure 4–1: i2 SE Tire/Wheel Assembly
i2 Wheel
Wheel Nuts
20158-00001
30 N-m (22 ft-lbf)
Gearbox Flange
i2 Hubcap

 Loading...