6 7
Setting up the Printer
Iftheprinterisnotrecogonizedusingtheinstallationwizard,youwillneedtosetupyour
printer manually. To do so, follow these steps:
Prepare the roll of labels
1 OpentheSmartLabelprintersoftware
2 UndertheLabelpull-downmenu,selectPrinter Set-up
3 SelectAdd a printer
4 SelecthowyourprinterisconnectedandclickDone.
Loading a Roll of Labels
Prepare the roll of labels
1 Removethestickerfromthebeginningoftherolloflabels.
Note: Makesurethereisablacksensormarkonthelabelbackingasshownonpage3.
2 If needed, cut between the labels to create a “leader.”
If the end of the roll is not prepared as shown above, cut between the labels leaving as
muchbackingaspossibleontheendoftherolltoactasaleader.
Load the roll of labels
1 Makesurethepowercordisconnectedand
the printer is turned on. The green status light
should be flashing.
2 Liftthebaseofthelabel
cover and rotate it open
as shown at right.
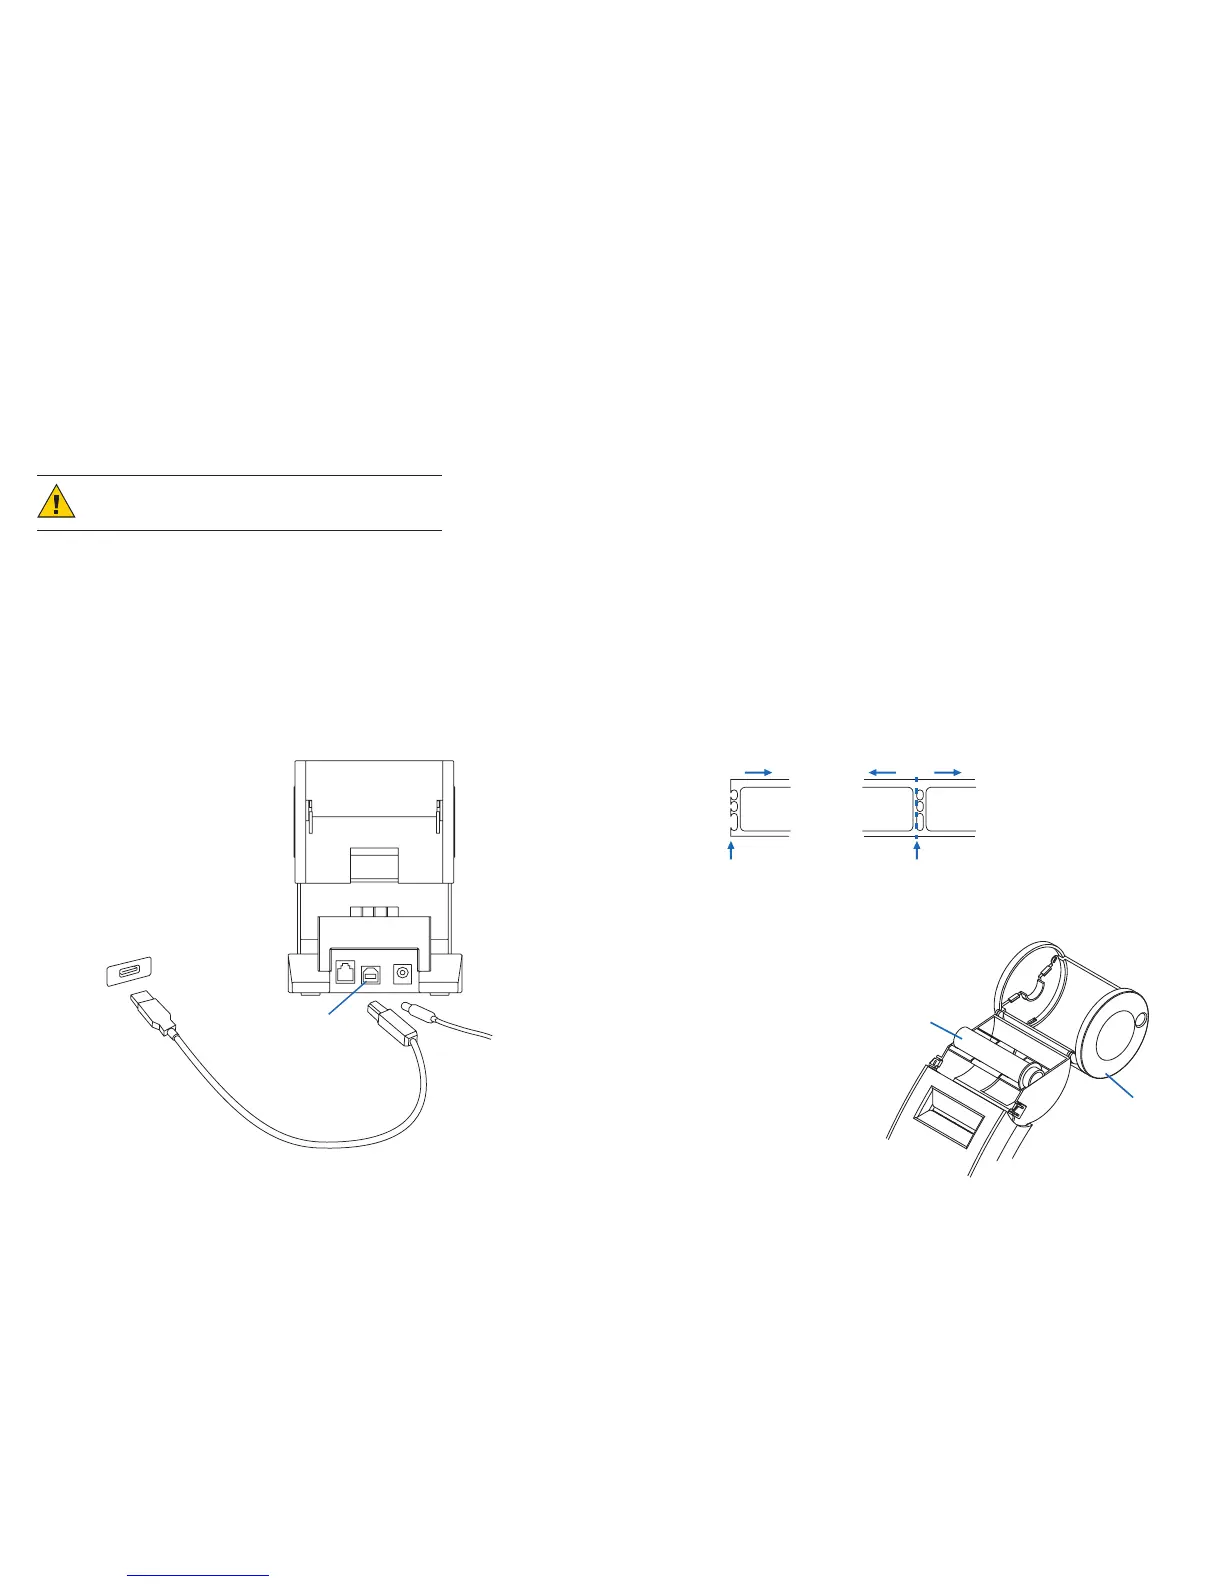
Connecting the SLP to your computer
UsetheUSBcableprovidedwiththeSLP440or450toconnecttheSLPtoyourcomputer.
CAUTION: Connecting or disconnecting the interface cable
while the printer is turned on may damage the printer.
Follow these steps:
1 MakesurethattheSLPisturnedoff.Ifthestatuslightison,holdthepowerbutton
until it turns off.
2 ConnecttheprintertoyourPCorMac.
• InserttheUSBcableintotheUSBportonyourPCorMac.
• IfallUSBportsareinuse,youmayneedtopurchaseaUSBhub.
• ConnecttheotherendofthecableintotheappropriateportonthebackoftheSLP.
Spindle
LabelCover
Prepared end Cut here
Roll Waste Roll
Computer
USBport
SLPUSBport
USBcable