8 9
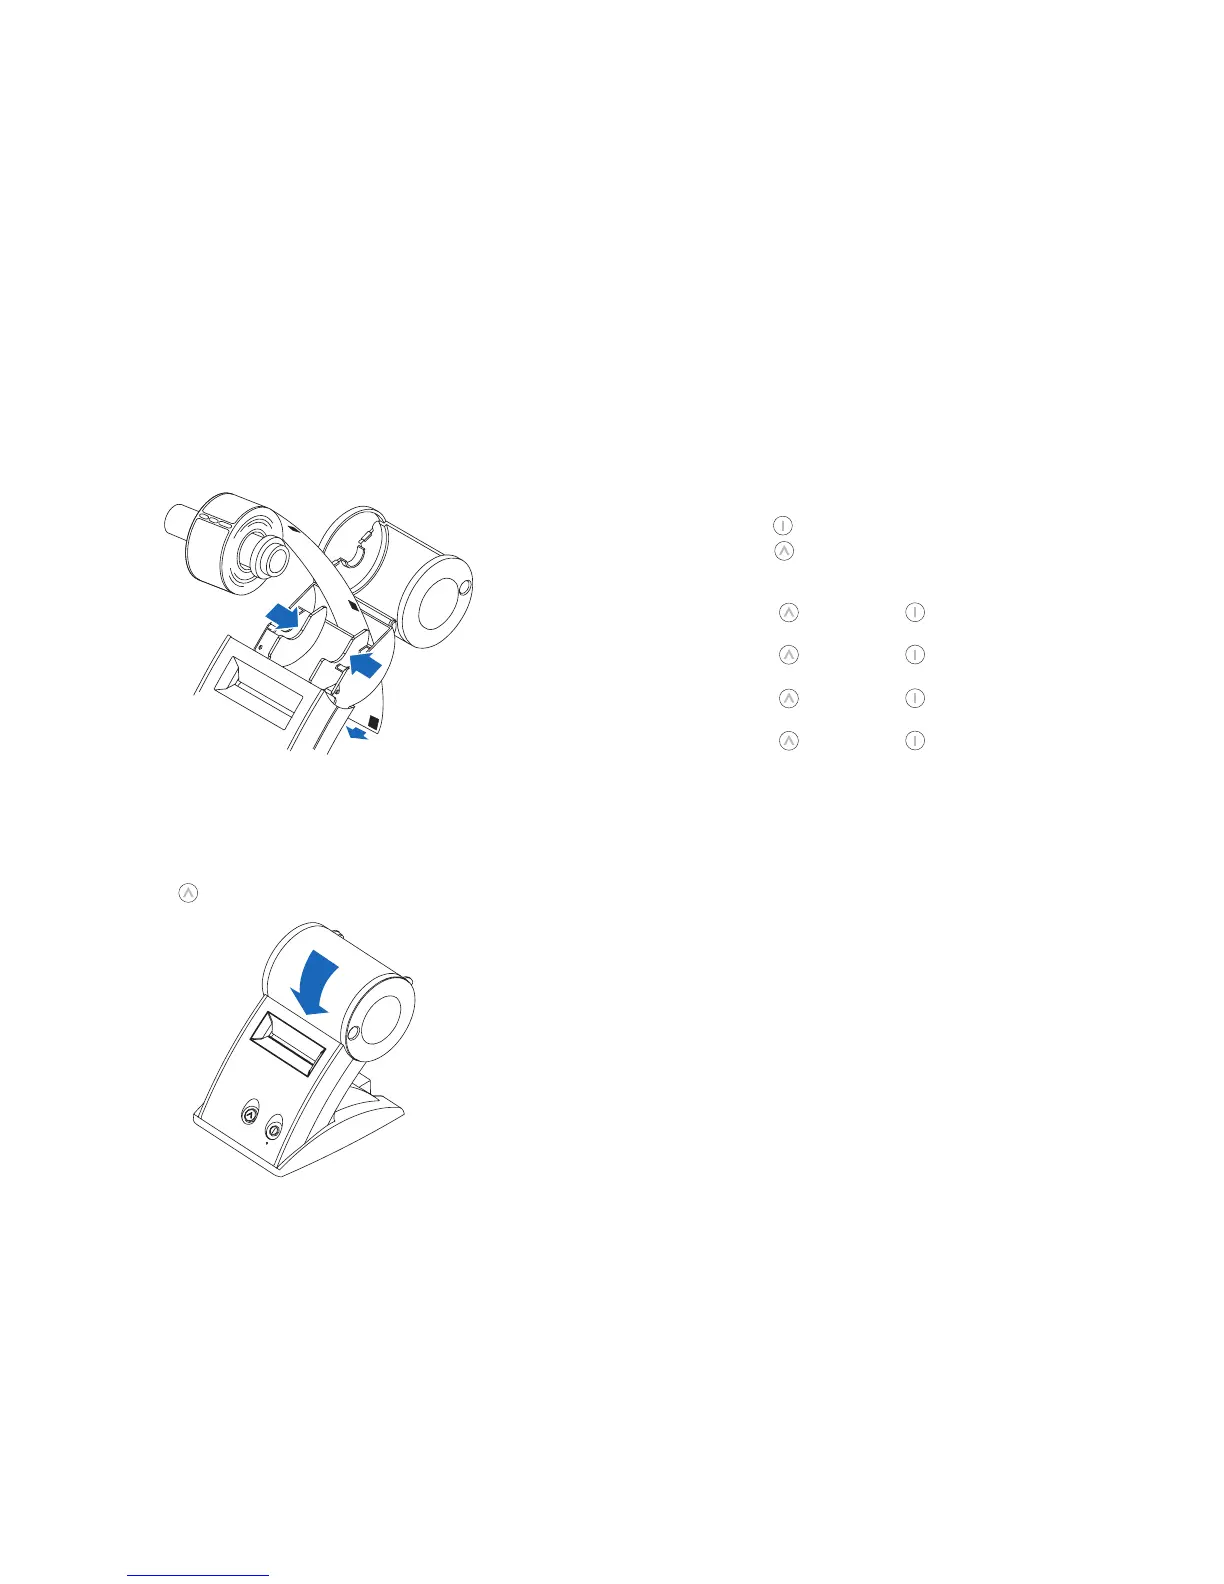
3 RemovethespindlefromtheSLPandinsertthelabelrollonthespindle.
4 InsertthelabelsandspindleintotheSLP.Ifnecessary,adjusttheguidestofitthe
labels as shown below.
5 Insertthefreeendofthelabelroll,labelsidedown,intotheslotonthebackofthe
printer.Pushthelabelstockintotheslotuntilyoufeelaslightresistance.Continue
pushinggently.TheSLPautomaticallyfeedsthelabelsthroughandalignstheend
intheexitslot.
If the label end doesn’t appear through the slot:
Press and release the form feed button to advance the labels.
6 Close the label cover.
Testing the Printer
Aquicktestletsyouknowyourprinterisoperatingproperlyandthatthelabels
are loaded correctly.
Testing the SLP 440 or 450
1 Press and hold the power button for 2 seconds to turn the printer off.
2 Press and hold the form feed button and then press the power button. The green
statuslightwillbegintoash.Donotreleasetheformfeedbutton.
3 To print the SIIgraphiclogo:
•Whileholdingthe button, press the powerbutton1xandreleasebothbuttons.
4 ToprinttheSIIsampleaddresslabel:
•Whileholdingthe button, press the powerbutton2xandreleasebothbuttons.
5 To print the density test:
•Whileholdingthe button, press the powerbutton3xandreleasebothbuttons.
6 To print the serial number and firmware:
•Whileholdingthe button, press the powerbutton4xandreleasebothbuttons.
SLP440/450
Label guides