23
508.366.1488 | www.semshred.com
5.6 Belt Adjustment
Tools and PPE: 7/16”, 3/4” wrench/socket wrench, belt tensioning gauge (recommended), cut resistant gloves.
Frequency: Initial check at 10 hours, afterwards check monthly and
replace yearly.
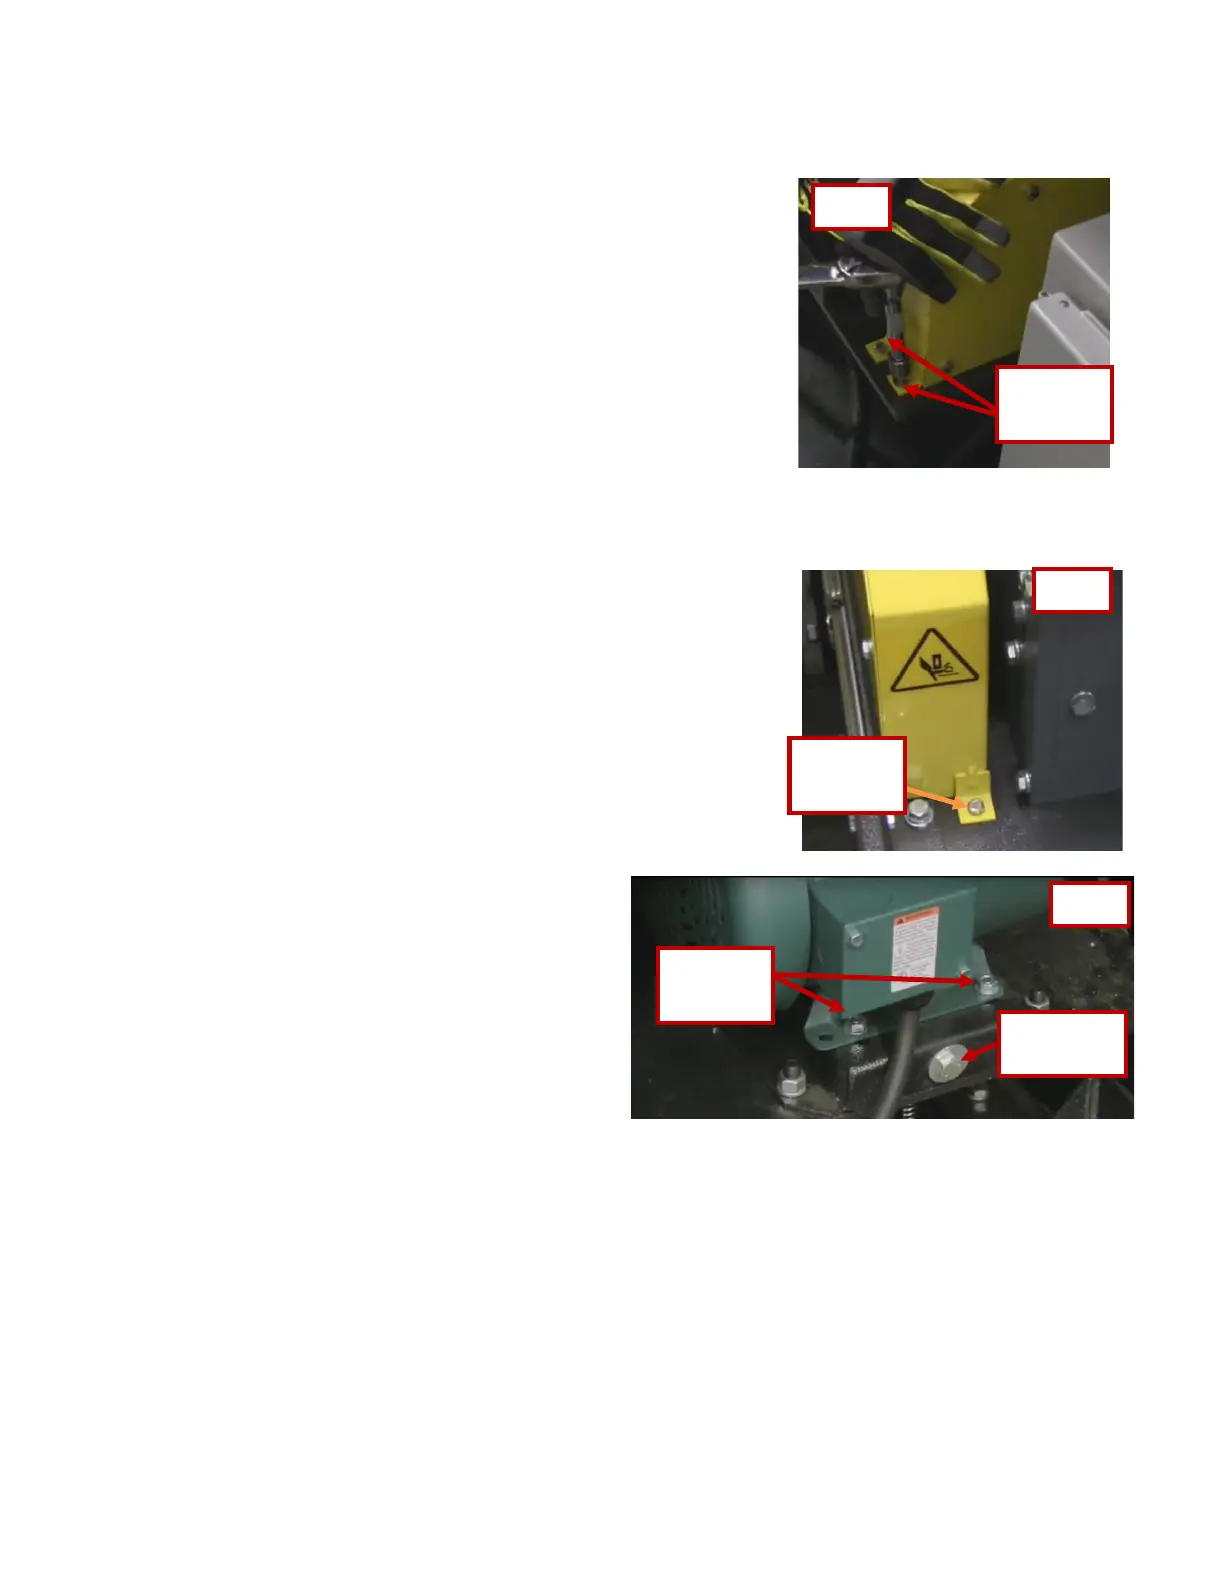
1. Remove the four bolts in the corners of the rear panel and remove the
panel.
2. Remove the bolts at the rear of the yellow belt guard, two flange bolts and
two on the side panel of the belt guard. Only needed if replacing belt.
3. Remove the two painted side bolts holding the stage 2 shelf and pull the
shelf out.
4. Remove the remaining bolts at the front of the belt guard, one flange bolt and the two bolts on top.
5. Carefully maneuver the front belt guard out (make sure the side panel is off).
6. The motor is mounted on a slotted frame. Slightly loosen the four
mounting bolts on the motor base.
7. Use the tensioning bolt on the frame to adjust the motor.
a. See Fig 3.
b. Adjusting the screw clockwise will tighten the belt and
counterclockwise will loosen or allow for belt removal.
8. Proper belt tension is determined by pinching both belts between the
thumb and forefinger and causing a bow on the slack
side. This should be approximately 7/32”.
a. SEM recommends using a belt tensioning
gauge. See step 12.
9. Adjust until proper tension is achieved and tighten
mounting bolts.
10. Rotate the belt to inspect for damage before replacing
belt guard.
11. Replace all guards and locking mechanisms.
12. Belt Tensioning Gauge: The proper deflection for this device is 0.2184” (7/32”) just short of 1/4”. For new belts the
tension should be 6.4 lbs. For adjusting the tension, it should be 4.4 to 5.7 lbs. This is measured in the middle of the
span with pressure applied to it perpendicularly to one belt.