SCORPIO LIGHT SERIES 10’/17’/23’L - SET-UP - Assamble the arm (If needed)
Version 1.04 May 26, 2022
SERVICEVISION BIS SL
Ríos Rosas, 20 · 08940 CORNELLA DE LLOBREGAT (Barcelona) Spain · Tel. 34 93 223 86 30 · Fax 34 93 223 86 31 37
comercial@servicevision.es · www.servicevision.es
3 SET-UP
The Scorpio light cranes series are very versatile cranes that can be used in different configurations
(Manual mode, without dolly, over slung, with fluid heads…). In this chapter it is described how to
prepare the crane in different configurations.
3.1 ASSAMBLE THE ARM (IF NEEDED)
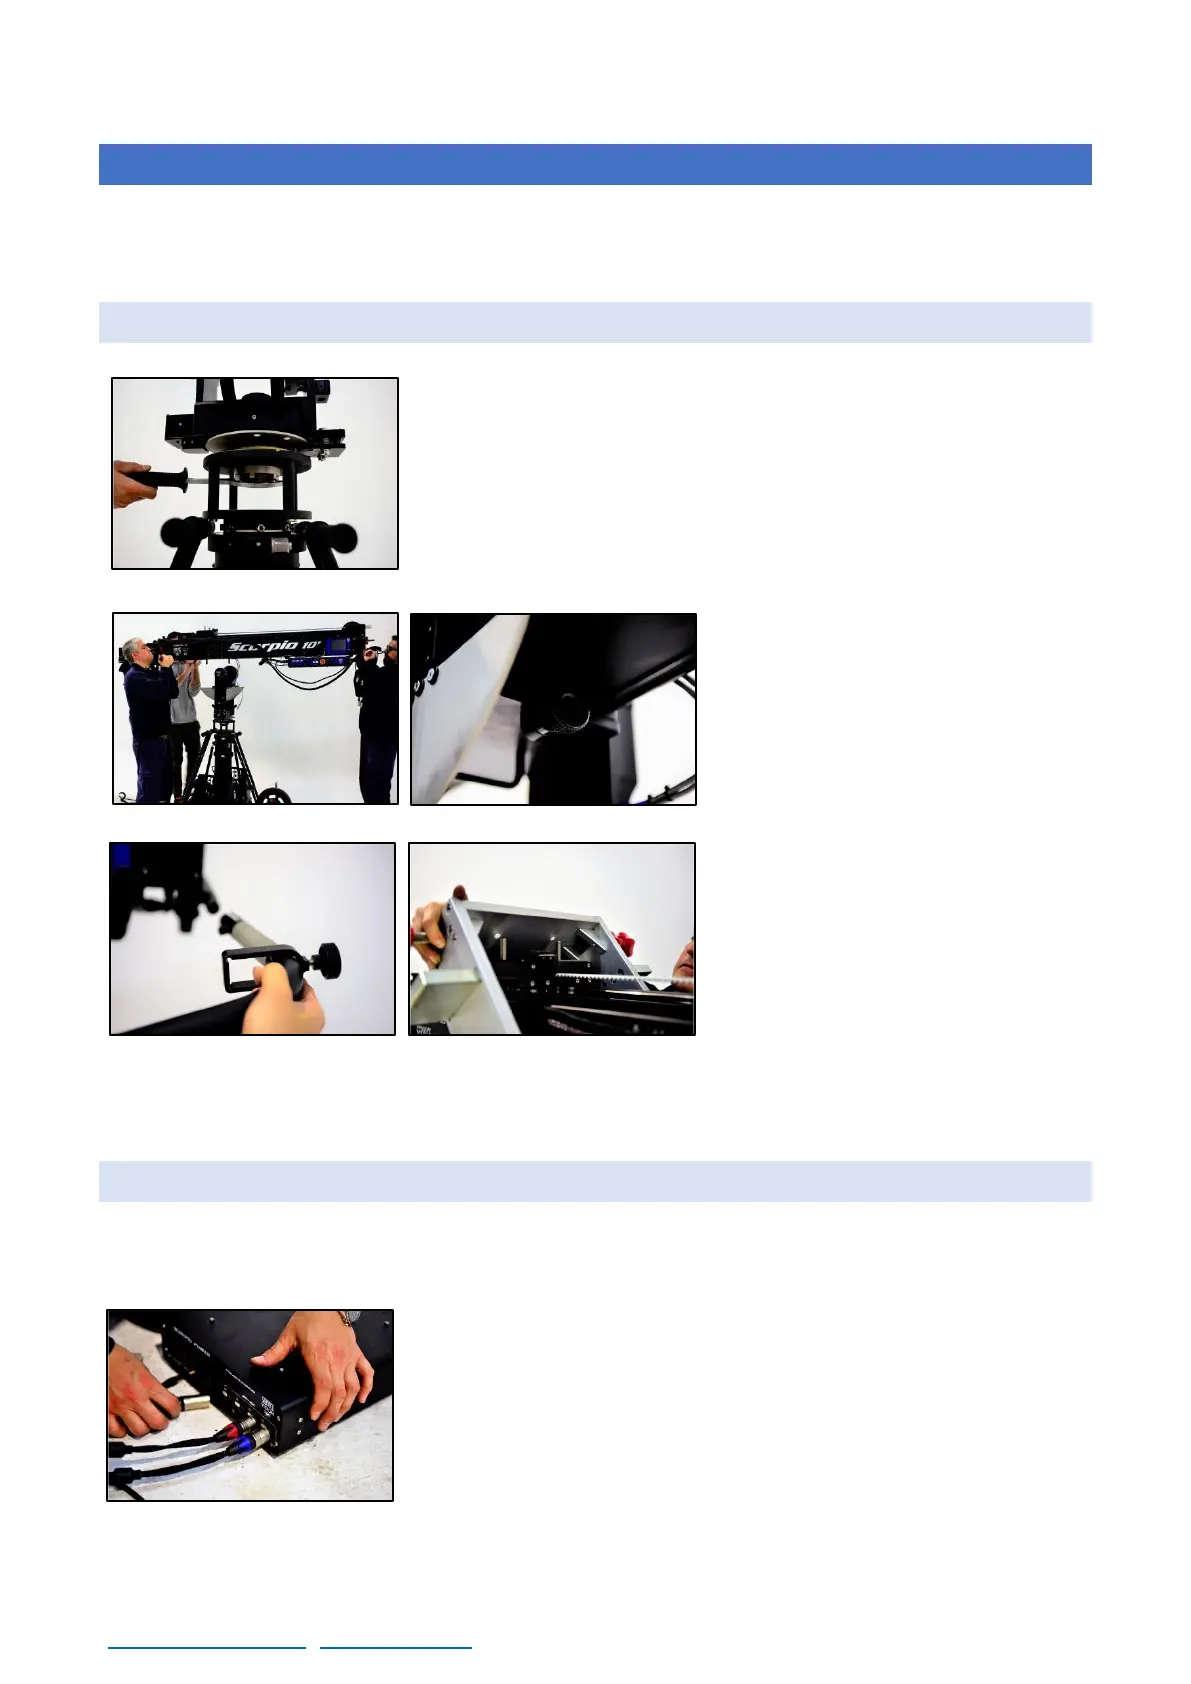
The Scorpio light cranes arm can be mounted in different supports.
The Mitchel mount on the base of the fulcrum can be attached to any
support capable of holding the weight of the arm fully loaded (It can
be verified in the technical info chapter) with a Mitchel mount adaptor
on it.
To tight the nut, use the Mitchel mount tool once the fulcrum is on
the support with the keyway aligned.
With the fulcrum attached, mount the
arm on top of the fulcrum by sliding it
inside from the top. There is only one
position to introduce the arm into the
fulcrum. This position is with the
brakes on the left side of the arm.
Once the arm is inside the fulcrum,
lock it using the knobs (fig.03.03)) and
use straps on both sides of the crane
to prevent the arm to fall.
Once the arm is introduced, mount
both sidebars remembering to
introduce the Hand command bracket
in the operators’ side prior attaching
the sidebar. The next part to mount is
the counterweights support on top of
the arm and tight it with the nuts
(fig.03.05).
3.2 START-UP
The first thing to do is to ensure that the crane will have a stable power source to perform. The power
requirements for the crane are detailed in the technical specifications(30V/40A). Batteries can be
used always as long as they meet the specifications.
To power the system, connect the DC power cable into the power
supply and verify in the voltmeter on the EB the voltage arriving at the
system. If it is correct, switch the breaker ON and press the start button
of the EB. If the securities are not ready (Hand command connected
and/or Emergency STOP released) the system will not start.



 To Next Page