5
Section One
Installing Y our Scale
SETUP
1. Locating your scale
The rugged design of your Setra scale ensures it will withstand most typical
environmental conditions. Nonetheless, you should treat your scale as you would
any piece of precision equipment, locating it on a clean, dry surface, protected
from extremes of draft and vibration.
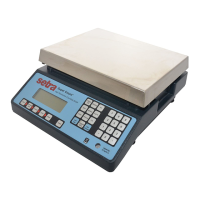
2. Leveling your scale
To level your scale, adjust the two scalloped feet on the bottom front, until the
bubble on the left front corner of the keyboard is centered inside the circle (see
Figure 1).
3. Installing the weighing pan
Next, you should place the pan to your scale over the shaft (or rubber guides on
the Model 12000C) on the top of the unit.
4. Connecting your scale to an AC outlet
To connect your scale to an AC outlet, insert the appropriate end of the A.C.
adaptor cord into an electrical outlet. Now connect the adaptor end to the back
of the scale (see Figure 1). Once you have plugged your scale into a live outlet, it
is automatically on. The scale itself, when not in use, draws very little current from
an outlet, and may be left connected. This keeps your scale ready to use with no
"warm-up" time.
EXPERIMENTATION
1. Display test
When your scale is first powered on , it automatically runs through a "display test"
showing all possible segments which might be displayed. This test lasts approxi-
mately six seconds. The scale next displays "HELLO" and performs a self-
diagnostics routine to ensure proper operation. The scale then sets itself to zero,
and is ready for use. For best accuracy, allow the scale to warm up for 45
minutes.
2. Trying your scale
Experimenting with your scale and its keyboard prior to reading this guide will
not harm your scale, and may actually give you a better understanding of the
instructions in this guide. If you instruct the scale to do something it is not
capable of doing, the scale will simply respond by displaying the message
"UnAbLE". To continue experimenting, press the clear key.