30
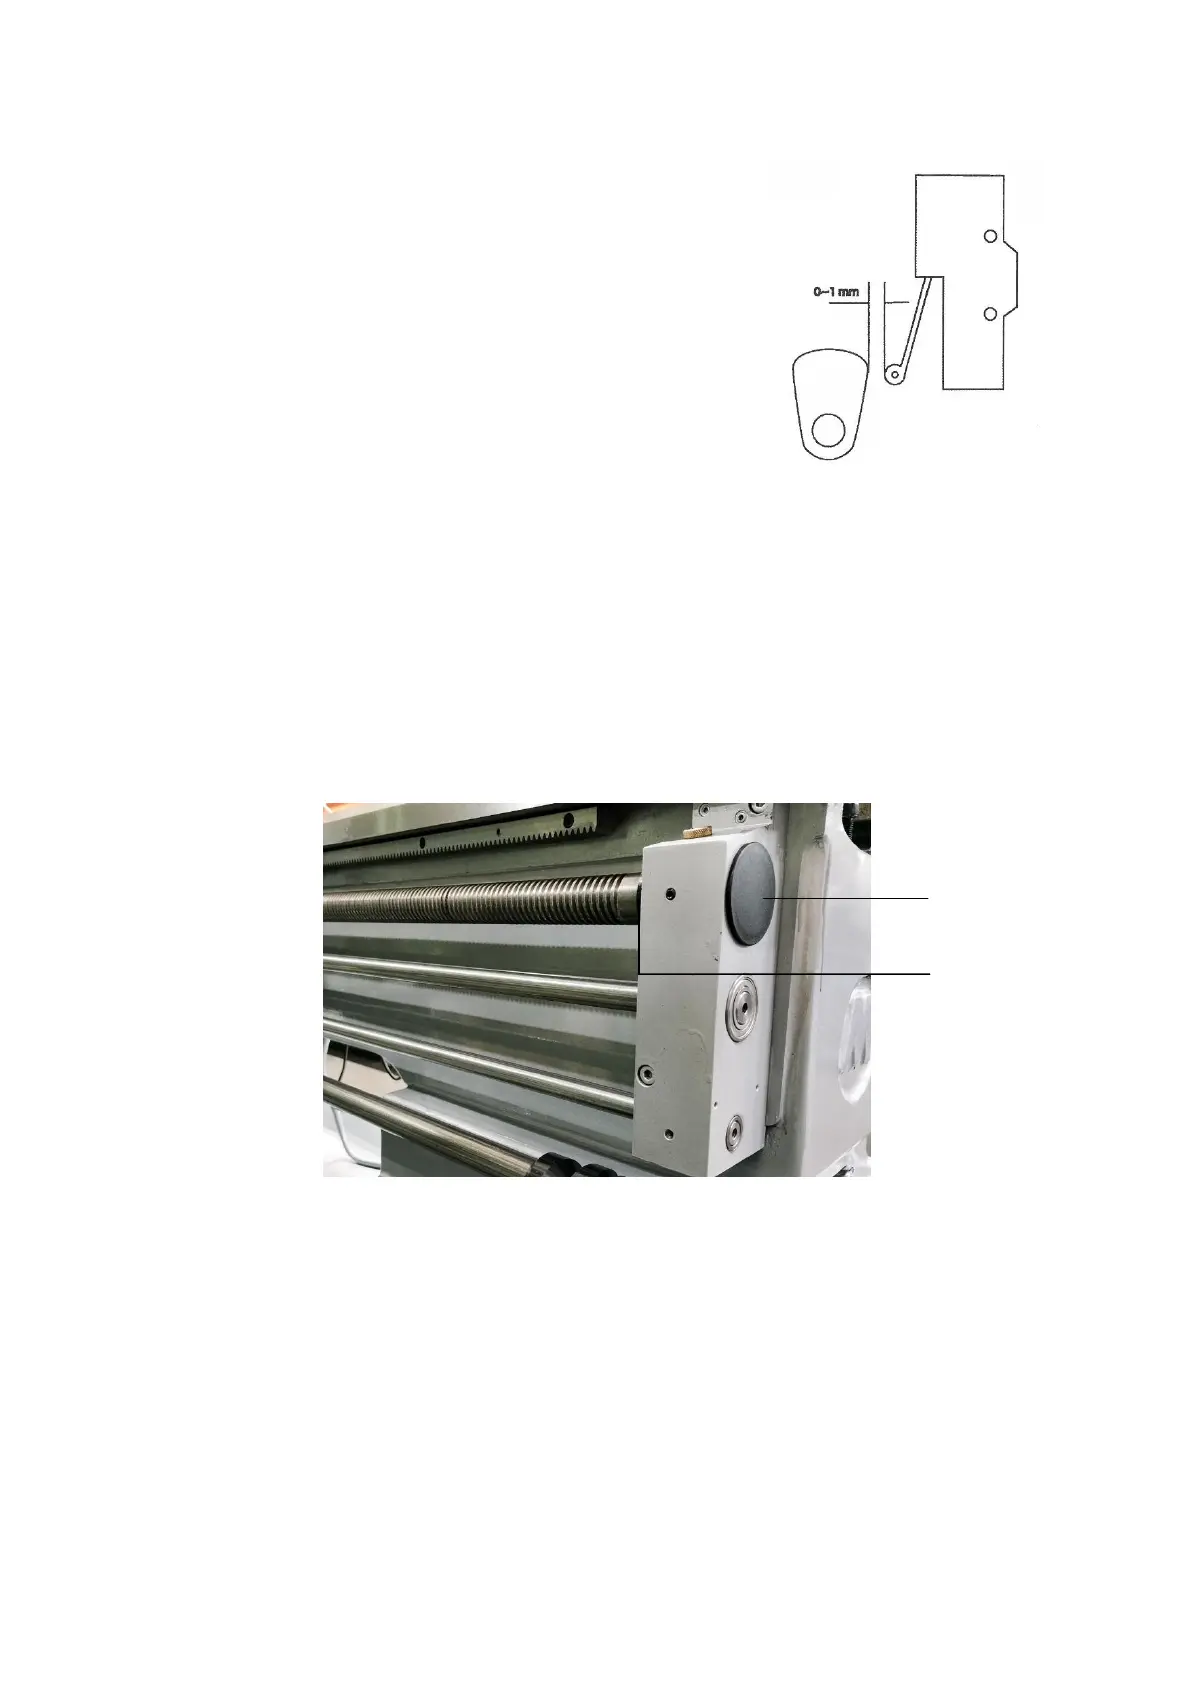
7-7 Brake & Micro Switch Adjustment
The foot brake is connected with the micro switch. It
should have 0-1 mm end play between the brake arm and
the touching, head of the micro switch. The correct brake
action should cut off the electricity first, then brake avoid
the brake belt being worn out. After stepping the foot
brake, needs to re-operate the spindle operation control
lever to make the spindle revolute again.
7-8 Leadscrew Backlash Adjustment
If multiple cutting is happened while threading, it is caused by the leadscrew
backlash. To adjust the leadscrew half nut properly, open the plastic cover of the
leadscrew bracket and loosen nut ○
A
. Then tighten the left side nut ○
B
until there is
no backlash. (For testing, press down the half nut by hand, turn the apron handwheel
forward and reverse and grasp the connecting section of the gear box and leadscrew
till no backlash happened.) Afterwards, replace the nut ○
A
to the leadscrew bracket.
7-9 Cutting Coolant Repair
If there is no coolant coming out after the pump switch is turned on, check the
pump motor is working or not. If yes, check and see if the coolant in the tank is over
the pump or not, If not, add the coolant, then turn on the switch. If there is still no
coolant, the pump must be blocked. Take off the pump to clean up or repair.